This tutorial covers how to disable access to installed programs in Windows 10. When you have done this, you won’t see the list of installed programs in Control Panel of Windows 10. As a result, you also won’t be able to uninstall programs or make changes to installed programs using Control Panel. For this, I’m going to use two different methods.
Basically, the methods that I have covered here disable “Programs and Features” option of Control Panel. This option helps to open the list of installed programs, but when it is disabled, installed programs are not visible.
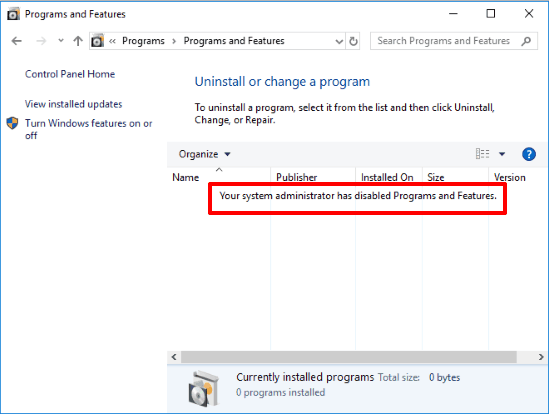
In the screenshot above, you can see that Programs and Features window is not showing anything. In fact, there is a message that system administrator has disabled Programs and Features. Disabling access to installed programs in Windows 10 can be done using Local Group Policy window and Registry Editor.
Note: After applying this tweak, you can view lists of installed programs in Start menu, but can’t uninstall programs. Also, this tweak doesn’t stop other third party uninstaller software to view and uninstall the programs.
Let’s see the first method.
Method 1: How To Disable Access To Installed Programs Using Local Group Policy In Windows 10?
Note: If you are on Windows 10 Home edition, then this method won’t work for you. For that, move on to the next method.
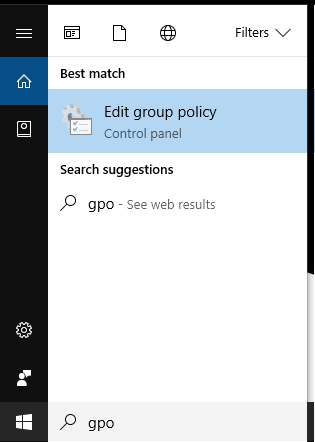
Step 1: Start GPO (or Group Policy) window. For this, enter “gpo” in Search box area, and use Enter. It will start GPO.
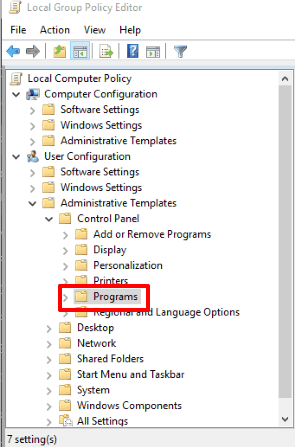
Step 2: Group Policy has “Programs” folder. Access it by following this path: User Configuration menu →Administrative Templates folder →Control Panel folder →and Programs folder.
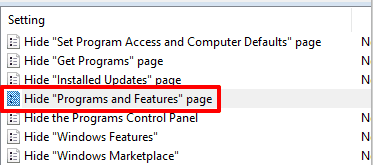
Step 3: Programs folder has “Hide “Programs and Features” page” option. Double-click that option.
Step 4: A big window related to that option will launch. In that window, you will see that Not Configured option is selected for Programs and Features option. That means list of installed programs will be visible in Control Panel. To hide the list of installed programs, use the “Enabled” option, and save this new change.
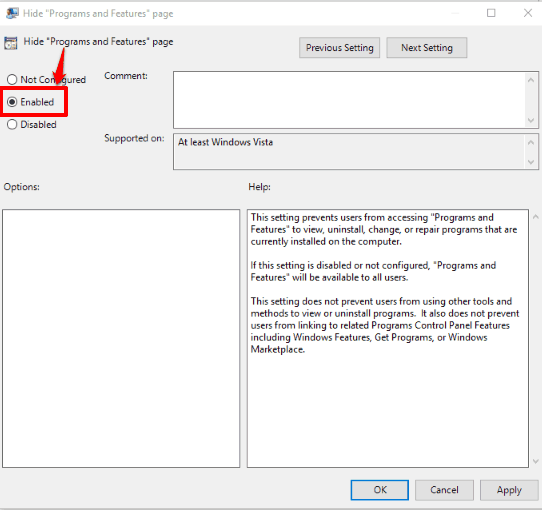
Now the list of installed programs is hidden.
To show programs again in Control Panel, you can set Not Configured option in the same window (as mentioned in above step), and apply the changes.
Method 2: How To Disable Access To Installed Programs In Windows 10 Using Registry Editor?
This method will work on all editions of Windows 10, including Home edition.
Step 1: Click on Search box or Press “Win+R” hotkey and type regedit. Hit Enter and then Registry will start.
Step 2: Access “Programs” key which is available under “HKEY_CURRENT_USER” root key. This key can be found easily using this path: expand root key HKEY_CURRENT_USER with double-click → then expand Software key → Microsoft → Windows key → double-click on CurrentVersion → Policies → and Programs key will be visible.
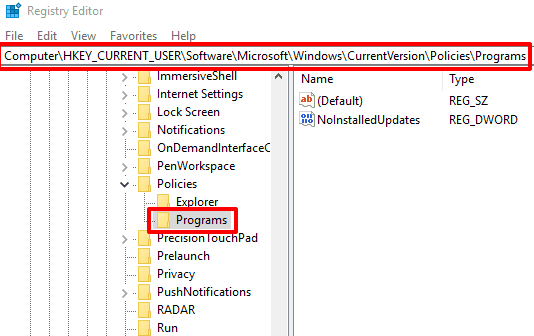
Step 3: Right-click Programs key → New → and click DWORD (32-bit) Value. Rename the new key with "NoProgramsandFeatures". Double-click on NoProgramsandFeatures DWORD and enter ‘1‘ in Value data.
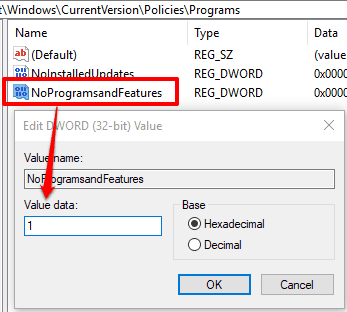
Save it and then File Explorer restart is needed. When you have done it, list of installed programs is hidden.
To see the list of installed programs again, you can enter ‘0’ in Value data of NoProgramsandFeatures.
You may also look at How To Disable Access To Installed Updates In Windows 10 and How To Delay Launch Of Startup Programs In Windows 10?.
The Verdict:
Disabling or hiding list of installed programs in Windows 10 is quite easy using these two methods. Of course, it is not a fool proof method to disable software uninstall, but it does gets you some basic security.