This tutorial explains how to automatically login to Windows 10 PC.
Windows 10 has the native feature to automatically login to Microsoft and/or local accounts. In this tutorial, I have covered two different methods to help you automatically login to Windows 10 PC.
Its simple purpose it to get rid of typing the password again and again to login to your Windows 10 PC. When you are testing some application or need to restart your PC couple of times for some other reason, in that case, you can set Windows 10 to automatic login mode for an account.
When you will restart the PC, it will not prompt you to type the password to access your Windows 10 desktop. It can also be handy when you have multiple accounts and you want to automatically login to a particular account.
You can also disable automatic login mode in Windows 10 as per your need. Let’s start with the first method.
Automatically Login To Windows 10 Using Advanced User Accounts Control Panel:
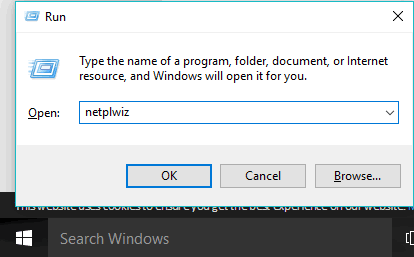
Step 1: Open Run command (Winkey+R) → type netplwiz → press OK.
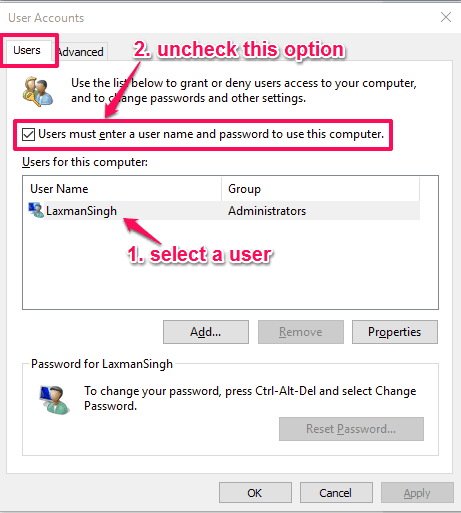
Step 2: “Advanced User Accounts Control Panel” window will open. On that window, you will see the list of users that you have added to use your PC. Select a user account of your choice and uncheck ‘Users must enter a user name and password to use this computer‘ option for that particular account.
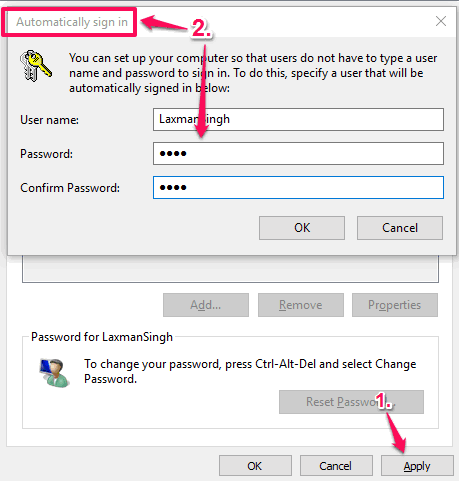
Step 3: Click Apply button and “Automatically sign in” window will open. On that window, you need to type the password for the account that you have selected for automatic login. Enter the password and click on OK button.
This will confirm your action. Now you should restart your PC to successfully apply new settings. That’s it! From now, you will login to your Windows 10 PC automatically.
Automatically Login To Windows 10 Using Registry Editor:
This is a bit lengthy method, but surely helpful to enable automatic login in Windows 10. Steps are as follows:
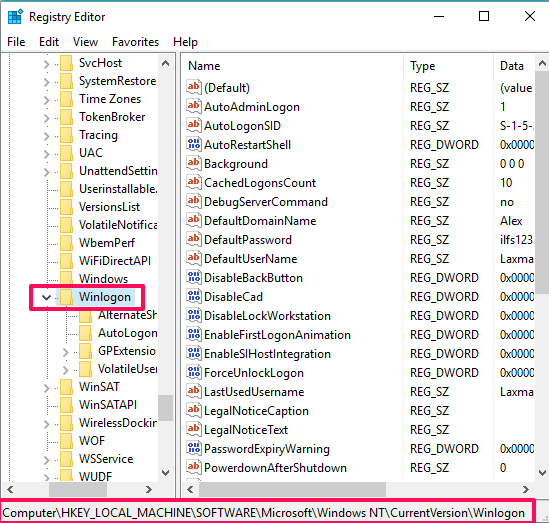
Step 1: Open Registry Editor and access Winlogon key. It will be located at: “HKEY_LOCAL_MACHINE\SOFTWARE\Microsoft\Windows NT\CurrentVersion\Winlogon“.
If you don’t like or want to mess with default Registry Editor of Windows 10, you can take the help of more convenient and portable registry editor for windows 10.
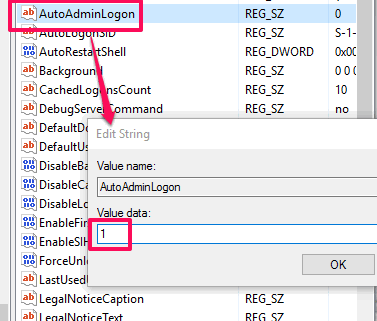
Step 2: Winlogon key contains multiple values. You need to find and double-click on AutoAdminLogon string value. Set its value data to ‘1‘ and save changes.
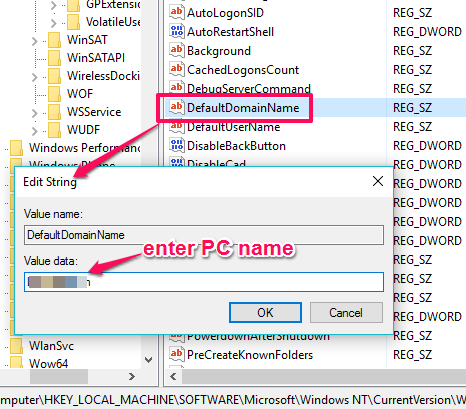
Step 3: Now you need to find ‘DefaultDomainName‘ value and double-click to edit its value data. In the value data, you need to enter the PC name if you are using the local account. However, if you are using Microsoft account, then you need to enter the domain name. If PC or domain name is already set, don’t change it, and press OK button.
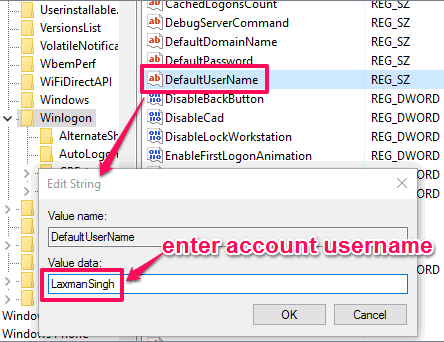
Step 4: In this step, you have to find DefaultUserName value, and edit its value data. In value data, you need to enter the username of your local or Microsoft account. If the username is already entered, do nothing, and use OK button.
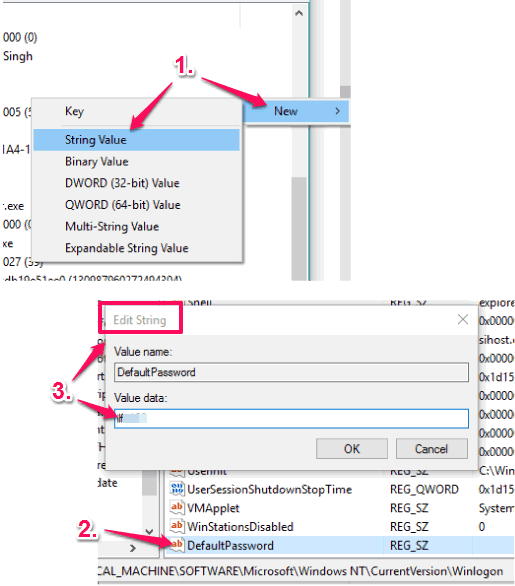
Step 5: This is the final step. You need to find DefaultPassword value. If it is not available, create it by right-clicking on the empty space → New → String Value. Rename the newly created String Value to DefaultPassword. After that, set Value data of that value. You need to enter the password of your default account in Value data.
Now you need to Restart PC to see the magic you just created. You will notice that login is bypassed automatically without any need to enter the password and you can access your Windows 10 desktop.
Conclusion:
I have enabled automatic login for Windows 10 using both of these methods and didn’t face any trouble. Personally, I prefer the first method, which is fast and easy than automatically login to Windows 10 using Registry Editor.
