This tutorial explains how you can enable two factor authentication in your Buffer account.
Buffer is one of the popular social media tool that helps to schedule posts for Twitter, LinkedIn, and Facebook. It is available as an online app as well as an extension for Chrome. As days are passing, more and more services are starting the two step verification for more security. Buffer is amongst those popular services now. It lets you secure your account by adding an extra layer of security. Once enabled, you will need your username, password, and a verification code to login successfully to your buffer account.
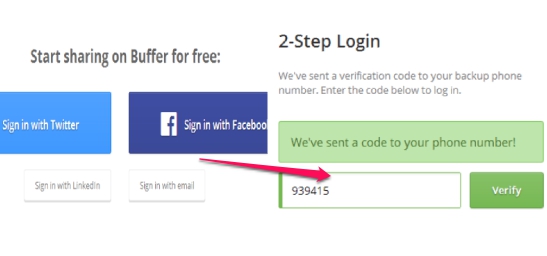
It provides SMS verification method to get security codes as well as allows to add your account with Google Authenticator app to generate one time usable security codes. In this tutorial, we will explain both the methods. Screenshot above shows how this two step verification method protects your account. Whenever you will try to sign in to your account with username and password, it will ask you to enter the security code to login successfully.
How To Enable Two Factor Authentication In Buffer?
As I mentioned before, you can enable this two factor authentication either using SMS verification or using Google Authenticator app. Lets start with the easier one; SMS verification method.
SMS Verification Method:
SMS verification is very easy process as well as helpful for those users who don’t have a smartphone to receive codes via Google Authenticator app. Here are the steps to enable two factor authentication with SMS verification method. Once enabled, you will receive verification codes as text message, each time you login to your Buffer account.
Step 1: Go to the homepage of Buffer and login to your Buffer account.
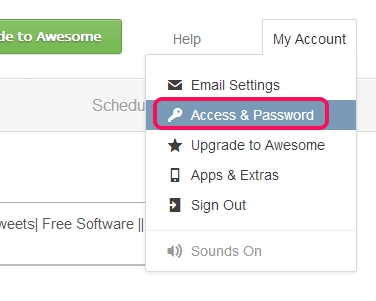
Step 2: Now click on ‘My Account‘ option that will be available at top right corner and tap on Access & Password option.
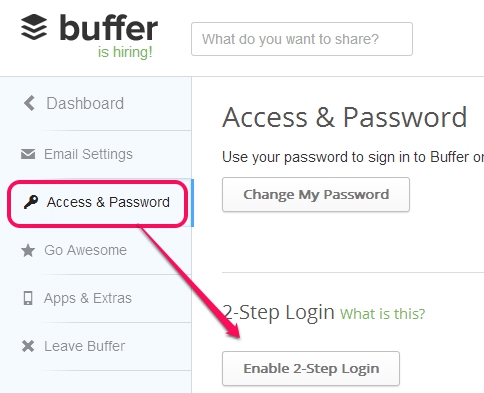
Step 3: Now you will be able to start the 2 step process. Just click on Enable 2-step login button and begin the process. After clicking this button, you will be asked to enter your password again for security purpose.
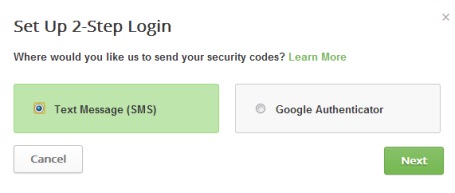
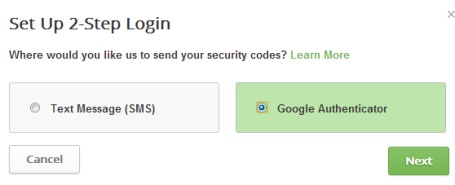
Step 4: In this step, you have to select which method you would like to prefer. Click on Text message (SMS) option and begin the process.
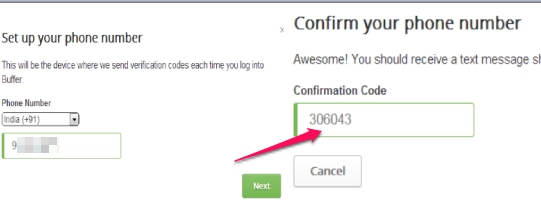
Step 5: Now select your country, provide your phone number, so that you can register your phone number for two step verification process via SMS method. Provide the phone number and you will get verification code to that number with a short delay. Here, the disappointing part is that if you didn’t receive any code for some reason, then there is no option to ask for code again. In that case, you need to restart the process from beginning.
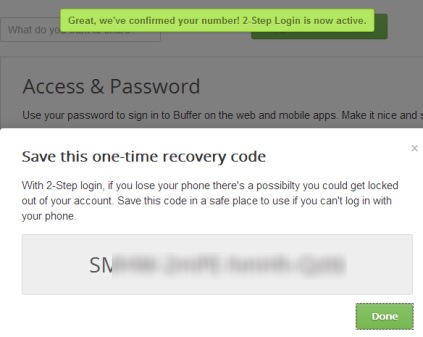
As soon as you have received security code, enter it in the required field, and that’s it! Two factor authentication for your Buffer account via SMS method will be enabled. You will also receive a backup code which you need to keep at safe place. It will help you login to your account, when your phone is not with you.
Get Security Codes Via Google Authenticator app:
Users having smartphone can use Google Authenticator app to receive one time usable security codes to login to their Buffer account. Google Authenticator app is also able to generate security codes even if you are in flight or network coverage is not available to your phone. You need to set up your Buffer account with Google Authenticator to enable two factor authentication. Here are the steps:
Step 1: First three steps are common, like SMS verification process. After this comes to the next step where you need to choose Google Authenticator option.
Step 2: Now on your smartphone, install Google Authenticator app (if you haven’t installed it already) from Google play store. After installing it, run Google Authenticator app to set up buffer account with it. You will also need barcode scanner to set up your buffer account.
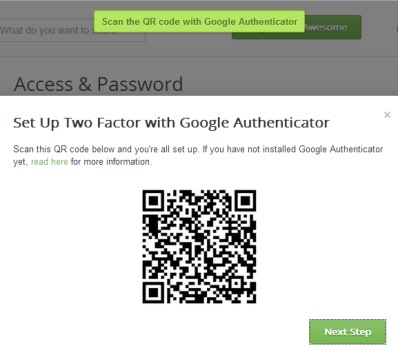
Step 3: After choosing the Google Authenticator option, you will find a barcode on your computer screen, just like visible in screenshot below. Scan it with the help of Google Authenticator to receive security codes as well as to setup your account.
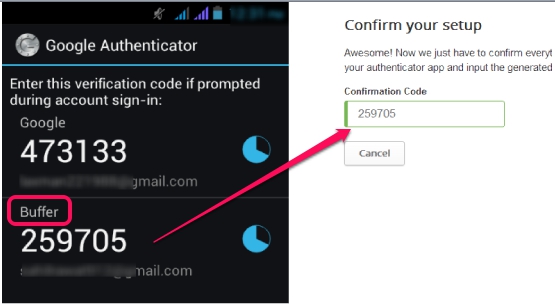
Step 4: As soon as you will scan the barcode, your account will be setup with Google Authenticator app, and it will generate security codes continuously for your Buffer account. Provide the most recent security code at the required field to confirm and complete your account setup.
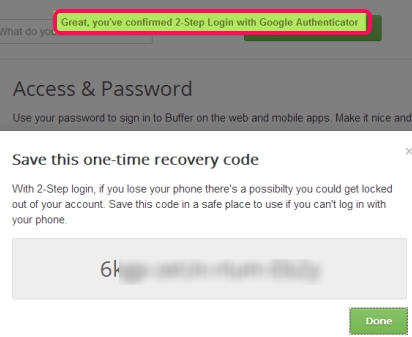
That’s all you have to do and set up will be completed. And as like the SMS verification method, a backup code will be provided to you to use in emergency.
Conclusion:
Buffer users should enable this two factor authentication on their accounts to make them more secure than before. Users can choose any method based on their requirement. But remember to keep the backup code at the safe place or print it out and keep with you. You can also switch to any method whenever needed or can simply disable two step verification using access and password option.
Also check out: two step authentication in Amazon Web Services, two step verification in Hotmail, Evernote multifactor authentication, and two factor authentication in Gmail.
