This article covers how to reset Windows 10 Start menu layout to default. Start menu of Windows 10 lets you pin apps as tiles, resize the added live tiles, change their positions, turn live tile on/off etc. Though it works pretty good, sometimes you might experience the problem in accessing the right-click menu for live tiles and more. In such a case, resetting Start menu to default layout may come in handy.
For this, you don’t have to rely on any third-party app or software. You can use Registry Editor of Windows 10 and then delete a DefaultAccount key in that window. After that, you can restart PC or Windows Explorer and your Start menu layout will be reset to the default layout. The only drawback is you need to add tiles again, resize them as per your needs, etc. However, resetting your Windows 10 Start menu layout to default will help you fix the issues you’re facing.

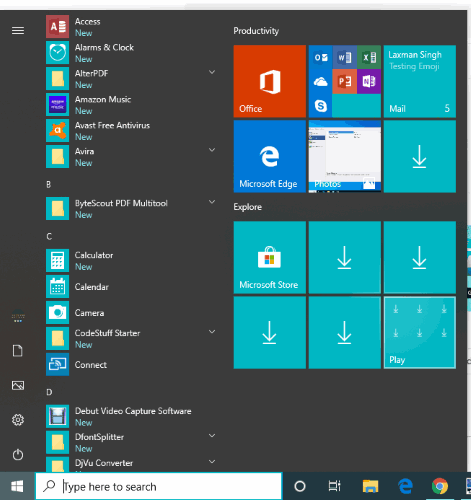
In the screenshot above, you can see the default Start menu layout is visible for my Windows 10 Start menu.
Before doing any changes, you should take a system backup or create a restore point to overcome any unwelcome changes.
How to Reset Windows 10 Start Menu Layout to Default?
Step 1: Click on Windows 10 Search box and type regedit. After that, you can press Enter and Registry Editor window will be in front of you.
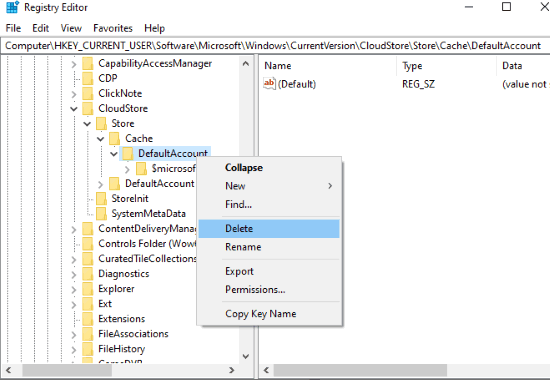
Step 2: Go to the “DefaultAccount” key. The location is as follows: HKEY_CURRENT_USER → Software → Microsoft → Windows → CurrentVersion → CloudStore → Store → Cache → DefaultAccount

Step 3: Right-click on DefaultAccount key and use Delete option.
Now you can restart PC/Windows Explorer. That’s it! your Windows 10 Start menu is reset to default.
The Conclusion:
If you have faced the same issue that when you’re not able to resize tiles or move them to desired positions, then resetting the Start menu layout to default will be the good option for you to try. Just a few simple steps and it will be done.