Planable is a free website to collaborate on social media content, approve, post content. Using this website, you will be able to collaboratively create and publish content to different social media accounts from one place. Currently, it supports Facebook, Twitter, and LinkedIn. You can simply create a workspace, add social media accounts, and then invite others for collaboration. In the workspace, you will be able to create, collaborate, review, and publish social media content. It also comes with a unique feature called “Approve” which can help you preview and approve posts before publishing them on any social account.
Another interesting feature of Planable is that it allows you to schedule posts at a specific time of your choice. This feature can come in handy, if you want to publish a post later after getting it approved from someone (like your clients, etc.). There are other services available which allow you to create and publish posts on multiple social media accounts from one place. But, none of them has the option to collaborate on content or approve posts. So, the collaboration feature makes Planable quite unique.
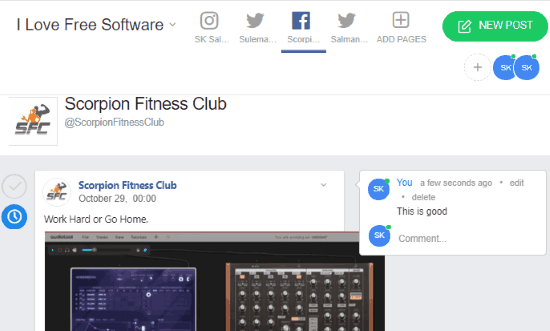
Note: The free version of Planable is limited to 1 workspace and 5 collaborators.
Using this Website to Collaborate on Social Media Content, Approve, Post:
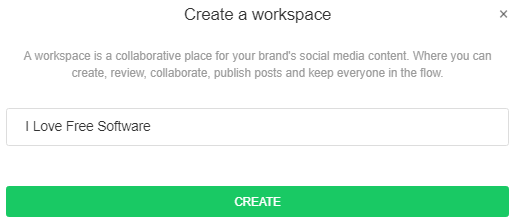
Step 1: First, go to the Planable homepage and sign up for an account. After that, the main window will appear where you would need to create a workspace. For this, click on the “Create a New Workspace” button and then enter a name for the workspace.
Step 2: After creating a workspace you can start adding your social media account. It lets you add Facebook Pages, Twitter, Instagram, and LinkedIn. Do note that publishing posts in Instagram is not yet supported. To add an account, simply click on the “Add Pages” button and then a popup will appear where you can select any social network and connect your account.
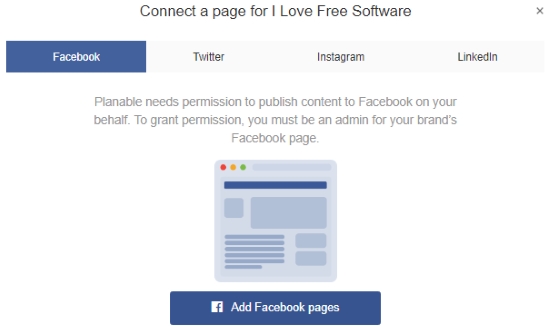
One of the unique feature of Planable is that you can add multiple profiles of any social network to a workspace. For example, if you have 3 Facebook pages, then you can add all of them to the workspace. Once you’re done adding accounts, you will see a separate tab for each account.

Step 3: Now, you can go ahead and invite collaborators to the workspace. To do that, click on the “+” icon at the top right and then a popup will appear with the option to send invitations. You can invite others by entering their email id, name, and selecting a role.
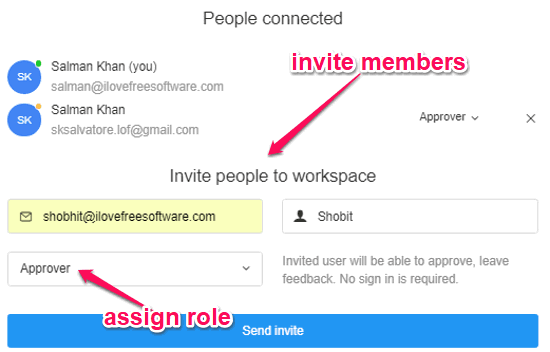
It allows you to assign three different roles to the invited collaborators. The roles are as follows:
- Contributor: The contributors can edit social media posts, connect new accounts, and leave comments.
- Approver: An approver will only have the permission to approve posts and also leave comments or feedback.
- Administrator: An administrator will have full access to the workspace and can do everything same as the account owner.
Step 4: After you’re done inviting members, they can join the workspace and start working together with you. Now, open any tab you want for creating and publishing post. To create a post, click on the “New Post” button at the top. After that, a popup will open up where you can create the post by typing text and also add an image, GIF, video, and even carousel for Facebook.
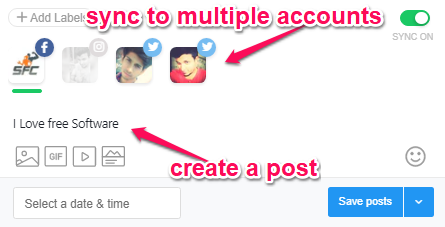
Step 5: When you’re done creating a post, you can either publish it instantly or schedule it for later. To directly publish the post, you can simply click on the “Arrow” icon associated with the “Save Posts” button and then click on “Publish Now” option. And if you want to schedule the post for later, then select the “Schedule” option and then set the time for publishing the post. Once done click on the “Save Posts” button and the post will be scheduled.
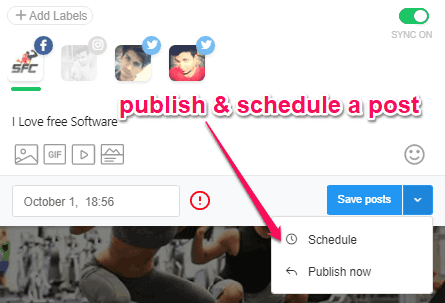
Before publishing the post, you can also get approval for the post from the approvers whom you have invited to the workspace.
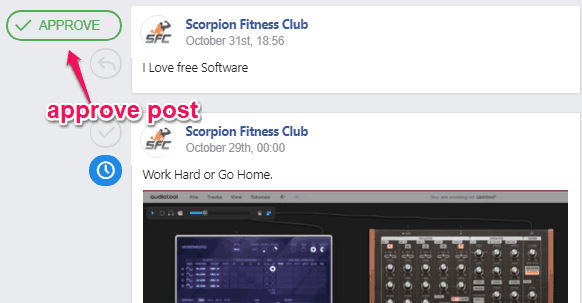
Step 6: If you are the owner of the workspace, then you will also be an approver along with the other invited ones. When you make any member an approver, he/she will only be able to approve posts, leave comments, and download the attachments. To approve a post, all you need to do is click on the “Tick” icon on the left of a post on the workspace. As soon as you or any approver do that, the post will publish instantly or get saved for later if you have scheduled it.
Closing Words:
Planable is a very interesting and useful tool for marketing teams to manage their social media content with ease and collaboratively. The best feature of this website is that you can create and publish posts to multiple social networks from one place. Go ahead and give it a try.