This tutorial explains how to choose the disk drives for automatic optimization in Windows 10. Modern operating systems are insanely comprehensive and well-rounded applications, and come with a whole lot of features and applications. These system applications let you tweak the OS, manage the hardware, and a heck of a lot more. And while most of these system applications are automated and work just fine without any user intervention, you can tinker with them if you want.
In one of my previous articles, I talked about Automatic Disk Optimization, and how it works behind the scenes to regularly monitor your computer’s disk drive(s) for any errors, and even fixes them, if the same are found. Normally, all the active disk partitions are optimized using automatic optimization, but what if you want only some of them to be optimized?
Not a problem, as you can do just that in a few clicks. Head past the break to find out how you can choose the disk drives for automatic optimization in Windows 10.

How To Choose The Disk Drives For Automatic Optimization In Windows 10?
Selecting the disk drives to be affected by the Automatic Disk Optimization features of Windows 10 is a fairly simple and straightforward task. The following stepwise walkthrough should get you started:
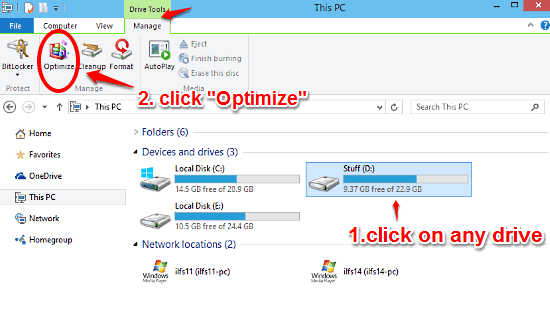
Step 1: Open up This PC (or My Computer), and click on any of the disk drives that are listed. Now head to the Ribbon Menu, and select the Manage tab, headed by the word Drive Tools. Under the options listed, click on Optimize.

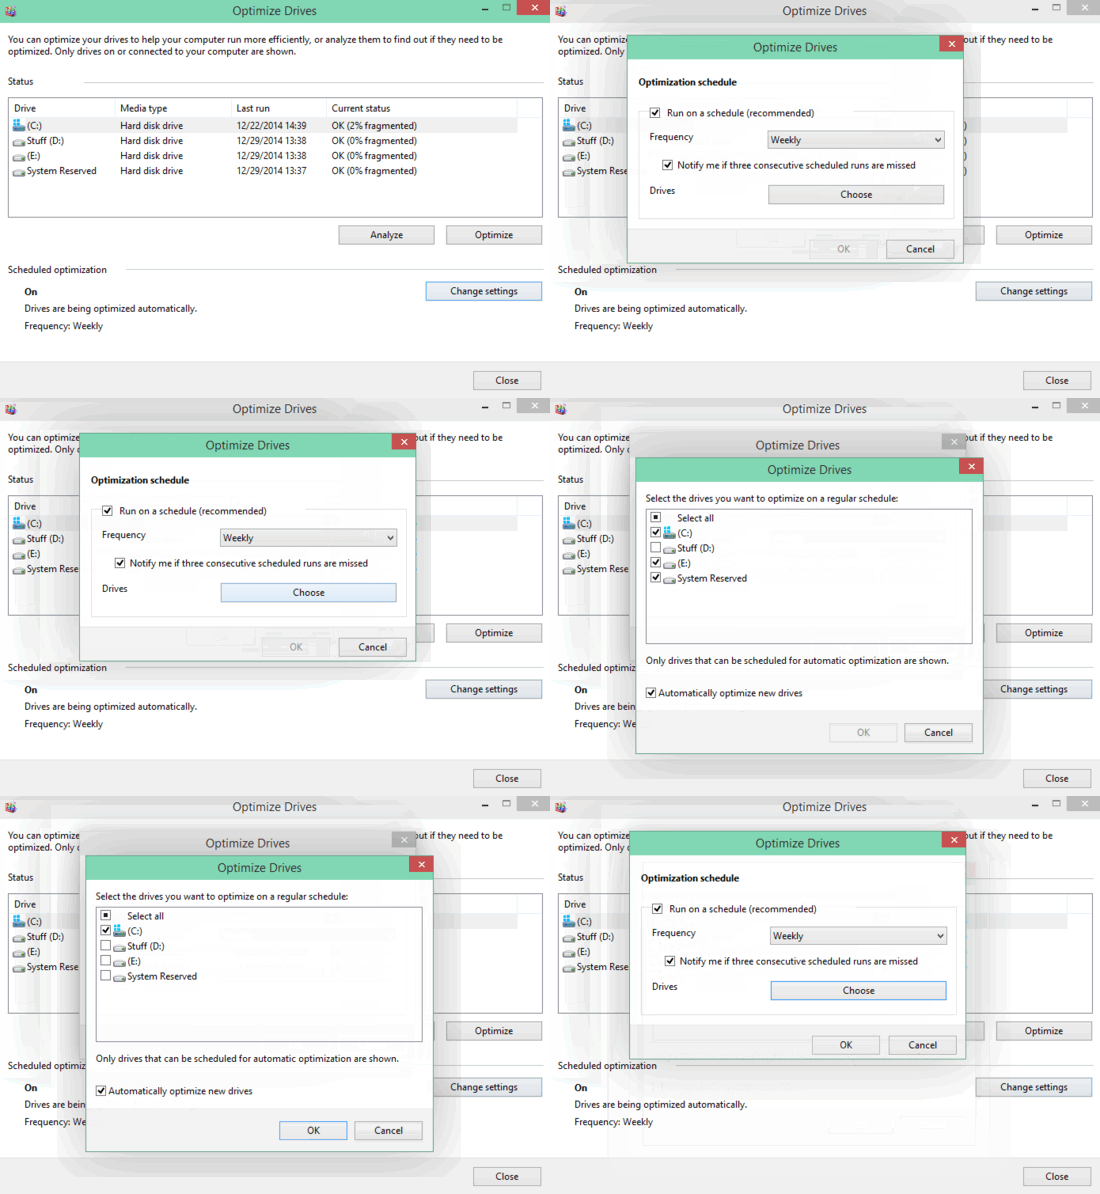
Step 2: The Windows Disk Optimization utility will now come up. It lists all the disk drives, as well as details such as fragmentation status, media type, and things like that. Click on Change settings, and another box will show up. Click Choose, and yet another box will pop-up up, where you can select the disk drives that you want to include in the automatically scheduled optimization. Make your selections, and hit OK. Check out the screenshot below:

Also See: How To Bypass Login Screen In Windows 10?
Closing Thoughts
Automatic Disk Optimization is an important built-in feature of Windows 10. Simple yet effective, it unobtrusively works to keep your hard disk drives free from all sorts of trouble. And the fact that you can even choose the disks to be included in the optimization procedure, makes the whole thing even better. Give it a shot, and let me know your thoughts in the comments.