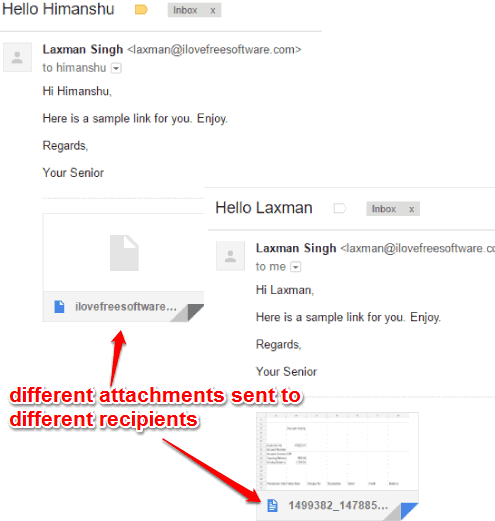
Here is a free Google Sheets add-on for Gmail mail merge with unique file attachment in each mail. So, you can send different file to each individual recipient in one go. This takes mail merge process to the next level. While traditional mail merge extension(s) let you create custom template and attach common files to send to the recipients, this add-on works in a bit different and advanced way. It lets you attach separate file for every single recipient and create custom template to do mail merge. This Google Sheets add-on is named as “Mail Merge with Attachments“.
Another fantastic feature of this add-on is that you can attach files from Google Drive or your PC. Once you have created a custom merge template, you can attach files from PC or Google Drive, set custom email subject and message, and send mail merge. Every recipient will get a unique message with a unique file attachment.
Note: In the free plan of this add-on, you can send emails to up to 50 recipients per day. Also, the maximum size for file attachments is 5 MB. If you have to share large files, then you need to first upload a file (that you want to send as attachment) on your Google Drive and then insert the link of that particular file.
How To Configure Gmail Mail Merge with Unique File Attachment In Each Email?
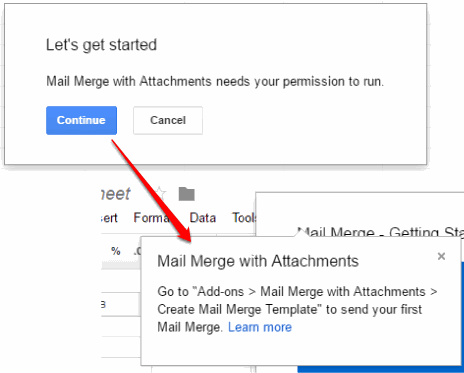
Step 1: Use this link to open the homepage of this Google Sheets add-on and install the add-on. You need to login to your Google account to install it and then a Google Sheet will be in front of you. The add-on will ask your permission to run. Grant the permission and then it will be ready.
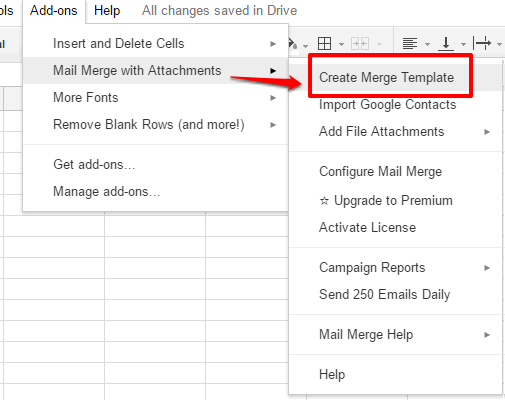
Step 2: Now the first thing you have to do is create a template for mail merge. For this, right-click on Add-ons→ Mail Merge with Attachments→ Create Merge Template.
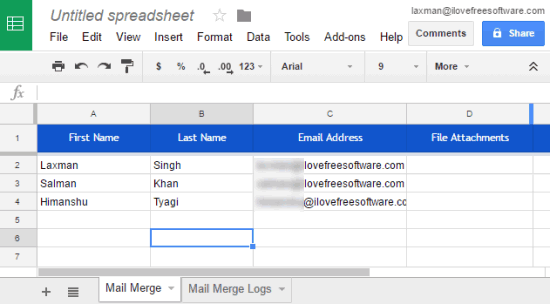
Step 3: A blank merge template will open. This sample template has some fields like First Name, Last Name, email address of the recipients. You can change these fields or add more fields, depending on what you want to be included in your final email. A File Attachments column is also available in that custom merge template. This is the column in which you have to add attachments. In that column, click on a cell associated with a particular user and go to the next step.
Step 4: Click Add-ons→ Mail Merge with Attachments→ Add File Attachments.
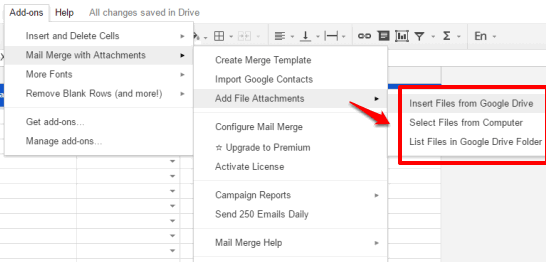
After that, you will see three options to attach a file. These are:
- Insert Files from Google Drive: This option helps to explore folders stored on your Google Drive and select a file.
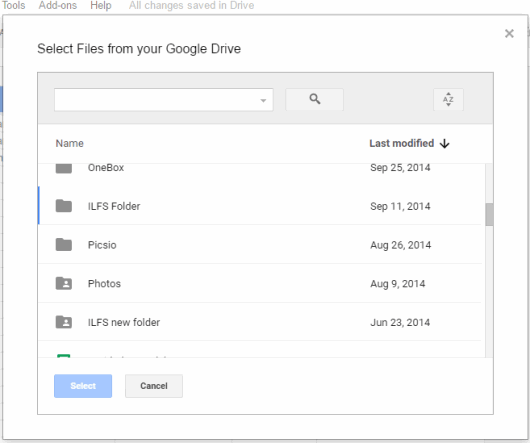
- Select Files from Computer.
- List Files in Google Drive Folder: Using this option, you can first select a folder from your Google Drive and then this add-on creates a drop down menu in each cell under File Attachments column. Using that drop down menu, you can select a particular file easily that you want to attach for a particular user.
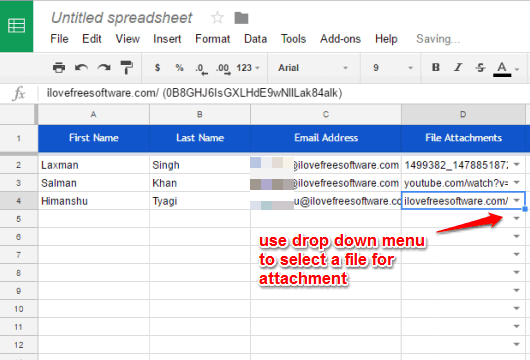
I will suggest you use the third option when you have to attach files for all recipients from a particular Google Drive folder. It is so because it will be very easily to attach files as you can use the drop-down menu only. If you have to attach files from different folders, then you should definitely use the first option.
When you have selected a file, its URL is added in the cell associated with that particular recipient. Repeat the step 4 to attach files for other recipients.
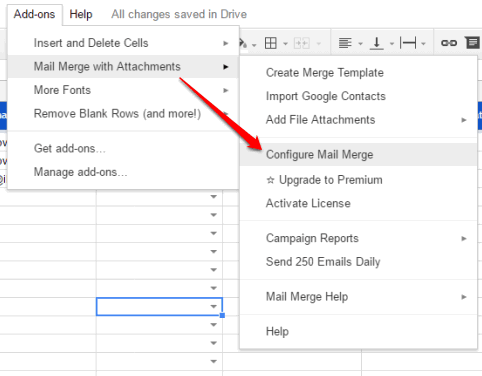
Step 5: Now it’s the time to Configure Mail Merge to send it to recipients. Go to Add-ons→ Mail Merge with Attachments→ Configure Mail Merge. It will open a pop-up.
Step 6: Enter sender (you) details like your email address, full name, Reply-to address, Campaign Name, etc. Fill details and go to the next step using Continue button.
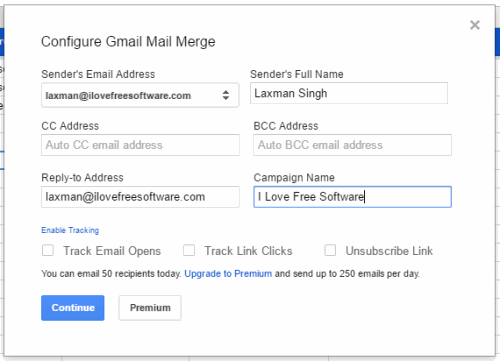
There are some email tracking options also available, but those are the part of premium plans.
Step 7: This is the last step. You need to select “Write your own template in plain text or HTML” from the drop down menu. After that, you can enter Email subject line (like {{First Name}} {{Last Name}}), and enter the custom message for recipients.
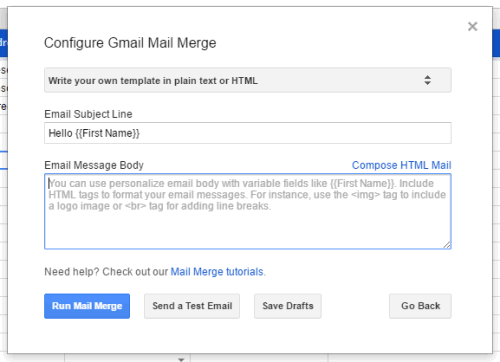
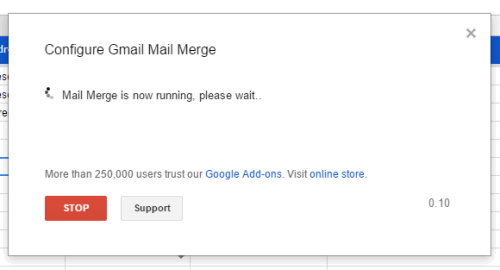
Press Run Mail Merge button and then mail merge will start sending emails with unique attachment to each individual recipient.
Before sending the emails, you can also use Send a Test Email button to receive a test email on your email address to check everything is OK.
So this way you can configure this add-on to send emails to multiple people with unique file attachments.
The Verdict:
There are some add-ons that can do mail merge with scheduler and mail merge to create personalized PDFs, but when it comes to mail merge with unique file attachment for different users, then this Google Sheets add-on would probably be the best option to try. Creating custom merge template and configuring it to attach unique file for each recipient is so easy. Try it.
via Labnol.org.