This tutorial explains how to disable first sign-in animation in Windows 10. By default, when you create a new user in Windows 10 (local or Microsoft account) or sign in for the first time, then Windows 10 shows a welcome message and other preparation messages. It happens for all the new local accounts as well as Microsoft accounts that you create on your Windows 10 PC. There are two methods to skip this first time sign in animation in Windows 10.
Once you have used any of these methods, welcome and preparation messages are not visible. Instead of that, it only shows a “preparing windows” (visible around 30-40 seconds) message and then it directly opens your user account. To disable first sign in animation for all user accounts, you can take the help of Regedit (Registry Editor) and GPO (Local Group Policy). Both of these methods with all details are covered here.
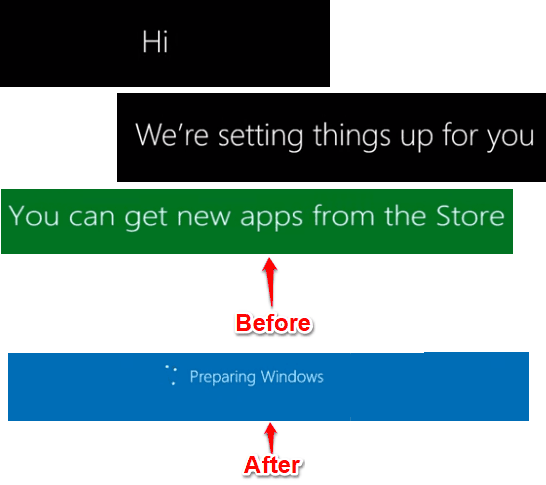
As you can see above, welcome and preparation messages were visible when sign-in animation was enabled. After disabling this, only a ‘preparing windows‘ message is visible.
Method 1: Disable First Sign In Animation for All User Accounts In Windows 10 Using Group Policy
Group Policy isn’t present in Windows 10 Home. If you use Home edition, then first install Group Policy or use the second method.
Step 1: Start GPO (Group Policy window). You can open it using Run box (Win+R) or Search box. Just type ‘gpedit.msc‘ in Search or Run box and use “Enter” key to open GPO.
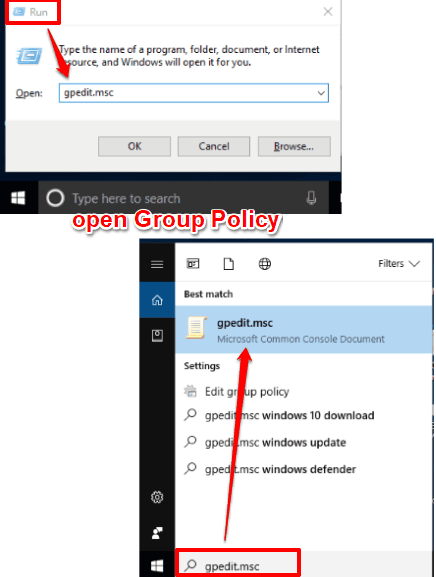
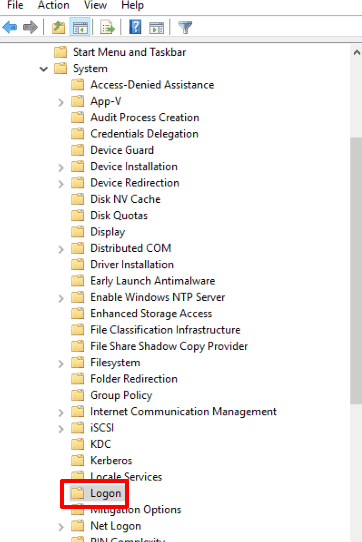
Step 2: Look for “Logon” folder. You can find Logon folder here: expand Computer Configuration menu → then double-tap on “Administrative Templates” → further expand System folder → and then you can access Logon folder.
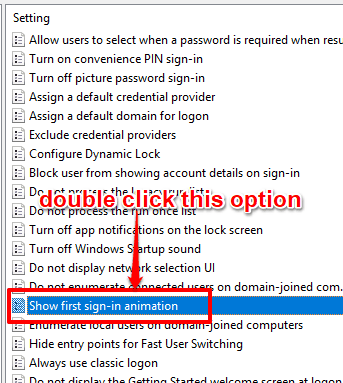
Step 3: Logon folder has many options. Scroll down those options and double-tap the “Show first sign-in animation“.
Step 4: “Show first sign-in animation” window will be visible separately. There you will see that Enabled, Not Configured, and a Disabled option is available. Use “Disabled” option.
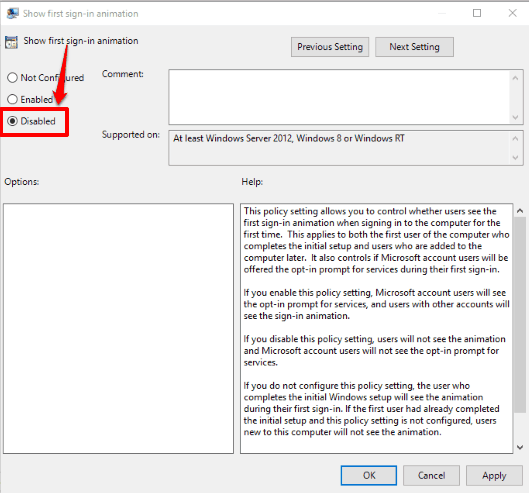
Save it and then first sign in animation will be disabled for all new or first user accounts in Windows 10.
When you want to re-enable sign-in animation, use the same window (mentioned in the above step) and use Enabled option.
Method 2: How To Turn Off First Sign In Animation In Windows 10 Using Registry
Step 1: Open Registry by entering ‘regedit‘ in Search box and pressing Enter.
Step 2: In Regedit window, look for “System” key. Its location is here: HKEY_LOCAL_MACHINE → then SOFTWARE key → then Microsoft → Windows key → CurrentVersion key → Policies → and finally there will be System key.
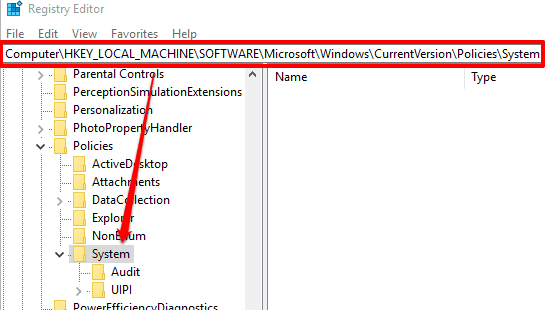
Step 3: System key will have “EnableFirstLogonAnimation” DWORD value. If this DWORD is not present, you can create it by right-clicking the empty space → New → and using DWORD value option. This DWORD value will have ‘0’ as Value data, by default. You don’t need to change it.
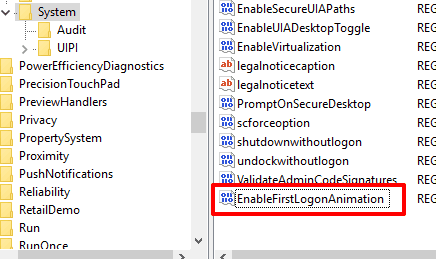
Simply restart File Explorer and user sign-in animation will be disabled on your Windows 10 PC.
To re-enable sign-in animation, you can simply delete EnableFirstLogonAnimation DWORD or add ‘1’ in its Value data box.
Here are other useful tutorials for you: How To Automatically Login To Windows 10 and How To Set Total Number of Failed Login Attempts In Windows 10.
The Verdict:
Those who need to delete and add user accounts regularly in Windows 10, this trick to disable first sign-in animation is handy. Instead of waiting for the completion of that whole sign-in animation, you can simply disable it and reduce the time to access the user account(s).