Expensebot is a free online expense report creator which lets you create reports for all types of expenses, in just a few clicks. You can create expenses reports for billable as well as reimbursable expenses. This online service also has a wide range of default categories for you to cover all the expenses incurred by you. You can create as many reports as you want.
This online expense report creator also has specific options for maintaining the fuel expenses known as Mileage with in-built calculator to calculate the total amount, depending on distance traveled by you. Other features include the uploading of receipts, iOS/Android apps for on the move reports, and auto categorization of uploaded receipts. You can also link your credit card details for paying the expenses from within the service.

In addition to all this, you can also add users to your account so that other users can submit their expense report to you, which you can then reimburse directly from the service. You have to link your credit card details for the reimbursement, though, I couldn’t test the feature.
Note: The free version of the service lets you add up to 5 users with one account.
Using this Online Expense Report Creator, Share Reports with Others:
You have to register for an account with Expensebot to start creating the expense reports. On successful registration, you will be redirected to your dashboard. It will be empty for the first time users, but as you start using the app, you will see the expense reports here. Click on Create an Expense Report to create the report by giving it a name.

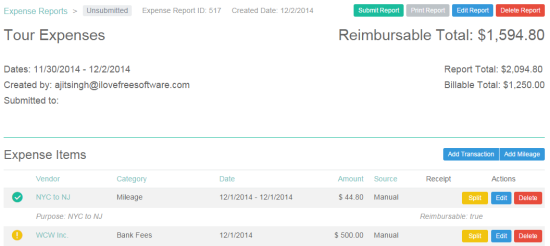
On creating the report, you will see the interface shown in screenshot below. For the fist time users, it will be blank. While adding your expenses, you can add them as: Add Transaction and Add Mileage.

For adding transaction, you have to enter vendor name, expense type, transaction date, expense amount, expense type (reimbursable/billable), and other optional details. Similarly for mileage, you have to enter the trip description, start/end date, start/end mileage, personal mileage, etc..
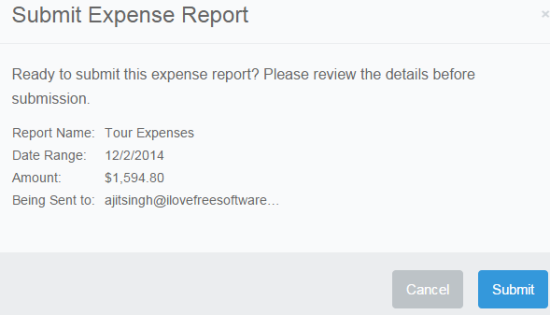
When you have added the expenses, you will see them aligned in rows as shown in above screenshot. You can see that it also has a Split option. You can use this option to split the expense among users. When your expense report is complete, you can then choose to submit it, print, edit or delete it. The Submit option is for those who are not the admin.

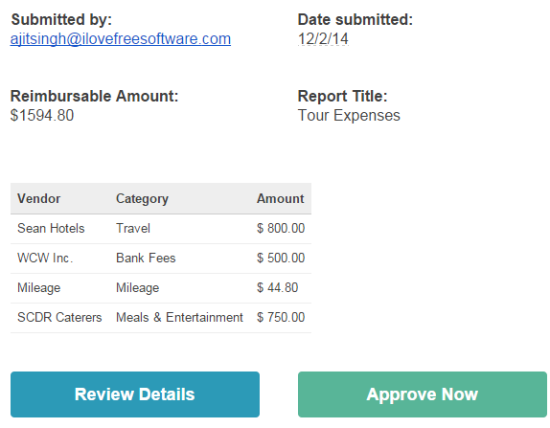
On submitting the expense report, the admin receives the report in his account. He can then choose to Reimburse the expense or reject it. If the admin has the credit card linked to account, then they can reimburse the expense using it.

Apart from just creating, sharing, and reimbursing expense reports, the expense report creator has a lots of other options for you to explore and use. Some of them are: Expense Reports, Transactions, Ignored Transactions, Receipts, Distances, Reimbursements, etc.. You can access all these options from left sidebar when logged into your account.
You may also like: 24 Best Free Expense Manager.
Final Verdict:
Expensebot is an awesome online expense report creator which makes it so easy to create expense reports. I enjoyed using the service as it makes everything happen with only a few clicks. If you have to create a lots of expenses and it takes time, then do give this online service a try. It will make your life easy.