Here is a free Markdown editor software that comes with syntax highlight, multi-tab interface, PDF export feature and more. The software is open-source and is named as “VNote“. It is helpful for both professionals as well as regular users like me who have a basic idea about Markdown formatting. On its interface, you can add different Markdown (*.md and *.markdown) files in separate tabs and syntax available in code block is highlighted automatically for easy recognition. By default, the files are opened in read-only mode, which I think is a good feature to prevent accidental changes, but you can also switch to edit mode to do changes and then save Markdown file with all the changes.
It also comes with many other fantastic features, which make it one of the best Markdown editors. You can preview the output before saving Markdown file, insert code block, add inline code, make text strikethrough, bold, italic, add headings, snippets, attach files, different themes, word count, insert images, etc. The software also lets you export Markdown as HTML or PDF file. So, pretty good features are provided by this software.
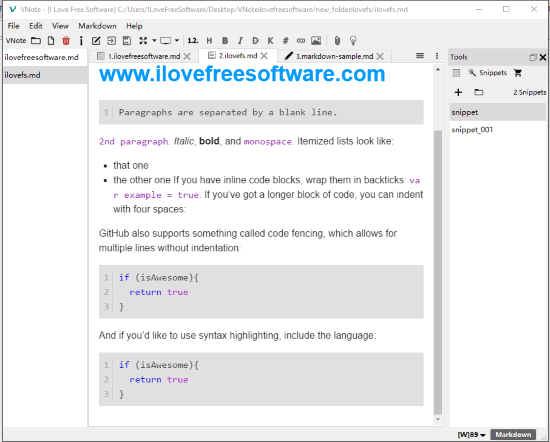
In the screenshot above, you can see the interface of this free open source Markdown editor software. As you can see, multiple Markdown files are opened in different tabs. Its syntax highlight feature is working automatically. And, multiple Markdown formatting options are visible in the menu of its interface.
How To Use This Free Open Source Markdown Editor Software with Syntax Highlight, Multi-tab Interface, PDF Export Features, Etc?
Download the portable 64-bit or 32-bit version zip file of this software using the link added at the end of this review. This software is also available for Linux and Mac.
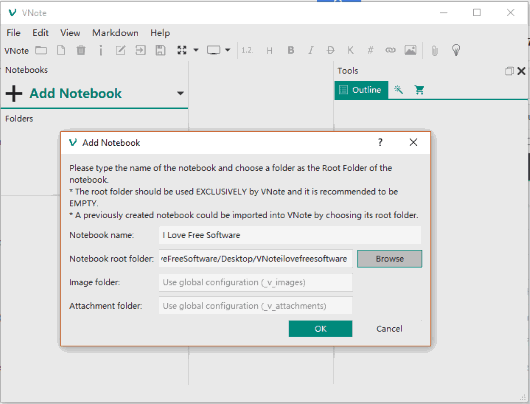
Extract the zip and then execute “VNote.exe” file. The interface will open and it will prompt you to add a new notebook. This is necessary so that you can access the interface and add Markdown files for editing. You can create more notebooks later also. After creating a Notebook, you also need to select a root folder.
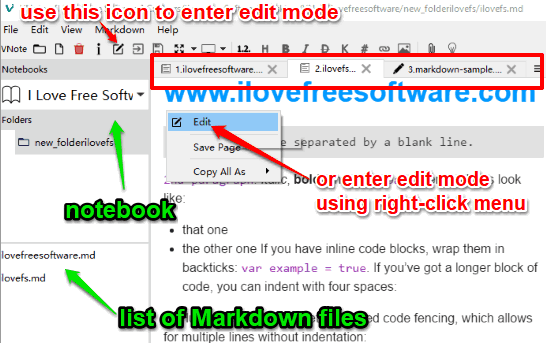
Now you are ready to add and edit Markdown files. Use File menu to add Markdown files and they are visible in different tabs on its interface. On the left side, you can see the created notebook and the list of opened files. And the rest of the interface shows Markdown tabs. Select a tab to access the input Markdown file. By default, the file is opened in reading mode. You can switch to edit mode using “Edit” icon or right-click menu.
After entering the editing mode, you can use Markdown formatting. Use the available menu and then you can:
- Add headings, make text bold, strikethrough, italic, etc.
- Insert code block and inline code.
- Add links and images.
- Attach files.
- Add snippets (this option can be used using the right section).
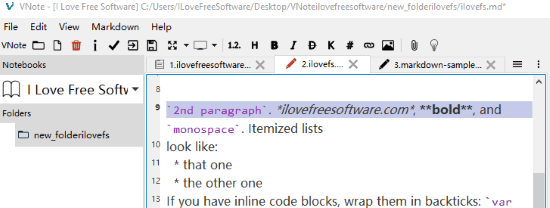
You don’t have to enter Markdown formatting manually as options are already available. Simply use them. Once the editing is done, switch to read only mode to see the output.
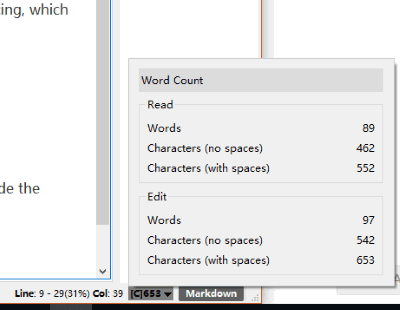
Apart from this, it also comes with word count feature which you can access using the bottom right part of its interface. The word count feature shows the total number of characters (with and without spaces) and words for reading mode as well as edit mode.
In addition to all these handy features, the software comes with different themes. You can set a particular theme using File menu and access Theme section.

Once the theme is selected, you need to relaunch the software to apply the new settings.
To save Markdown as HTML, PDF, or original format (which is Markdown), simply use Export option in the File menu.
The Conclusion:
I have come across numerous Markdown editors which include open source Markdown editor(see list here), collaborative Markdown editors, and more. All such products are really nice but this open source Markdown editor is a bit special because of the features. Its code block insert feature, tabbed UI, syntax highlight for the code block, different themes, file attachment, and Markdown to PDF/HTML export features make it one of my favorite free Markdown editor software.