This tutorial is all about how to auto sync local folders with OneDrive on Android. One of the major advantages of auto syncing Android folders with OneDrive is that you don’t have to manually upload files from your phone to OneDrive storage.
This can actually be done using a free Android app named, “OneSync” which allows you to keep your data sync between your local folders on Android and OneDrive. It allows you to make a connection between a local folder on your Android phone and a remote folder in OneDrive by creating a folder pair. After that, the selected folder will automatically sync between your phone storage and OneDrive.
How to Auto Sync Local Folders with OneDrive on Android:
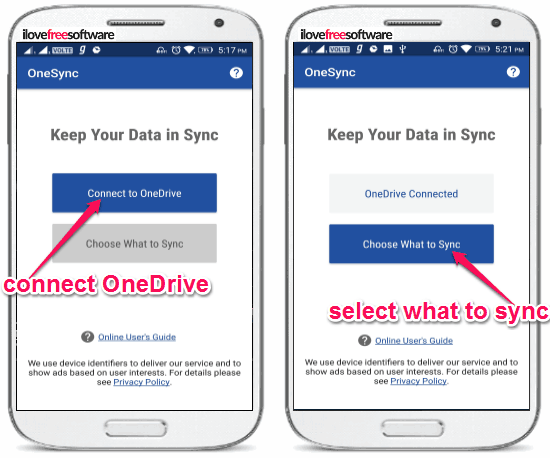
Step 1: When you open up the “OneSync” app on your Android phone, it will ask you to connect your OneDrive account. For this, simply tap on the “Connect to OneDrive” button on the main screen and then feed your account details. Once your OneDrive account is connected, simply press the “Choose What to Sync” button on the main screen to proceed.
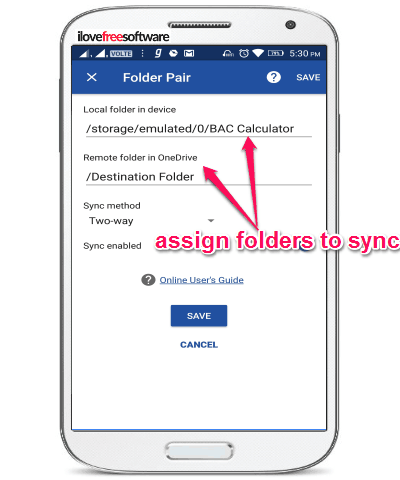
Step 2: When you do that, it will ask you to create a folder pair between your phone storage and OneDrive. To do this, simply click on the option that says “Let me create my own folder pair”. After that, it will open a new screen where it will ask you to choose a local folder in your device and a remote folder in OneDrive.
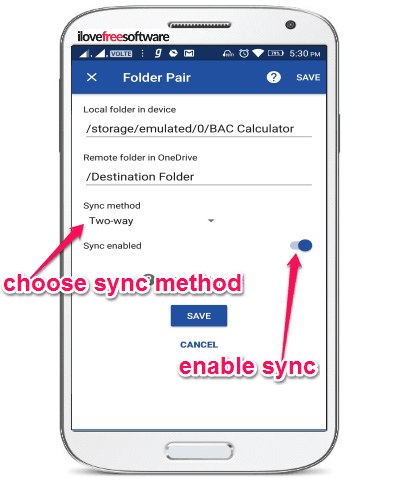
Step 3: After you’re done assigning the folders for auto sync, simply select the sync method as “Two-way”. Then toggle ON the slider button associated with the “Sync Enabled” option.
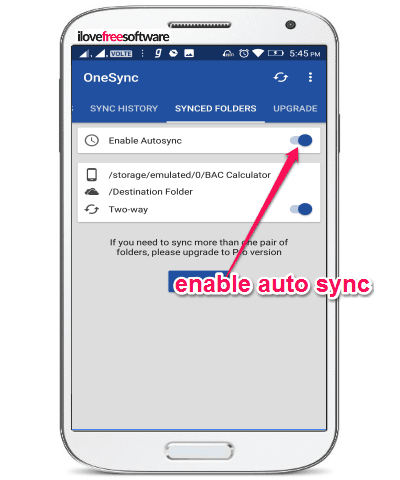
Step 4: As soon as you do that, simply hit the “Save” button to save and activate the folder pair. Now, the local folder which you have selected will automatically sync with the remote folder which you have chosen in OneDrive. Before that, please make sure that you have activated the “Enable Autosync” button on the “Synced Folders” tab.
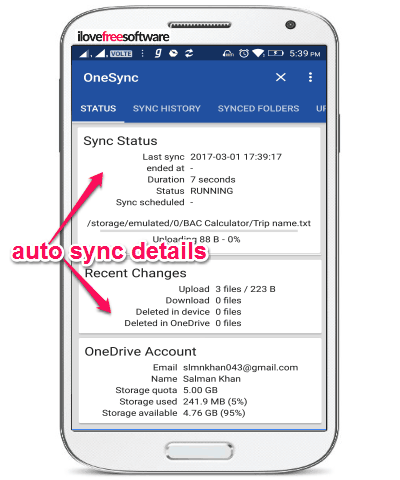
From now on, whatever changes you will do in any of the folders (local or remote) will automatically sync with one another. That means if you add a new file to any of the folders, then it will also be available in the other folder and same goes if you delete any file. You will be able to see all the auto sync details like the last sync date and time, the number of uploaded files, etc. on the “Status” tab, as shown below. If you want to know which individual files are auto-synced, then you can see that on the “Sync History” tab.
Closing Words:
If you have been looking for a way to automatically sync your local folders with OneDrive on Android, then this tutorial is what you’re looking for. In this tutorial, I have explained a simple method using which you can now auto sync local folders with OneDrive. For this, all you need is the “OneSync” app which makes it very easy to do the same.