This tutorial covers how to delete files by date. By the word “date”, I mean you can delete files by creation date, modification date, or last accessed date. Though you can manually delete a file or first access properties of a file to see its creation and modification dates and then delete that file, this process is not very helpful when you have to delete so many files. Therefore, I covered this tutorial which includes multiple methods to delete files.
To delete files by their creation, modification, and/or accessed date, I have covered 3 free software in this tutorial. Most of these software let you delete files by creation/accessed/modification date and other software let you select all the filters to scan and delete files. Some unique features are also present in these software. For example, you can securely delete files, move files to some other folder instead of deleting them, specify file type for deletion, etc.
Let’s check all the methods one by one.
Method 1: How To Delete Multiple Files Using Free “Delete Files By Date” Software?
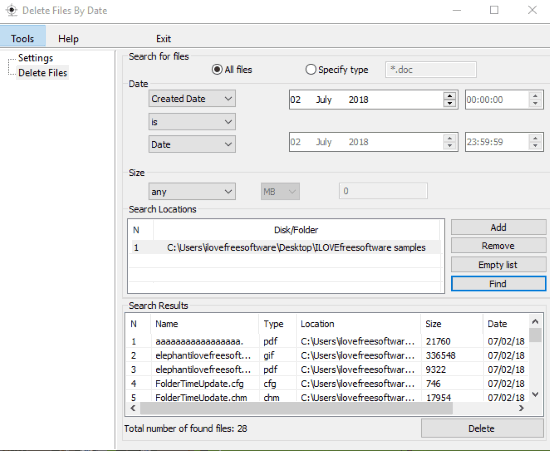
The name of this software, “Delete Files By Date” (Homepage), itself clears its purpose. You can delete files using created, modified, or accessed date. The best part is you can also apply different conditions based on which you can delete files. For example, you can:
- Specify file type (*.doc, *.mp3, etc.).
- Set a particular creation date.
- Use option that creation date is between this and that date. After that, the software will automatically scan files whose creation dates exist between the specified values, and then add them to list for deletion.
- Include time along with creation date.
- Add size (in MB, KB, etc.) to include only those files that match the size limit.
You can also set master password for its interface so that no one can change the filters or settings adjusted by you.
Step 1: Download this portable file deletion software and open its interface.
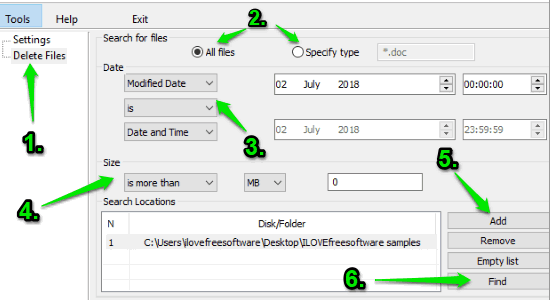
Step 2: Use Delete Files section and then the list of filters will be in front of you. You can set the type of date (created, Accessed, or Modified), set exact date and time, use file size filter, add folders which contain the files for deletion, and use Find button.
Step 3: The list of files based on the applied conditions will be visible to you on the bottom part of its interface. Finally, you can select files and then click on the Delete button.
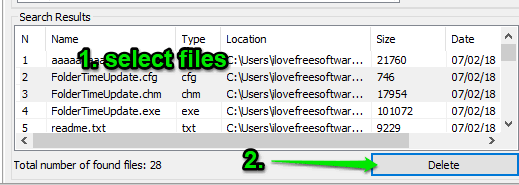
The selected files are deleted. You applied settings are saved automatically. So, the next time you will open its interface, the settings will remain as it is.
Method 2: Delete Files By Date Using Free Cyber-D’s Autodelete Software?
Cyber-D’s Autodelete folder is another handy software that supports feature to delete files by modified, accessed, and creation dates. It also comes with two interesting features not present in many other similar software. You can delete files securely so that it would be almost impossible to recover delete files. Another fantastic feature instead of deleting files securely, you can move them to recycle bin or a particular folder of your choice. This will come in handy when you accidentally deleted files but you need them later.
Step 1: Download and install the software.
Step 2: Open its Configuration window and add folders whose files you want to delete. You can also enable option to create logs of file deletion by just switching the available button.
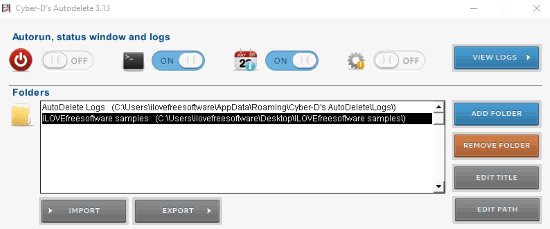
Step 3: On the bottom part of its interface, you will see three tabs:
- Name Filters tab: which lets you add filter to “never delete these types of files” or “delete these types of files“. Select an option and then you can add file type (*.mp3, *.doc, etc.) or mask filter.
- Date Filters tab: in which you can enable buttons for creation, modification, and accessed dates. After that, you can move the sliders to set years, days, hours, and minutes for those dates.
- Delete Options tab: Here you can set whether you want to delete files securely, move them to recycle bin, move files to a particular folder, include/exclude sub-folders from scanning, etc.
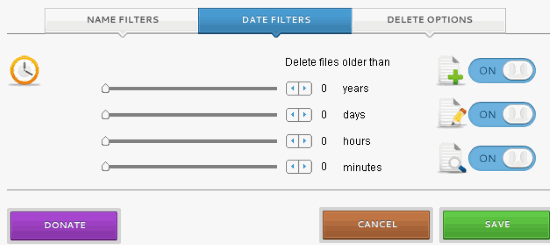
Step 4: When the filters are applied, you can Save the settings. After that, it will prompt whether you want to run the file deletion process. Press Yes button and then it will delete or move files based on the selected filters.
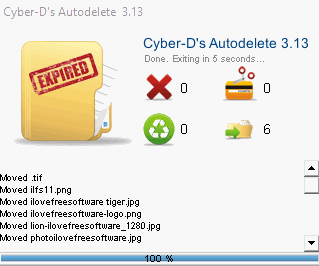
You can also save settings so that you can restore them later anytime.
We have also covered separate review for Cyber-D’s Autodelete software.
Method 3: Delete Files By Date Using Free “Remove Old Files” Software?
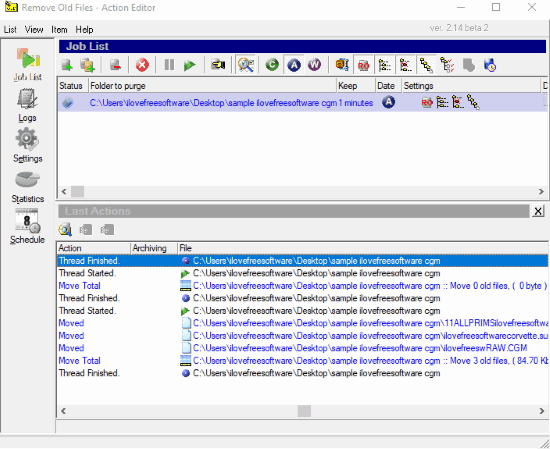
This software (Remove Old Files) has two unique features that catch my attention. The first one is it lets you create multiple jobs and you can apply different settings in each job to delete files by date. The second interesting feature is you can schedule any job to run at a specified day and time and delete the files based on the job condition. I tested its beta version and it worked great. If you don’t want to use the beta version, then you can also download the stable version. Its interface is old and looks a bit complicated but once you start using it, then deleting files by date will be very easy for you.
Step 1: Download its zip file, extract that file, and run the setup.
Step 2: Open the interface and then create a new job.
Step 3: In new job window, you will see multiple options. You need to:
- Add a description or name for that job.
- Select the folder which contains your files for deletion.
- Set the destination: you can either delete old files immediately, move them to recycle bin, some folder of your choice, or copy them to a folder.
- Use a date (last modified, accessed, or creation) for file deletion.
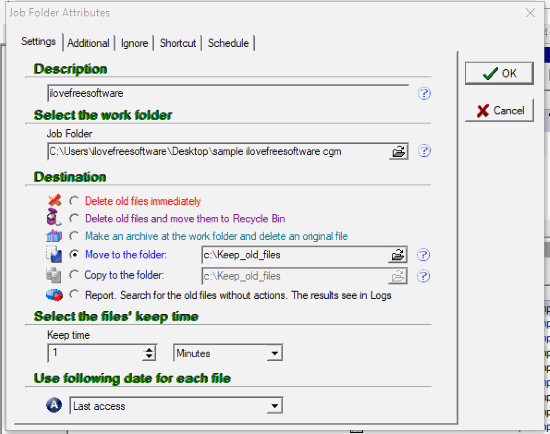
Set options and save the job. You can also use schedule feature to run the job automatically per day or selected days at specified time.
Step 4: Now you can run the job, sit back and relax. The software will take care of the rest. It will scan the folder and take action based on the job settings.
The Conclusion:
I like all these methods as the process to delete files by date is done successfully. While first software is handy to set file size, file type, different conditions (like set creation/modification date range), etc., the second software is there to select all date types, move files to recycle bin or a folder, and third software lets you schedule the file deletion process and create multiple jobs. Try them and see which one would be best for you.