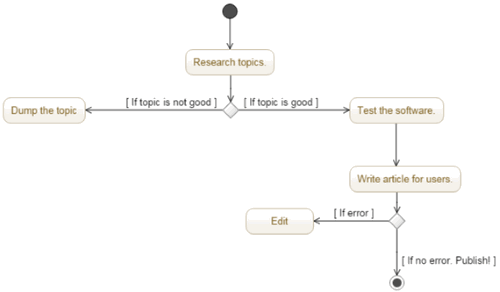
In this article, I will introduce you to 5 free websites to draw activity diagram online. These websites will let you draw activity diagrams and export it in numerous file formats like SVG, PNG, PDF, etc. Some of them even support real-time collaboration and chat with the collaborators at the same time. In addition to that, the process to draw activity diagrams is straightforward; just drag and drop diagram elements like Activity, Decision, etc on to their editing canvas. After that, you can draw the control flow between these elements and change their appearance like background color, font size, color, etc. The best part is that you can use these online activity diagram creators to draw various other types of modeling diagrams as well like network diagrams, circuit diagrams, flowcharts, other UML diagrams like Class, Object, Sequence, etc diagrams. The first service on my list is only completely free and others have some limitations in their free plan which I have clearly mentioned while discussing each website.
Draw.io:
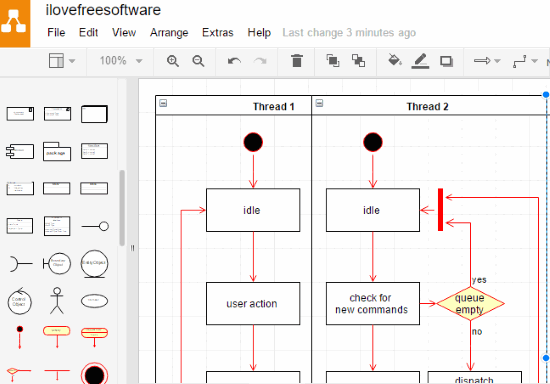
Draw.io is a free online diagram maker to draw activity diagrams. It is a completely free online service to draw software design diagrams like activity diagrams and other types of diagrams like network diagrams, flowcharts, etc. The best part is that it can be integrated with Google Drive, OneDrive, and Dropbox to store diagrams online. This allows you to use the service on the go and use any device to edit your diagrams. Do note that Google Apps domain accounts are not included in the free plan. The business accounts for other services on the list can use it for free but its pricing page clearly states that one day you might have to make a one-time payment in order to use it. For regular account users, it is completely free without any limitations.
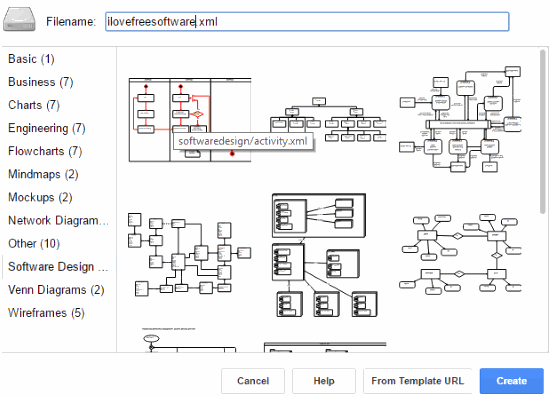
Visit the link provided above and then select where you want to save your diagram i.e. Google Drive, GitHub, Dropbox, OneDrive, or your PC. If you choose to save the diagrams in Cloud, then you will have to integrate Draw.io with these services. Once you have selected a destination i.e. where you want to save the diagram, then click on the Create New Diagram button. After that, select Software Design from the categories and then choose the first diagram on the list i.e. Activity Diagram, as shown in the screenshot below. In the end, click on the Create button to open the editing interface of Draw.io.
Editing interface of Draw.io consists of a toolbar on the left side and the editing canvas on the right. The editing toolbar includes most of the drawing elements required to draw the activity diagram. You can find these drawing elements in the UML category of the toolbar, as shown in the screenshot below.
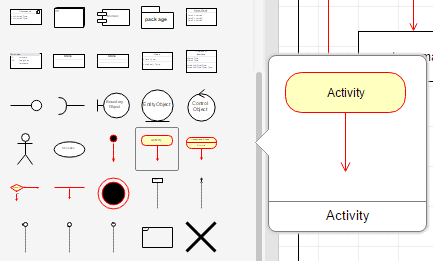
Click on any of these drawing elements and it will be then inserted to the editing canvas. You can then resize the added activity diagram element and move it to any part of the drawing canvas. The other options let you move a diagram element to stay on top or bottom of another diagram element. The most exciting feature is “Scratchpad” in which you can drag and drop diagrams and sub-diagram parts and use them in other Draw.io projects as well. So, if you have some common diagrams, then you can save them in Scratchpad and reuse them later. The steps to use Scratchpad are simple; just select a diagram element and then drop it to the Scratchpad section above the toolbar, as shown in the screenshot below.

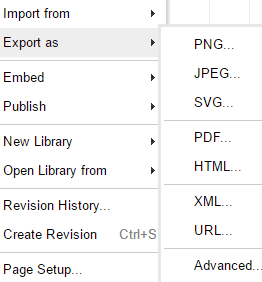
The best part is that you can export the drawn activity diagram in various file formats like PNG, JPEG, SVG, PDF, HTML, XML, etc. Most of the other websites on the list to draw activity diagrams provide this option in their premium plans as it is a very handy feature to export the created activity diagrams as images.
There is also an option to collaborate on creating diagrams and chat but this option didn’t work for me. I shared the editing link of the activity diagram with one of my friends but when he followed the link, he just saw the image of the activity diagram. I will recommend you to try this feature at your end to see if it works for you. To share the activity diagram document, go to “File>>Share..” and then copy the link that you have to share with your friends.
Integrate Draw.io with Google Sheets. Get Draw.io Chrome app.
Cacoo:
Cacoo is another free website to draw activity diagram online. The best part of using Cacoo is that you can collaboratively create activity diagrams and chat at the same time. In its free version, it allows you to share an Activity diagram or other modeling diagrams with up to 15 people. So, if you have a small sized team of up to 15 members then Cacoo can be the perfect platform to team up and draw software design and architecture diagrams. You can also draw Class, Object, Sequence, State Chart diagram, etc. In addition to that, you can create an unlimited number of projects and each project can contain up to 6 sheets. But, you can only export an activity diagram in PNG format.
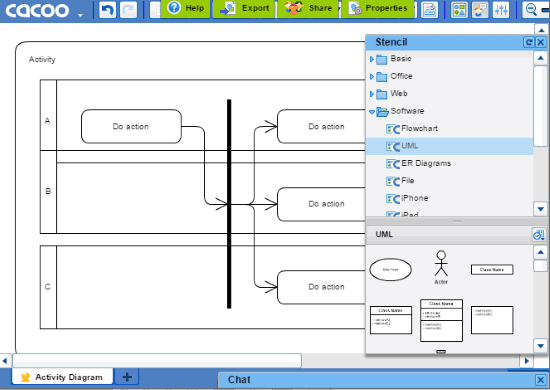
The editing interface of Cacoo consists of an editing canvas and some floating widgets that can be moved and resized across its interface. Do note that it requires Adobe Flash player to run. So, make sure you have the Adobe Flash player installed on your PC before getting into action. One of the floating widgets is called Stencil which includes all the diagram elements to create different types of diagrams. These diagram elements are organized in different categories like Office, Web, Software, etc. To create activity diagram, you can find the diagram elements in Software>>UML category. You can then drag and drop the activity diagram elements on to the editing interface. The inserted diagram units can be resized and moved to any part of the canvas. In order to change its appearance, you can use the Inspector widget which is shown in the screenshot below. If it’s hidden by default, then you can enable it from the View menu at the top; just select View>>Inspector.

The Inspector widget lets you change the font style, size, alignment etc of the text displayed on the diagram element. There are also options to change the background color, change line thickness, change size and position, etc.
If you want to work in multiple sheets then you can add up to 6 sheets in a project with the free plan. Click on the “+” button at the bottom of its interface to add sheets. You can the start working in the added sheets to draw another activity diagram or different modeling diagram.
If you want to collaborate on any activity diagram, then you can add up to 15 people via email. To share the project, Click on the Share button at the top and then enter the invitation message and email ID of the person. The email invitation is then automatically sent to the specified person. The invited person can then follow the link in order to start editing the activity diagram. However, if that person is not registered on Cacoo, then he/she will have to first create an account. Once that person is onboard, you will get a notification, as shown in the screenshot below.

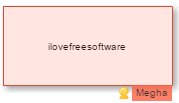
The collaboration process is quite up to the mark as you will be able to see the real-time changes by the person on the second side and the best part his/her name is also displayed, as you can see in the screenshot below.
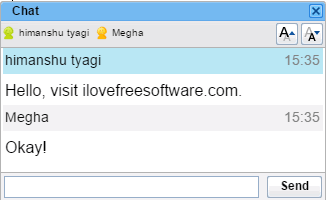
As I mentioned, you can also chat with the collaborator. You can do this via Chat floating widget. Again, if it’s not visible on the Cacoo interface, then you can toggle it from the View>>Chat option. This will enable the chat widget and you can then chat will all the online collaborators, as shown in the screenshot below.
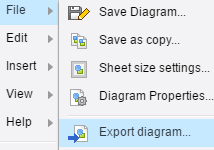
At last, you can save the created activity diagram as a PNG image or save in a Cacoo folder. Go to “File>>Export diagram…” option and then select PNG. After that, the activity diagram will be downloaded as a PNG image on your PC. The pro version allows you to save it in numerous file formats including SVG, PDF, PS, PPT, etc.
If there are multiple sheets in your project then there is no option in the free plan to export all of them at once. You have to manually download each sheet as PNG; the pro version lets you save all multiple sheets in a PDF format.
As compared to other websites to draw activity diagrams, I find Cacoo to be most useful because of its collaboration feature and the amazing free plan which is better than free plans of other websites on my list. However, I didn’t like the fact that an activity diagram can be just exported as a PNG format. It would have been a lot better if it supported exporting the projects in more file formats like SVG, XMI, etc.
GenMyModel:
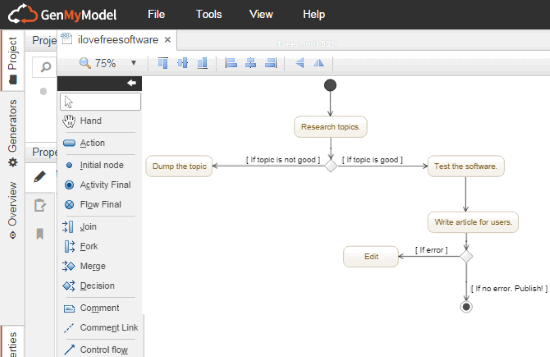
GenMyModel is a free website to draw activity diagrams online. In its free version, you can create unlimited public projects with limited complexity size and export activity diagrams as XMI files. The complexity size of a diagram depends on how many elements you have incorporated in the activity diagram. So, this limits you to create moderately complex activity diagrams. The public projects can be viewed by any person on the platform. The pro version is very rich in terms of the number of features available as you can export the activity diagram as an image file i.e. SVG, PNG, or JPG format, collaborate with team members to jointly create activity diagrams, and many others. Not just UML activity diagrams, you can also create other types of software architecture diagrams like Use Case diagrams, Class diagrams, etc. The other supported types of modeling by GenMyModel include Business Process (BPMN), Database, Flowcharts, JPA, Ecore, and DMN.
To create activity diagrams or any other types of modeling diagrams on GenMyMotion, you need to first create an account on it or you can also log in with your Google, GitHub, or LinkedIn account. After that, you will see its dashboard from which you can start a new project. Click on the New Project button and then select UML from the pop-up window. There are different options to get you started; you can start a blank project, choose a template from GenMyModel repository, generate UML from java source hosted on Git, and import an XMI file. Let’s now choose the “Blank Project” option to keep things simple. After that, you need to enter the project name and select Activity from the Default Diagram section. Once you have created a project, you can access it from the Projects section of the Dashboard. Now, in order to open the created project to create the activity diagram, click on the Open in Editor button. This will open up the project in GenMyModel editing interface in a new Chrome tab, as shown in the screenshot above.

The editing interface of GenMyModel makes the drawing of activity diagrams a very easy task. You just have to select an element from the toolbar and then click anywhere on the editing canvas to edit it. Various elements in the toolbar include Action, Initial Mode, Activity Final, Decision, Control flow, etc. You can also copy and paste diagram elements within the editing interface. In addition to that, there is also an option to undo changes by Control+Z hotkey. As I mentioned above, the free plan of GenMyModel allows you to create public projects with limited size. This limited size is indicated at the top-left part of its interface as a progress bar. I read on its official blog that once this bar is full, you won’t be able to add more elements and you can just modify the existing elements on the editing canvas but I was able to add more elements and save the project. I checked that by visiting the public page of my project where I saw the newly added elements. You can also download your project as JPG, SVG, and PNG image from the public page. The link to the public page of a project is provided in the Project Dashboard, as shown in the screenshot above. You can also add other types of UML diagrams in a project like Class, Object, Use case, Sequence, State, and Activity diagram.
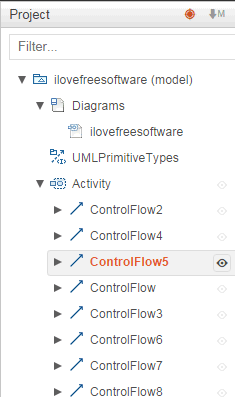
The other components of its online editor include the Project, Generators, and the Overview panel. The Project panel can be used to quickly locate an element on the drawing canvas and delete it. When you select a drawing element from the Project panel, it is automatically highlighted in the drawing canvas.
The Generators tab allows you to generate any kind of code i.e. C#, PHP, etc from your model. You can read their official blog post on this feature and how you can use it. And the Overview tab can help you view large activity diagrams in the editing canvas.
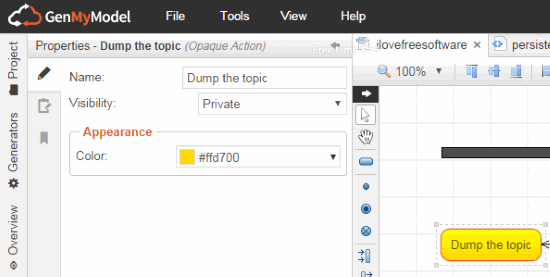
You can also specify properties of each drawing element of the activity diagram via Properties panel. Select any element from the editing canvas and then click on the Properties panel. It will then open the Properties panel in the left sidebar as you can see in the screenshot below. You can set the name, visibility, and the background color of an activity diagram element. Note that, some options change as per the diagram element type like the main activity element will give you the option to set activity templates.
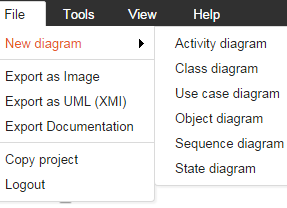
When your activity diagram is complete, you can export it from File>>Export as UML (XMI). This will let you download the XMI file which you can export to any of these free business process modeling software for further editing.
Creately:
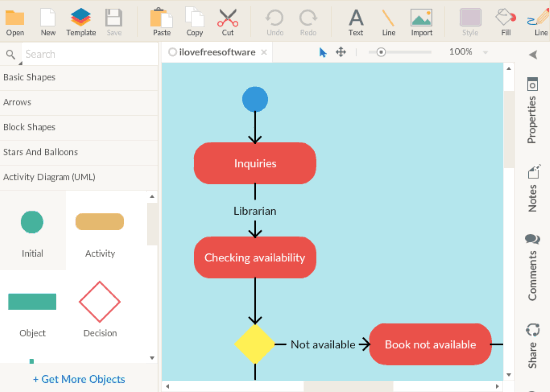
Creately is yet another free website to create acitivity diagrams. The free plan of this online activity diagram tool is limited as compared to others mentioned above. You can only create 5 public and 0 private diagrams, only one project, and add up to 3 collaborators, unlike Cacoo and GenMyModel which allow you to create an unlimited number of projects and diagrams. You can export the activity diagram as PDF, PNG, and JPEG file format.
Visit the link provided above and then create a free account on Creately. After that, you will see its Dashboard, you have to select the option to create a new diagram. It then prompts you to choose which diagram you want to draw. Type activity and then select “Activity Diagrams (UML)”. You can start with a blank template or choose from a number of different public templates from Creately like hospital management system, library management system, etc.
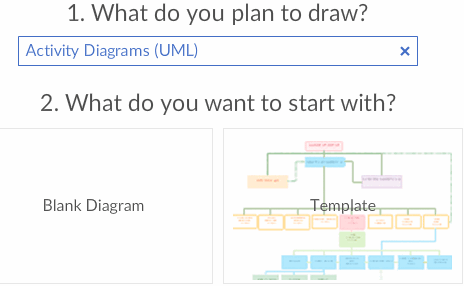
Once you have chosen an activity diagram template, click on the Open Document button. This will open the editing interface of Creately which is pretty straightforward and easy to use. On the left-hand side, you will see a toolbar from which you can drag and drop activity diagram elements like Decision, Object, Activity, etc onto the editing canvas.
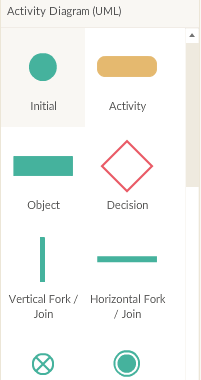
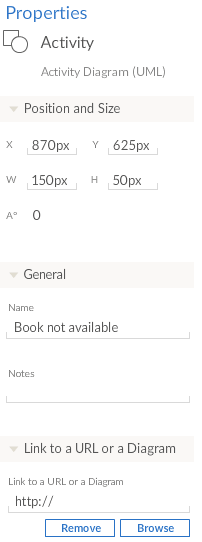
These inserted activity diagrams can be resized and moved freely on the canvas. There are also options to add an element to the back or bring it to the front. Select any element and then choose the option to move the diagram element to the back or forward. You can also change the names of these diagram elements and add notes to them from the Properties tab. Click on any element to select it and then click on the Properties button that appears at the right-hand side of the interface. This will open the Properties panel from which you can change its coordinates, name, add notes, and add a link to an URL or another diagram.
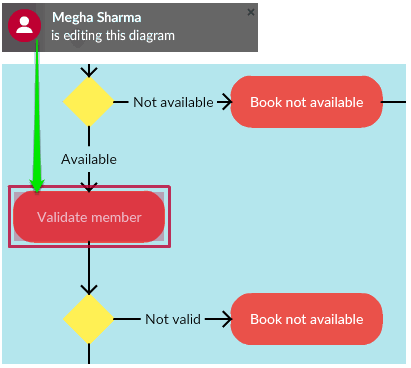
You can add collaborators to the diagram via email invitation. Click on the Share button and then invite collaborators. The best part is that collaboration is shown in the real-time, as shown in the screenshot below. But this is not as advanced as in Cacoo which also displays the name of the collaborator and also gives you the option to chat with real-time collaborators.
At last, you can export the activity diagram as PDF, PNG, and JPEG format. Click on the Export button and then select the file format to download.
Lucidchart:
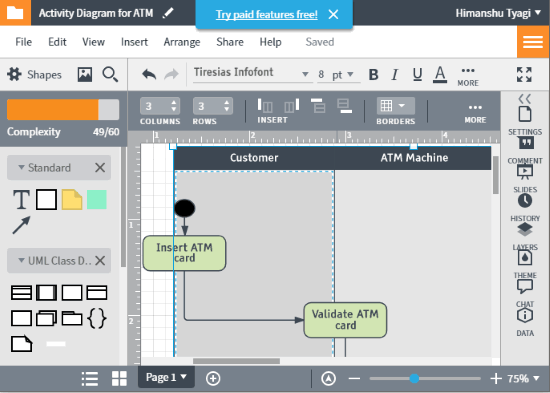
Lucidchart is the last free website in this list to draw activity diagrams. Like other websites to draw activity diagrams online on my list, it is also a full-fledged online diagram designer which can be used to draw flowcharts, ER Diagrams, etc. It also lets you add multiple sheets in a document. This lets you create multiple activity diagrams within the same document. However, the free version is quite limited as you can only keep 3 active documents and each diagram can only include up to 60 elements (even if you have multiple sheets in a document). In the free version, I was able to add 100+ sheets, I don’t know what is the exact number as it is not clearly mentioned on their pricing page. Well, there is also a real-time collaboration feature in the free account but you can only add 2 collaborators. In addition to that, you can export the activity diagram in following file formats: PNG, PNG with transparent background, JPEG, SVG, etc.
Visit the link provided above and create a free account. After that, you will see its Dashboard from where you can keep track of your active documents and create new ones. The editing interface of Lucidchart works in the same way as other online diagram makers on my list. There is a toolbar on the left which has various diagram elements to draw UML diagrams like Class, Activity, etc. You can drag and drop activity diagram elements from this toolbar on to its editing interface. The inserted activity diagram components can be moved and resized. The top bar allows you to alter its appearance style like make text bold, italic, change line styles, add shapes, etc. The best part is that you can comment and add notes to an activity diagram element; right-click on it and select Add Comment or Add Note option. This option helps you to smoothly communicate with other collaborators to convey important messages related to the diagrams. You can also add external actions to a diagram element like link it to a URL, email, etc. There is also an option to add image and SVG file to activity diagram.
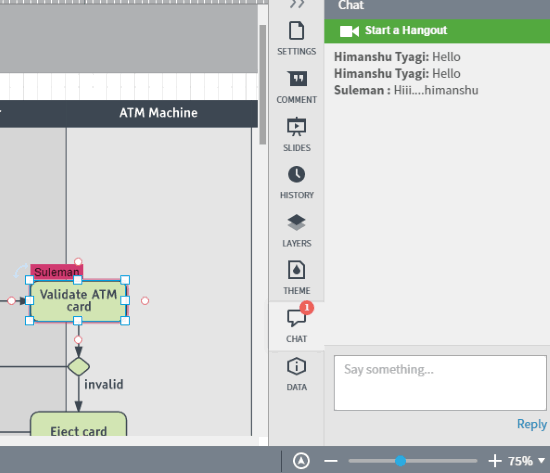
To add collaborators, click on the Share button and then specify the email of the person. The specified person will then receive an email from Lucidchart with the collaborative link to the document. In the real-time collaboration mode, you will be able to see the selected diagram element by the second person and also his/her name. You can also chat with the collaborators from the left panel. Click on the Chat option and then start the conversation with the real-time collaborators, as you can see in the screenshot below.
To export the activity diagram, go to File>>Download As and then select the file format. After that, the activity diagram will be downloaded to your PC in the selected file format. If you have multiple sheets in the document then PDF format will extract all sheets at once. You can also extract multiple sheets as separate JPEG and PNG files; just provide the page range parameter before downloading. This will download a ZIP file which you can extract to obtain all activity diagrams on multiple sheets as separate JPEG or PNG format.
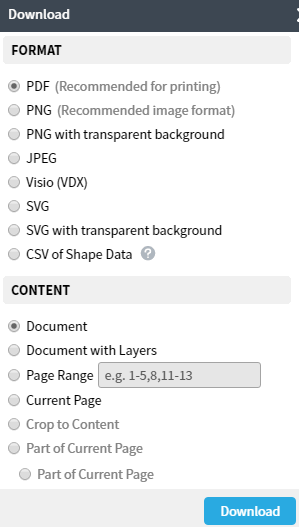
There are also other exporting options in the free version, feel free to explore yourself :)
You can also integrate LucidChart plugin with MS Word to draw and insert diagrams right in your documents.
Verdict:
Out of these websites to draw activity diagrams online, I will recommend you to check out Draw.io as it is completely free to use and without limitations. Other than that Cacoo also caught my attentions as its free plan is really cool and more flexible than other websites that I mentioned. Also in Cacoo, you can add up to 15 real-time collaborators which is much greater than other similar websites on my list. In terms of editing interface, I liked GenMyModel and also it gives you the option to generate a C#, PHP, etc code file from the model.