In this tutorial, I will explain how to capture photos while recording video on iPad. This is an exclusive feature which iPhone 5 users are enjoying it since its launch and there isn’t an easy way to do it in iPad. But now, after following this tutorial, you will be able to capture photos while recording video on iPad.
This feature can prove to be really helpful as sometimes while recording, it might happen that you see a fantastic scene which you would like to capture. So with the help of this tutorial, you will be able to capture photos along with recording video on iPad. Isn’t it like killing two birds with a stone?
Note: You can follow this tutorial on any iOS device running on iOS 6.0 or later.
How to Capture Photos While Recording Video on iPad:
To follow this tutorial, you first need to install an iPad camera app called [Blink]. You can get this app either by clicking on the link given at end of this review or by searching it on iTunes App Store. After installing this app, follow the steps mentioned below.

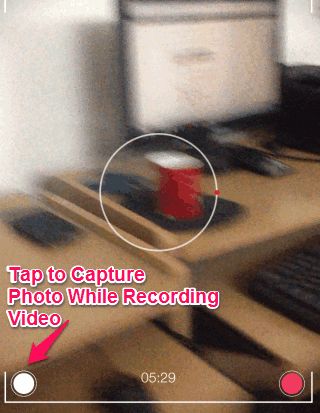
- Launch the app and it will start your iPad’s camera, as shown in the screenshot above.
- As soon as you launch the app, you will see that app has also started recording video automatically.
- Continue to record video like you do normally, but for capturing photos while recording video on iPad, you need to tap on the icon at bottom left corner.
- You can tap on it any number of times to capture as many photos as you want. On tapping the icon, you will see a blinking effect with click sound, which confirms that photo has been captured.
All photos captured by you will be saved to your iPad’s camera roll. The button on bottom right corner is for pausing the video recording.
The other good feature of the app is that just as soon as you exit the app, it automatically saves the recorded video to your camera roll.
Get [Blink] iPad camera app here.
You may also like: iPad Camera App to Make Animated GIFs Using Camera.