This tutorial explains how to take screenshot of Windows 10 Logon screen.
No matter how many times we press PrintScreen key or use third-party screen capture software for Windows 10, it is not easy to take screenshot of Windows 10 Logon screen.
However, a tiny tool, named Ease of Access Replacer, does this task in just two mouse clicks. Yes, you heard it right!
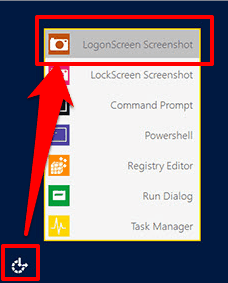
As the name of this tool indicates, it replaces Ease of Access options with its own options. So, clicking on Ease of Access button will open the options of this tool. Among those options, you can click on LogonScreen Screenshot option and it will take screenshot of Windows 10 Logon screen.
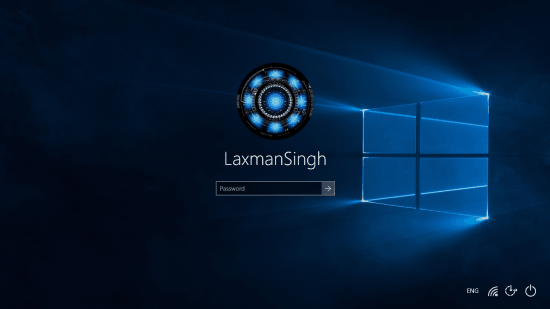
Above screenshot shows logon screen of my Windows 10 PC captured by this handy tool.
How To Take Screenshot of Windows 10 Logon Screen?
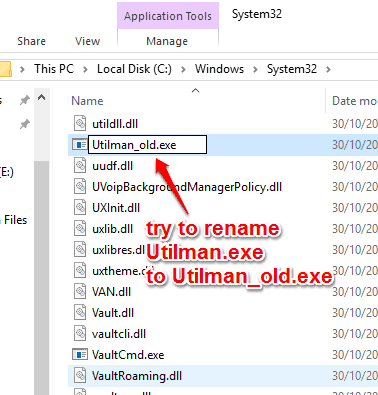
Step 1: You first have to access: C:\Windows\System32. This location contains ‘Utilman.exe‘ file. You need to rename it to Utilman_old.exe or Utilman_backup.exe. If you fail to rename it because of insufficient permissions, then in that case, you have to change the ownership of this file.
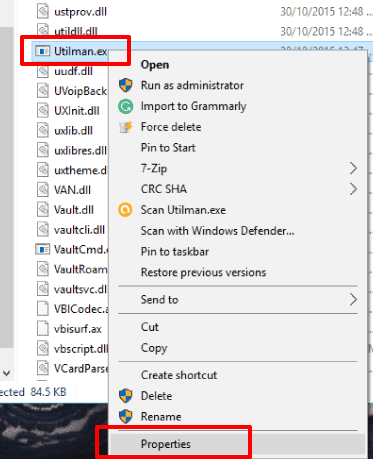
Step 2: To change the ownership of Utilman.exe file, right-click on that file, and access Properties option.
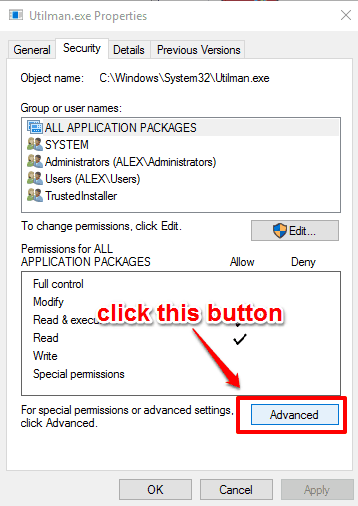
Step 3: After opening the Properties window, click on Advanced button for special permissions.
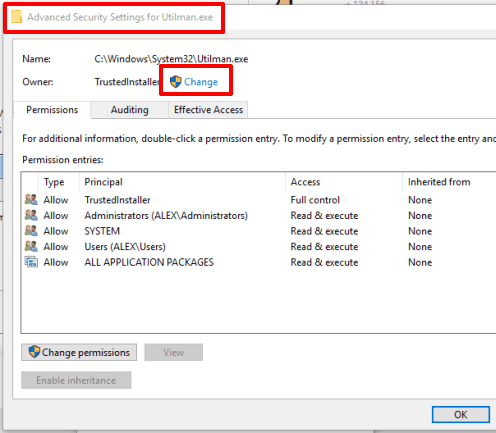
Step 4: Advanced Security Settings for Utilman.exe shows the Owner, which is set as TrustedInstaller by default. Use Change option to move further to change the permissions.
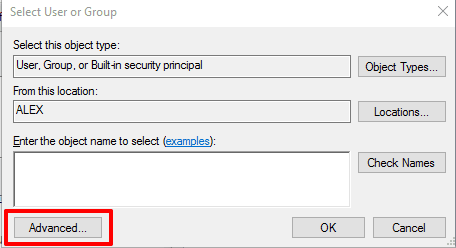
Step 5: Clicking on Change option will open Select User or Group window. In that window, you have to tap on ‘Advanced‘ button. It will further open a new window.
Step 6: The newly opened window includes a Find Now button. Use that button and it will show the list in the search results of users that can be set as owners. Select Administrators from the Search results and press OK button.
Press the OK buttons for all the other windows and get back to Properties window of Utilman.exe.
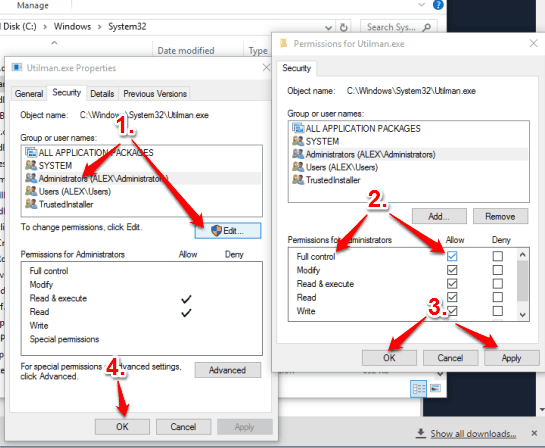
Step 7: Properties window contains Group or user names section, where you will see Administrators. Select it and click Edit button. After this, you need to enable Full control in Permissions for Administrators.
Save the changes and get back to System32 folder containing Utilman.exe file. Now you will be able to rename that file.
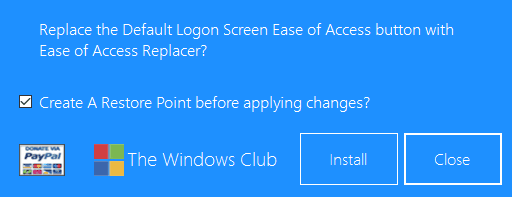
Step 8: Use this link to download Ease of Access Replacer tool. It is a portable tool. Open its interface and it will show Install button. It also enables the option to create a restore point before applying changes. I will suggest you to keep enabled that option. After this, press Install button.
The magic will start and this tool will replace Ease of Access options with its own options.
Step 9: Lock your Windows 10 PC (use Winkey+L) to access the Logon screen. Now press Ease of Access button and you will notice that a pop-up is opened with multiple options. Use LogonScreen Screenshot option. It will automatically capture the entire logon screen and save the screenshot to “C:\Screenshots”.
Apart from capturing the Windows 10 logon screen, you can also try this tool to capture Lock Screen, open Command Prompt window, Registry Editor, PowerShell, etc., on the Logon screen.
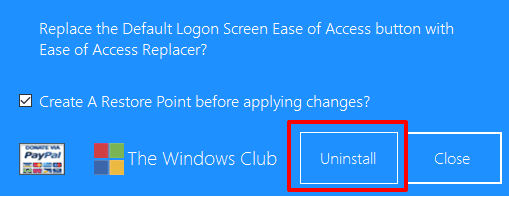
Step 10: When you want to get back Ease of Access, execute Ease of Access Replacer. This time, it will show Uninstall button.
Use that button and Ease of Access options will be back again.
Conclusion:
When you want to show a new background set by you on Windows 10 Logon screen to others, this Ease of Access Replacer will surely be handy. Just two mouse clicks will take capture screenshot of Windows 1o Logon screen and save it. Try it yourself.
Get Ease of Access Replacer tool here.
