This tutorial explains how to disable write caching for disk drives in Windows 10. Being the intricate pieces of software that they are, modern Operating Systems have to handle a lot of stuff, whether it’s device management, resource allocation or anything else. And all of this happens under the hood when you’re using your computer to watch a movie, or finish your project. The same is true for Windows 10, which includes an almost infinite number of features, that work together and make it the awesomeness that it is.
One such feature is the built in Write Caching for connected disk drives (or partitions). It helps improve the overall system performance and speed by writing the changes to the disk initially to a faster cache, so that the system doesn’t have to wait (even though the wait time is in milliseconds, that’s a hell of a lot of time in computer terms) for the write head to position itself at the correct position to do its thing. While it does enhance performance, it can also lead to data corruption and/or loss, in case of a power failure (as cache is volatile memory). And that’s not a good thing, right?
Thankfully, Windows 10 provides a solution for this, that lets you turn off write caching for the disk drives. Sounds interesting, doesn’t it? Let’s find out how you can disable write caching for disk drives in Windows 10.

How To Disable Write Caching For Disk Drives In Windows 10?
The following stepwise tutorial illustrates how you can turn off write caching for disk partitions (and consequently, the entire drive) in Windows 10. Read on folks:
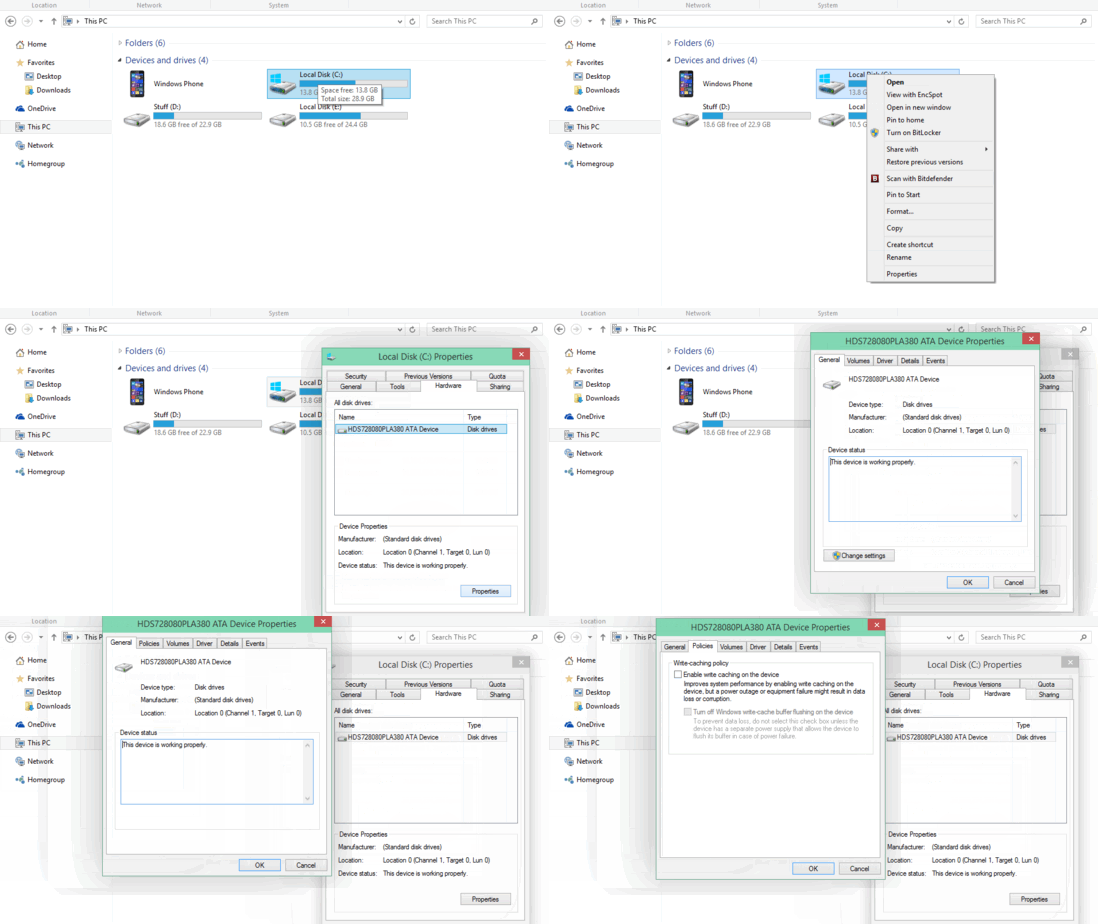
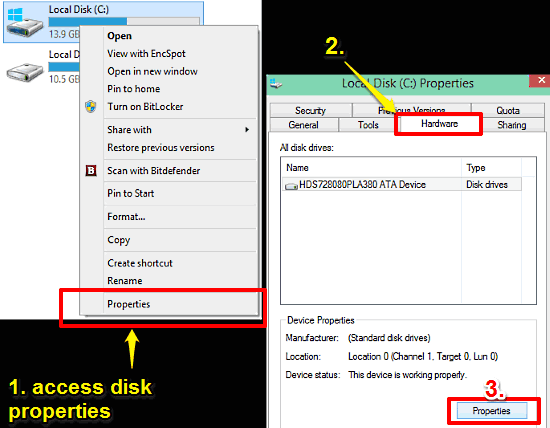
Step 1: Open up This PC and right click on any of the listed disk drives. Click on Properties to access the disk properties dialog box, and click on the Hardware tab, and then the Properties button.

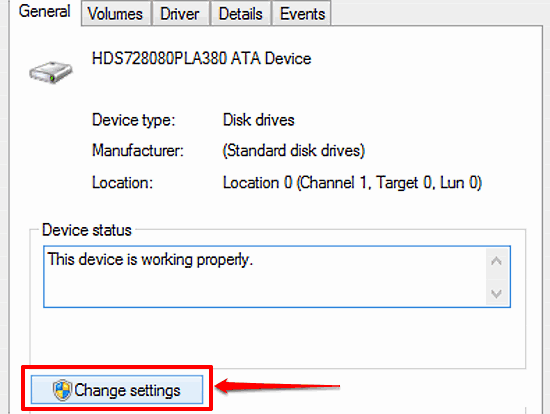
Step 2: This should lead to another tabbed dialog box popping up. On the General tab, click the Change settings button (this requires administrator privileges).

Step 3: On the dialog box that opens up next, click on the Policies tab, and under the Write-caching policy section, uncheck the Enable write caching on the device option. Check out the screenshot below:

And we’re all set. This will disable write caching on all the disk drives, and hence, the entire drive. Pretty awesome, right?
See Also: Choose The Disk Drives For Automatic Optimization In Windows 10
Concluding Thoughts
Write caching is an important OS functionality that significantly ups overall system performance. However, since it depends on the volatile cache, it can also lead to data loss in the event of a power or disk failure. Good thing is that you can easily turn it off as explained above. Try it out and let me know what you think of it.