AutoActions is a Free Windows based Application that automatically runs any Program or changes Windows Settings like Display and Audio. These Changes are triggered by Events related to specific Programs.
For example, an application may require a particular display resolution when it runs, which is different from your default resolution. You can manually change your resolution before the application starts and return to your default resolution after it exits. This will be tedious and cumbersome. Similarly, another application may require some different settings related to playback and recording devices while it runs.
All this can be automated by AutoActions as follows:
- Create Profiles which include the list of Actions to be performed, like Display Settings, Default Audio Settings, launching a Script or Program etc.
- Define the Application Events that will trigger the above Actions. Examples can be Application Started / Closed / Got focus / Lost focus
- Add an Application and assign a profile to it.
Once you complete the above steps, AutoActions will constantly monitor the Application and trigger Actions on occurrence of any of the Events defined in the Profile.
The following are the available choices of Actions that can be defined in an AutoAction Profile:
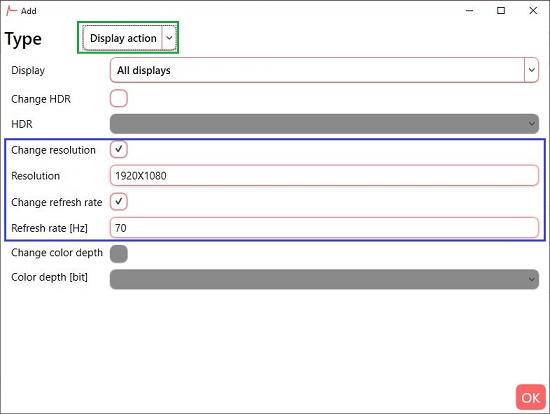
- Display (per Monitor): Change resolution, Toggle HDR, Change refresh rate / color depth. You can define these actions individually for each monitor in case you have multiple displays.
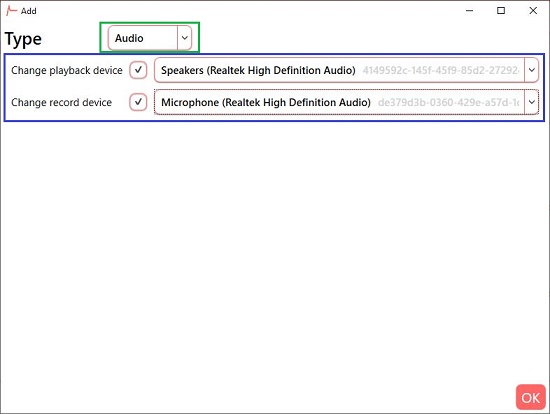
- Audio: Change default playback or recording devices.
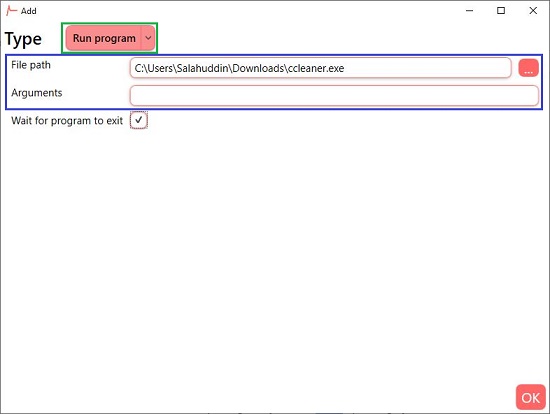
- Run program: Execute any program or script or kill any running processes.
Instead of creating one for each Application, you can assign a Profile to multiple applications, saving you a lot of time and effort.
I was able to test AutoActions with selected Applications. The Actions defined in the Profile triggered successfully although there were a couple of initial hiccups.
Here are the steps that you could follow:
1. Download AutoActions from the link provided at the end of this article. Remember to choose the correct package for your 32 / 64 bit operating system.
2. Once you run the Program, click on ‘Profiles’ and then click on the ‘+’ sign at the bottom to create a new Profile and assign a name to it.
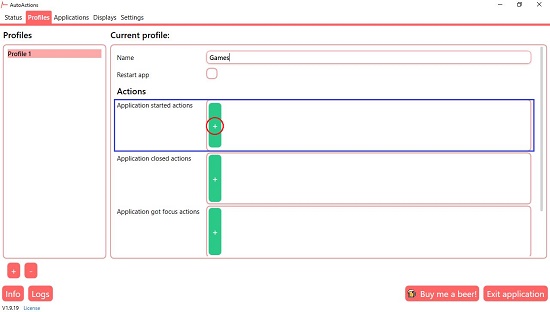
3. Under ‘Actions’, Click on the ‘+’ sign next to any Event.
4. Click on the ‘Down Arrow’ and select the Action to be triggered on the above selected Event.
5. For Each action define the related Settings. For example, if Display Action is selected, specify the resolution, refresh rate etc. for each monitor. If you select Audio Action, define the playback / recording device. Likewise, if you define Run Program, specify the file path and arguments for the program to execute. Repeat these steps for every Event with which you want to associate an Action.
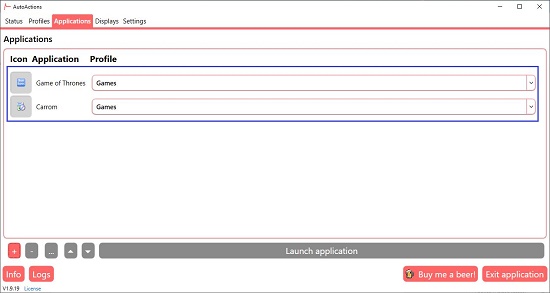
6. After all your Profiles are built, click on ‘Applications’. Add any Application by clicking on the ‘+’ sign at the bottom and selecting its executable.
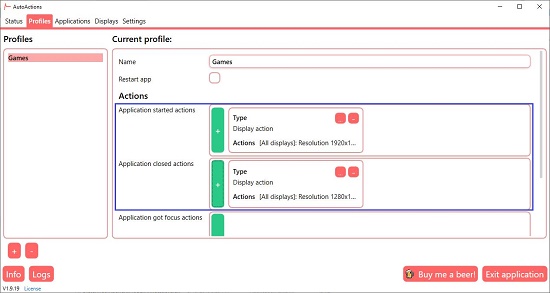
7. Assign a display name for the Application and select any Profile to be assigned to it from the adjacent drop-down menu. Repeat this process for every Application for which you require to trigger any action.
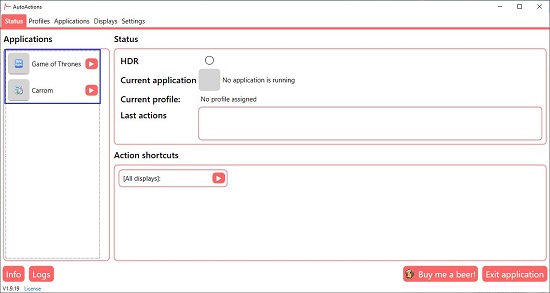
8. Click on the Status Tab for a real-time update on any Actions that are being triggered when you start running the Applications.
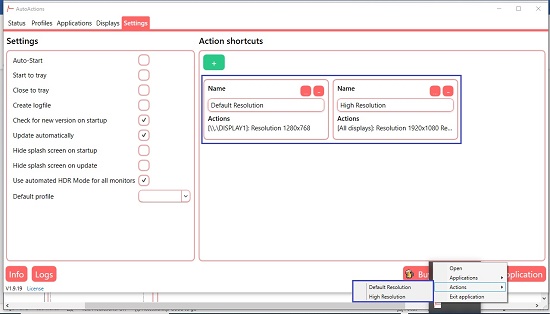
AutoActions also allows you to define Shortcuts for specific Actions. These Shortcuts can be added from the ‘Settings’ tab and can be accessed from the Status Tab or the Tray Menu.
Verdict:
Gamers can make good use of it as they constantly need to modify their Display / Audio settings before and after each gaming session. The dialog boxes and other windows are unnecessarily oversized and the developers could do better in improving these aesthetics. Overall, AutoActions is a pretty good application in what it claims to do.
Go ahead and download it from this link.