Extreme Clipper is a screen capture tool for Windows that lets you take screenshots (whole screen or a specific area) and you can resize and save them with ease. Extreme Clipper is much better than default PrintScreen option. It is so because using PrintScreen option, you cannot resize screenshots neither you can capture a particular region. That’s why Extreme Clipper is useful and easy to use. However, it lacks the facility of editing and enhancing captured screenshots, but it is good to use tool if you need a basic and simple screen capture software free.
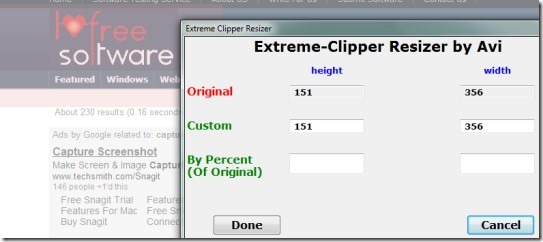
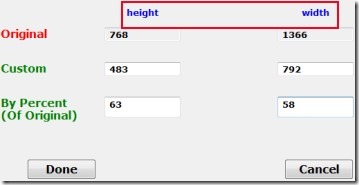
You can use this screen capture tool using Hotkeys. And these Hotkeys are customizable which you can change according to your need. As you can see in the below screenshot, a resizer window will open up immediately after capturing the screenshot. This window will let you change the size (height and width) of your screenshot.
Even more, the directory (containing your screenshots) will also open up automatically after resizing the screenshot. It’s a new way to capture screenshots. Lets have a look about the working process of Extreme Clipper.
How To Work With Extreme Clipper?
You can use Extreme Clipper directly as installation is not needed for this software. Download link is available at the end. You will find ‘Download.exe‘ option on its download page which will be available at the bottom left side. After downloading it, you can run its application file and it will stay in system tray. Now whenever you want to take a screenshot, you can press default hotkeys. There are three ways to take screenshots using Extreme Clipper. These are:
- Tap on ‘PrintScreen key’ (primary key) and immediately hold and drag your mouse (left click (secondary key)) to capture a specific area of your computer screen.
- Hold ‘PrintScreen key’, then hold and drag left mouse.
- Tap on ‘PrintScreen key’ to capture the whole screen of your computer.
These are the three ways using which you can take screenshots. Once after performing an action, Resize window will open automatically using which you can change size of screenshot(s).
Adjust the size of screenshot, and hit the Done button. Then your screenshot will be saved automatically and screenshot directory will open up showing you all screenshots.
Change Settings of Extreme Clipper:
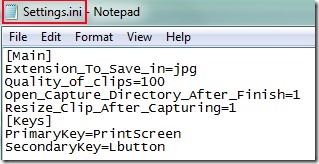
When you will run Extreme Clipper for the first time, then its settings file (text file) will be created automatically in same download location of Extreme Clipper. It is named as ‘Settings.ini’. Open it and you will be able to change settings: screenshot extension (jpg, bmp etc.), screenshot quality, Hotkeys etc.
Note: Close Extreme Clipper before changing settings.
Features of This Free Screen Capture Tool:
- Easy to use & very simple tool with customizable hotkeys.
- Capture the whole screen or a specific part.
- Change width and height of captured screenshot.
- Automatically stores screenshots.
- Change settings according to your requirement.
- Very lightweight, portable, and free of cost available for Windows.
Similar tools: Screen Capture+Print and Lightscreen.
Conclusion:
Extreme Clipper is one of the simplest tool for capturing the whole screen or an area. You can resize screenshots but cannot edit them. So if want more featured rich tool, then you can try Monosnap. But, if you are looking for a simple and basic screen capturing tool for Windows, then you can try Extreme Clipper free of cost using below link:


