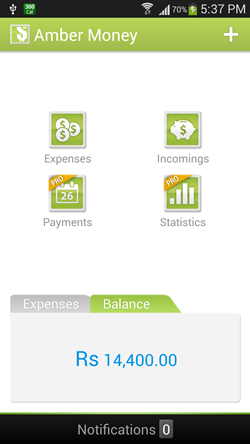
Amber Money is a free Android app that helps to keep your budget in check. This app features a neat and uncluttered interface that allows you to update your incoming balance and expenditure with a lot of ease and comfort. The app makes sure that updating your incoming balance and expenditure is made as simple as possible, and it achieves it by providing neat buttons on the home screen that allow you to update your balance and expenditure with just a few taps. You can see your remaining balance and the summary of expenses on the home screen of the app itself.
Amber Money runs smoothly and without any lags of any sort on a wide array of Android devices. With an interface that is exceptionally easy to be understood, you will never have any kind of troubles updating the app about your balance/ expenditure.
Amber Money is available as a free download from the Google Play Store.
Features of this app, Amber Money for Android…
The app is optimized for tablets as well as cell phones, and this makes it a really good download for budget watchers.
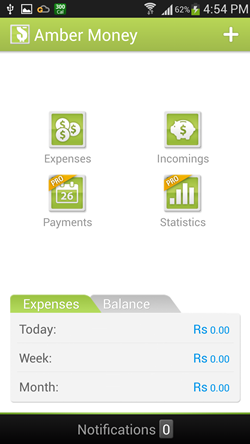
When you download the app and launch it, you will be presented with a window wherein you will be asked to choose the currency for your transactions. Once you are done with selecting the currency, you will be presented with a screen that looks like the following screenshot.
In the above window, to add your incoming balance, click on the Incomings icon. To add expenses, click on the Expenses icon. Payments and Statistics icons are also present, but these features are only present in the pro (paid) version of Amber Money. To quickly add an expense, you can also click on the + button at the top-right corner of the screen.
To get started with using Amber Money, let us first add some balance. To do so, click on the incomings icon. Once you have done so, you will be presented with a window that looks like the following screenshot.
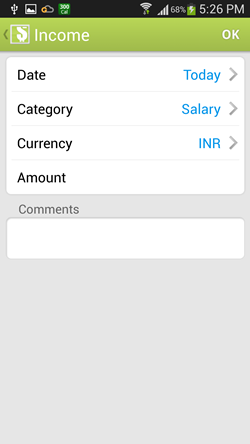
To add an incoming, click on the + button on the top right corner. Now you will be presented with a window that looks like the below screenshot.
In the above window, when you are done adding the amount, changing categories etc., click on the OK button on the top-right corner of the screen. Once you do so, you will be taken back to the main screen of the app, and now, you can continue adding the expenses etc.
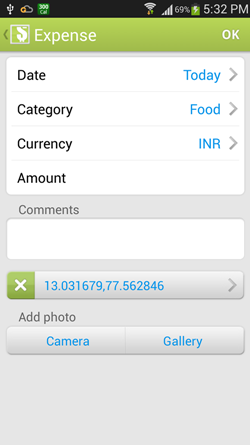
To add an expense, click on the Expenses icon on the main screen of the app. Now you will be presented with a window wherein you can create and add expenses. On clicking the Expenses icon, you will be presented with a window that looks like the following screenshot.
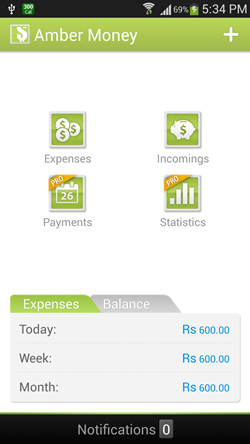
In the above Window, you can easily add expense amount, leave comment, add photo of the bill/thing you purchased etc. What’s more, if your GPS is enabled, the app will also save the coordinate of the location where the expense was made. Once you are done entering the information, click on the OK button at the top right corner, and you will be taken back to the home screen of the app. (see below screenshot)
In the above screenshot, now you will be able to see that the expenses have been updated with whatever value you entered. The more expenses you enter, the higher the expense counter value will get. You can also check the remaining balance that you have by clicking on the Balance tab. (see below screenshot)
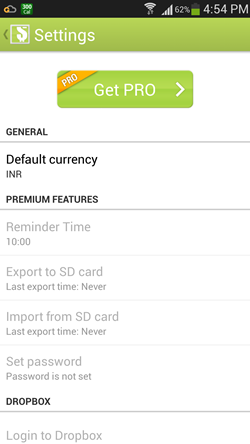
To access the settings of the app, click on the options softkey on your Android device, and select settings from the menu that pops up. When you do so, you will be presented with a window that looks like the following screenshot.
In the above window, although there are many configurable options, you can only change the default currency. The other options are available to the users of the Pro (paid) version of the app.
That’s it. This is all that is needed to be known to get started with using the Amber Money app for Android. We hope that you will have fun using this app. Also, do check out the list of 5 other expense management apps for Android.
The Verdict?
Amber Money is a good expense management app for Android devices. All the budget watchers out there, do give it a shot.

