This tutorial explains how to change default icon associated with a file type in Windows. There is a native feature in Windows to change the default icon for a folder. You need to access Customize tab under Properties box and select Change Icon option. However, no such option is available to change the default icon of file types (say Audio file, image file, etc.). So, if you looking for some option to change the default icon associated with a file type in Windows, then this tutorial is very useful for you.
I have covered different methods using which you can replace the default icon of different files types with a custom icon. You can use EXE, ICO, PNG, etc., to use as the custom icon for a particular file type.
Let’s move forward with the first method.
Method 1: Change Default Icon Associated With A File Type In Windows Using Free Types Software
Types is a very simple and interesting software which helps to change default application association (which program will be used as the default program to open a particular file type, icon, and classes of a file type). To change the icon associated with a file type, you need to follow these steps:
Step 1: Launch its interface and it will load all the available file types along with their icons. It will take 2 to 3 seconds to load all the file types. You can scroll down or use Search option to find the file type for which you want to change the icon.
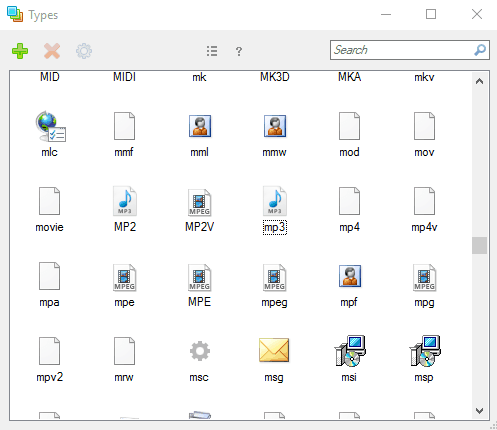
Step 2: To change the icon of a particular file type, double-click on that file type. A new small window will open. In that window, click on Icon tab.
![]()
Step 3: Click on the folder icon and a window will open using which you can select a file (PNG, EXE, ICO, etc.) available on your PC.
Step 4: When the icon is selected, close that small window, and come back to the main interface. You will see that default icon is changed to the newly selected icon on its interface for that particular file type. However, your changes are not applied yet. You need to restart File Explorer.
![]()
That’s it! Now when you will access a folder containing files of that file type, you will see that new custom icon is visible for those files.![]()
In a similar way, you can set the default icon back or use some other icon.
Method 2: Change Icon Associated With A File Type In Windows Using Free Default Programs Editor Software
Default Programs Editor is a portable software that lets you change File Type settings, Autoplay settings, and Default Programs Settings. Let’s see the steps to change the icon associated with a file type:
Step 1: Execute its portable file and a wizard like interface will be in front of you. There will be three options (as mentioned above). You have to click on File Type Settings option.
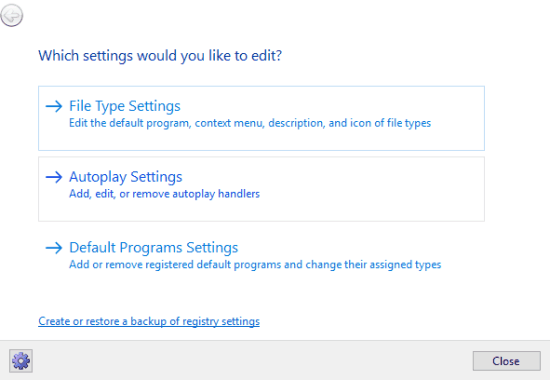
Step 2: Now you have to select which type of settings you want to edit: Context Menu, Icon, or Description. Select Icon to change the default icon of a file type.
![]()
Step 3: Now the list of file types will be in front of you. You need to select a particular file type whose icon you want to change. You can take the help of Search box to quickly find a file type.
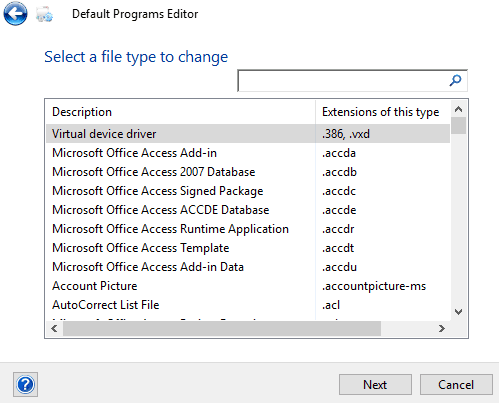
Step 4: Now select the new icon for the selected file type. Use Browse button and a small window will open. That window shows all the Windows icons and also provides the option to use a custom icon. You can use a DLL, EXE, or ICO file as your custom icon.
![]()
When the icon is selected, you can preview it within its interface and then click on Save Icon button to apply the changes.
![]()
This way, you can change icons of other file types using this software.
Method 3: Change The Icon Associated With A File Type In Windows Using Free FileTypesMan
FileTypesMan is also a portable software which lets you manage file type associations. You can read its detailed review here. To change the icon for a file type using this software, you need to follow these steps:
Step 1: Execute its portable file and its interface will open. After that, you can see the different file extensions, file type name, description, and other details for different file types.
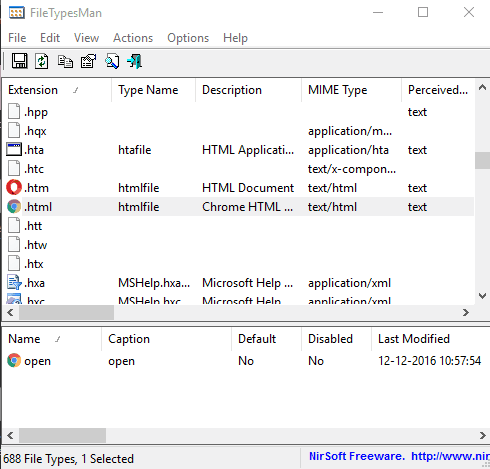
Step 2: To change the icon for a particular file type, right-click on the file extension, and click on Edit Selected File Type option.
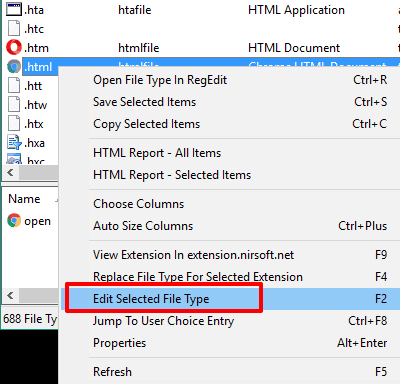
Step 3: A new window will open. In that window, you will see Default Icon option. Here, you will see the path of default icon currently set for that file type. Use the browse button to change the icon.
![]()
Step 4: A small window will open. Using that window, you can choose a custom EXE, ICO, or DLL file to use as the new icon for the selected file type. Select the icon, press OK, and save the changes. This software doesn’t provide the list of Windows icons.
![]()
Now the new icon is set for that particular file type.
![]()
Follow the same steps to change the icon of some other file type.
In case you don’t want to use any software, then you can change registry settings to change default file type icon. You can see the steps for that here. However, I haven’t tried this out, so can’t confirm if it works as intended.
The Verdict:
The method that I prefer the most is method 2. I really like the feature that it lets you use Windows icons as well as custom icons. Other options are also good, but when you have to use Windows icons in those 2 methods, then you first have to download the icon of your choice. Therefore, method 2 is perfect for me.