This tutorial here explains how to enable spot light theme in Windows 11. Quite some time ago I wrote about the Spotlight wallpaper which is one of the built-in options to set dynamic wallpaper. Microsoft has now extended this feature and converted it into theme. You cannot try the spotlight theme in the latest developer insider build. But for some people, it is not enabled and that’s why in this post I will show you how to manually turn it on.
Spotlight is a very nice feature of Windows where it downloads beautiful imagery from Bing and sets it as your wallpaper and lock screen. But now with the theme, it creates perfect blends and gives a very pleasing look. Since this is a controlled roll out feature, so not everyone will get it instantly. But there is any trick that you can apply on your computer to manually enable it and the steps are mentioned below.
How to Enable Spotlight Theme in Windows 11?
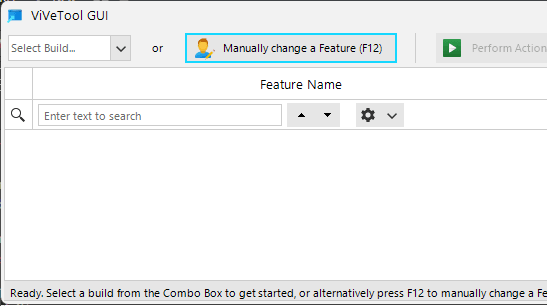
To enable the new spotlight theme, we will use a tool called ViVeTool GUI. This tool is used to enable hidden features in Windows insider builds. You can download it from here and then run it directly. It’s window looks like as shown below.

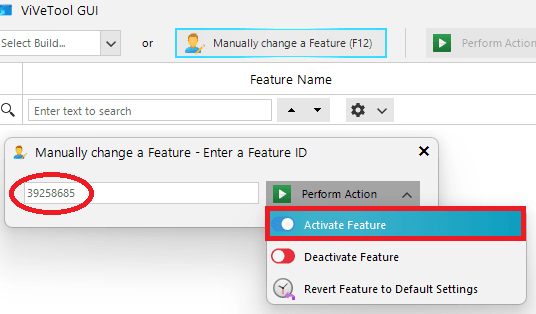
Now, you just press F12 and then enter “39258685“. From the drop down, select “Activate Feature” option and then apply the changes. And you are now done.

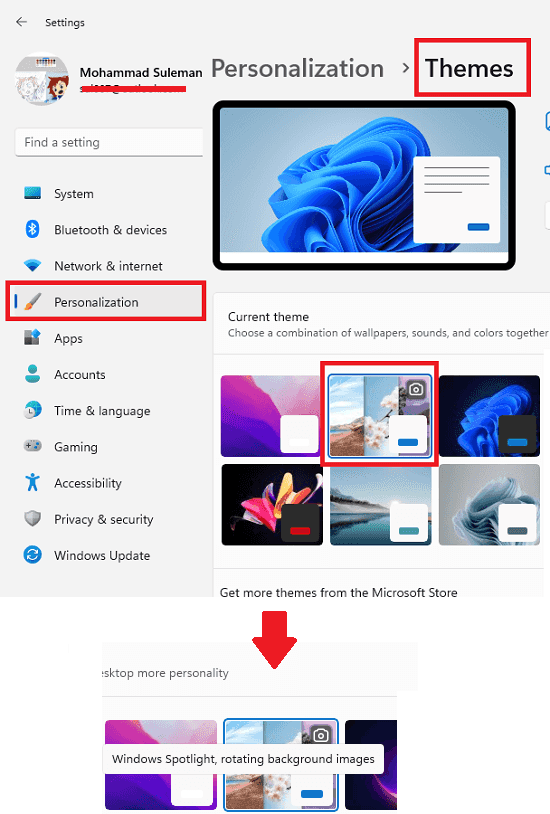
Go to the Personalization section in Windows Settings and in Themes, you will find new spotlight theme. It has a different icon which looks pretty much like as shown in the screenshot below. You can hover over it to learn more about it.

This is it. This is how you can enable the new spotlight theme feature in Windows 11. Just use the ViVeTooI as I have mentioned above with the specified feature ID. And if you want to disable it then the process is very similar. Instead of activating the future, you have to select the deactivate button in the ViVeTool.
Final thoughts:
I am a great fan of windows spotlight. And I am glad that they have extended it to turn it into a theme. So, in case you are looking for ways to manually enable it then you are at the right place. Use the steps I have mentioned here to quickly enable this feature on your Windows PC.