This tutorial explains how to temporarily pause Gmail inbox. For this, I have covered two different Chrome extensions. Pausing the Gmail inbox is handy when you want to focus on some other task rather than spending time on responding to new emails. One of these Chrome extensions hides the new emails in some other label (created by extension automatically) and the other extension simply hides all new and old emails from the inbox. Thus, you won’t see any new email and can work on the other task.
These Chrome extensions have other features also. For example, you can send auto-reminder to the sender that your Inbox is paused temporarily, schedule time to receive the new email in the inbox, lock inbox, etc.
Let’s start with the first Chrome extension.
1. Temporarily Pause Gmail Inbox Using Inbox Pause Chrome Extension:
Inbox Pause Chrome extension does exactly what its name indicates. It hides new emails in a label (created by the extension itself) and put them back in the inbox in a click. It also comes with the option to send the auto reminder to the sender. Steps to use this extension are as follows:
Step 1: Install the extension and open Gmail in a tab. If Gmail is already opened, then you need to refresh it. After that, you will see a PAUSE button. Click that button and give this extension permission to access your Gmail account.
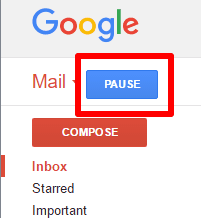
Step 2: After granting the permission. A new pop-up will be in front of you. It is a very important pop-up. It provides different options that you need to configure:
- You can enable/disable Auto-Responder. If you have turned it on, then you can set the subject and body content of your choice that will be sent to the receiver. You can also use the default subject and body content.
- You can hide the label when pause process is in progress. Thus, you won’t be able to see new emails in any label at all.
- You can schedule the time to automatically move emails to the inbox.
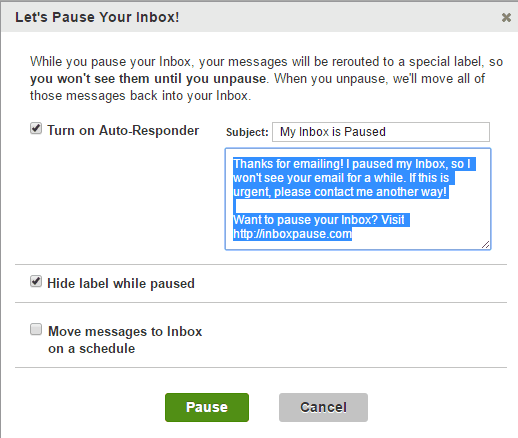
Configure these options and press the Pause button. After that, Gmail tab will be refreshed automatically. Now your Gmail inbox is paused. You will also see a yellow banner indicating that currently your inbox is paused and new emails won’t come in the inbox.

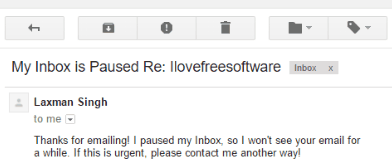
Anyone who will send you emails, this extension will automatically take action and prevent those emails from coming to the inbox. If you have configured Auto-Responder, then the sender will receive an email that currently you can’t receive emails.
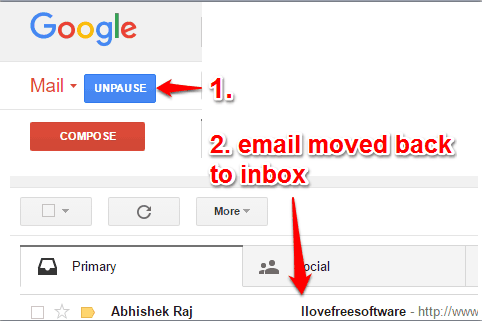
Step 3: To get emails back to the inbox, you need to press that UNPAUSE button. After that, Gmail will be refreshed and all the new emails will be added to the inbox.
This is indeed a very useful and powerful extension that you can try.
2. Temporarily Pause Gmail Inbox Using Inbox When Ready for Gmail Chrome Extension:
Inbox When Ready for Gmail is another great Chrome extension to temporarily pause Gmail inbox. This extension provides a button to hide/show Gmail inbox and works in a different manner. When the extension is activated, it hides all the emails (old as well as new emails) available in the inbox. Thus, there will be nothing for you to see.
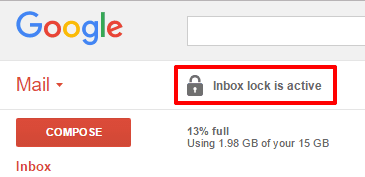
Another great feature is that you can lock inbox for the selected days and time. This will prevent you view inbox. The inbox remains locked until the lock timer is over.
Steps to use this extension are as follows:
Step 1: Install the extension and open Gmail.
Step 2: It will automatically hide all the emails available in the inbox. You can access inbox to check.
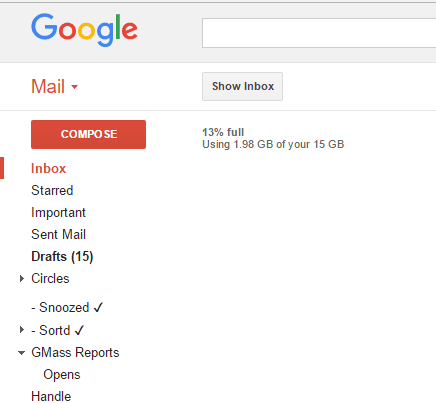
Step 3: To view the new and old emails, click Show Inbox button. After that, all the emails will be in front of you.
Step 4: To make settings more strict, you can access Options of this software and enable its Inbox Lockout feature. After that, you can select days and times to lock the inbox. When this feature is activated, then Show Inbox button won’t visible and your inbox will remain locked.

This Inbox Lockout feature is in beta but worked very well during my testing.
You may also check free Gmail scheduler Chrome extensions covered by us.
The Verdict:
So, these are the two handy Chrome extensions to temporarily pause Gmail inbox. Both the extensions are very good and you can select any one as per your need. For me, the first extension is better because it has Auto-Responder feature to make it sure that sender will come to know that I can’t respond to his/her emails for the time being.