Screen Markers is a free software to create marker lines on desktop screen and save their positions. Later, you can restore all those marker lines with their specific positions at once. It lets you create a group and store multiple marker lines in that group. You can also adjust horizontal and vertical lengths of selected marker line, change its color, and opacity. The thickness, opacity and length of other marker lines associated with a particular group can also be adjusted easily using the interface of this software. It can be very useful for website developers as well as other users.
You can also create multiple groups and each group can have a single or multiple marker lines depending on your needs. Options to delete any marker and group are also provided by this software.

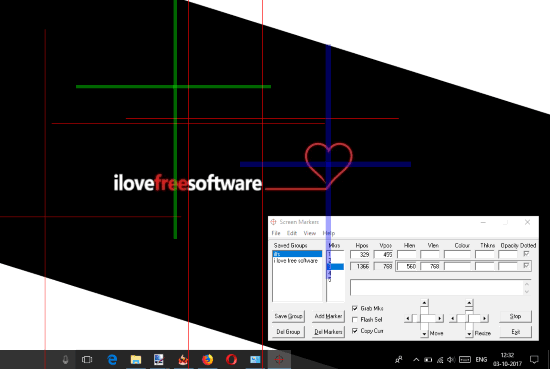
In the screenshot above, you can see different marker lines, and interface of this software where you can set thickness, opacity, and length of marker lines.
How To Create Marker Lines On Desktop Screen and Save Their Positions Using This Software?
Get the set up file of this screen marker software and install it. Launch the software to access its interface.
There’s an Add Marker button. You can use that button or Edit menu to create the first marker line. Simply do a click anywhere on the desktop screen and marker will be added. The marker line is visible with default length, opacity, color and thickness.

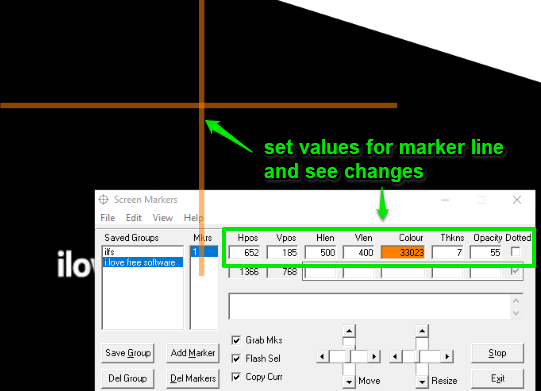
If you want to change the vertical and horizontal lengths, opacity, color and thickness of selected marker line, then you can use the available fields:
- You can set vertical and horizontal lengths by entering the custom values in the available fields.
- To set color for marker line, double-click on Colour box or field. It will open a color palette to set the color of your choice.
- To set thickness, enter some odd number (say 7, 11, etc.) in the given field.
- For adjusting the opacity of marker line, enter a value between 1-100 in Opacity field.

As soon as you press enter or move from one field to another, you can see the changes done by you for the marker line.
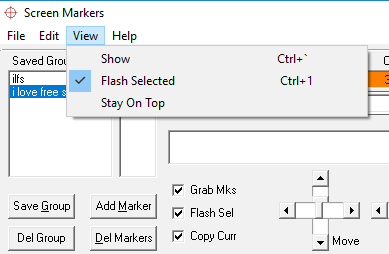
In this way, you can create more marker lines on desktop screen. You can also show or hide marker lines using View menu. Moreover, it lets you flash currently selected marker line to have focus on that line or easily identify the marker line when there are many other lines. For this, you can use View menu and select Flash Selected option.

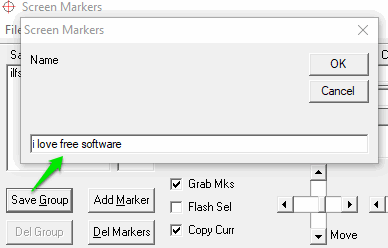
You must save all marker lines by creating a group to use them later. For that, use Save Group button. A pop-up will open using which you can give a name to that particular group. The group is saved to default location, but you can also export a group as INI file to the destination folder of your choice. For that, you need to use Edit menu and click on Export Group option.

Later, when you will open its interface, you will see all the saved groups. Or else, you can also import any group using Edit menu. Selecting a particular group will show all the marker lines. You can also do changes for any marker line if needed.
If you are looking for some desktop annotator, then you may check this list containing free software to draw on desktop screen.
The Conclusion:
Adding marker lines on desktop screen and saving all those marker lines along with their specified positions is so easy using this software. I also like features to set thickness, opacity, and colors for marker lines a lot. Whenever you feel the need to create marker lines on desktop screen, this software will be a time saver for you.