GifCam is a free portable desktop screen recorder for Windows which you can use to record your computer screen but instead of saving the recording in a video format, you can create GIF animations right away, without setting up conversion or anything like that. So, you can record your desktop to an animated gif, which you can share with anyone or post on websites.
Since this is a portable application, it doesn’t require installation to run, just download, click and run. You can make various settings like frame delay, edit frames, define screen area to record, etc. The interface is very easy to use and quite intuitive, as you can see below.
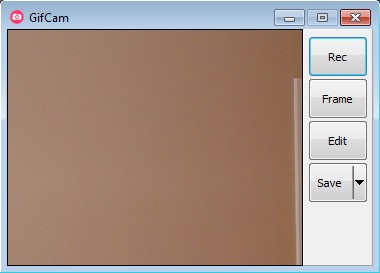
Interface of GifCam can be seen on the image above. Entire left side of the interface is the recording selection box. This window is completely transparent and whatever happens inside it is recorded as a GIF animation. Controls for starting/stopping the recording, exporting it, adjusting the frame delay and opening up the editor can be seen in the right sidebar. That’s pretty much it, there’s no complicated menus, which makes desktop recording very easy to setup.
Key features of free GIF desktop recorder are:
- Portable – doesn’t require installation, can be used from USB flash drive
- Save the GIF as quantized, 256 colors, 20 colors, grayscale image type
- Frame delay – enter frame delay between frames of the animation
- Adjustable desktop recording area – by resizing the application window
GIF animations are a great way how you can share short and interesting situations with the entire world. Unlike Flash, they don’t require any kind of additional players to be installed in order to be viewed. This makes it possible to view GIF animations on a much larger number of devices. Creating a video recording of your desktop to show off to your friends, or to quickly show how to do something might be a bit problematic for some to setup; with GifCam you can avoid that.
Similar software: Jing, SMRecorder, AutoScreenRecorder.
How to create GIF desktop recording with GifCam
Like we already mentioned, the left selection box determines the screen area that’s gonna be recorded. Be careful when setting it up, because the bigger the GIF animation and of course the longer it lasts it’s gonna take longer to load, since high resolution and long GIF animations tend to be big.
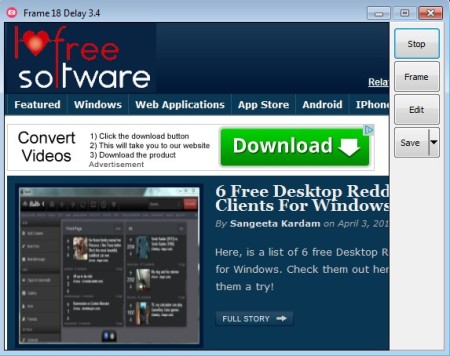
Once that you’ve made a selection, you can use the Frame button on the right to adjust the delay between frames of the GIF animation, if you need it. Delay values are set in tens of a second. When you click on the Record button, frames in window border in the top left corner will start changing, that’s how you know that recording is working. To stop, click on the Stop button from the right sidebar.
Edit button from the right sidebar will open up the editor, where you can edit frames, additionally adjust delay, rearrange, delete, etc. Use the scroll bar down below to move through the frames. When you’re done with the setup, click Save, select the GIF type, enter name, select where to save the GIF animation and you’re done.
Conclusion
Creating GIF animations from desktop video recordings would normally require you to cut and convert the video inside of a video editor, but with GifCam all that’s not needed. Give it a try and see how it goes.


