This tutorial explains how to create custom shapes in Paint.NET and save them, so that you can use them in different images.
Paint.net comes with some basic shapes, like arrows, polygons and stars, symbols, etc. If you want more shapes, then you are out of luck. Thankfully, there is a way to create your personal custom shapes (SVG (2-D graphics) Shapes), within Paint.NET, that you can save and use with other drawing tools also.
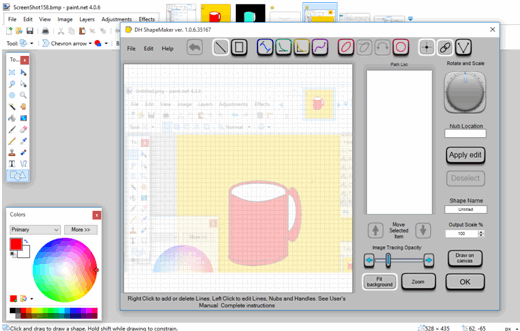
To create your own custom shapes in Paint.NET, you need to install a plugin, named ShapeMaker. This Paint.NET plugin has sufficient tools and provides a separate window to build a unique and custom shape. Output can be saved as *.xaml (Windows Markup File). Later on, you can use that shape in Paint.NET to fill colors and make it more beautiful.
The screenshot above shows the window of this plugin. Seriously, I’m too bad in drawing, but anyone can be a pro in designing custom shapes with some practice using this plugin.
Don’t forget to check these 7 Paint.NET plugins covered by us.
How to Create Custom Shapes in Paint.NET?
Follow these steps carefully to install and use ShapeMaker plugin in Paint.NET:
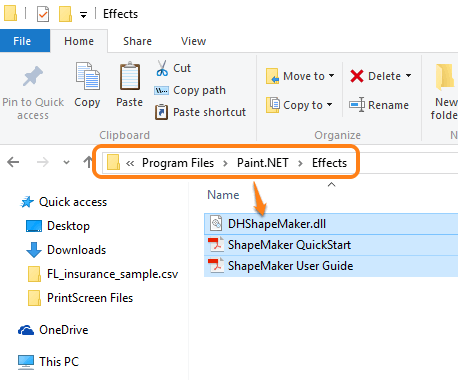
Step 1: Download the zip archive of ShapeMaker. Extract the archive to access DLL file and PDF files of this plugin. PDF files contain the user guide of this plugin, so you can understand about this plugin.
Step 2: Now you need to copy all files and put them in Effects folder of Paint.NET. Its default location is: “C:\Program Files\Paint.NET\Effects“.
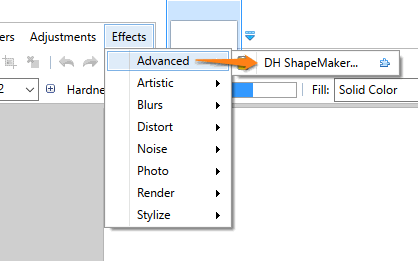
Step 3: Launch Paint.NET. If you have already opened it, then you need to relaunch it. Now access Advanced option available under Effects menu and you will find this plugin.
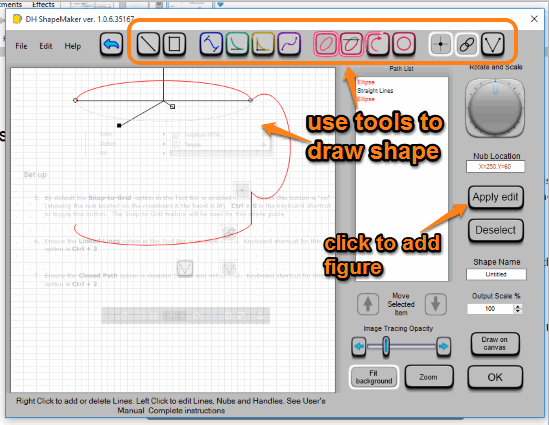
Step 4: Click on DH ShapeMaker option and window of this plugin will be in front of you. Its window contains multiple tools like Elliptical Arc, Quadratic Bezier, Smooth Cubic Bezier, Auto Rectangle, Straight Lines, etc. Each individual tool plots the associated figure. A figure contains the nodes that you can use to optimize the shape, size, and place of the figure.
To apply a figure, you need to use Apply edit button, then only you will be able to use another tool.
Step 5: When your shape is prepared, its time to save it. But before that, you should give a name to it. After this, use File menu and click on Save PDN Shape button. You should save the shape to Shapes folder of Paint.NET (“C:\Program Files\Paint.NET\Shapes”). However, if you get some error, then you first need to save the shape to some other location, and then paste it to Shapes folder.
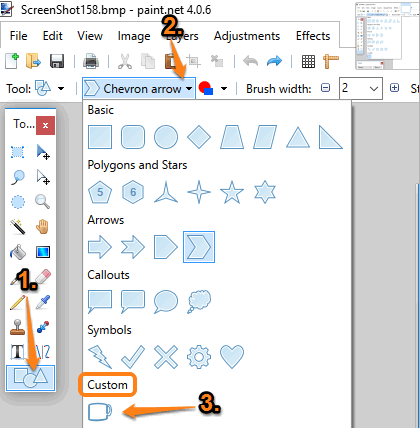
Step 6: Now select Shapes from Tools menu and then use the drop-down menu to open the Shapes pop up. In that pop-up, there is a Custom section where your custom shape will be visible to you.
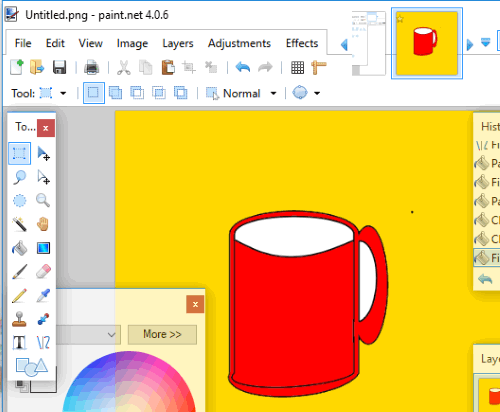
You can select that shape and drag mouse cursor on Paint.NET’s interface to add that shape. Now you can fill colors or whatever you have to do.
Conclusion:
With the help of this plugin, it is now possible as well as an easy task to draw custom shapes on Paint.NET. You need a bit of practice to become the master and use this plugin like a pro.
