Here, are steps to schedule a call on Android phone. Automatically making a call is not possible on Android phone unless we dial a number or select a specific contact and then make a call on that contact from our Android phone.
But now Android phone comes up with automatically dialing number on Android. You can easily schedule a call on your Android phone. After scheduling a call, your Android phone will automatically make a call on the preferred date and time set. So below are the steps to schedule a call on Android phone.
Steps To Schedule A Call On Android:
Step 1: Login to Google Play Store.
Step 2: Search for “Call Schedule Lite” app in Google Play Store.
Step 3: Install “Call Schedule Lite” app on your Android phone.
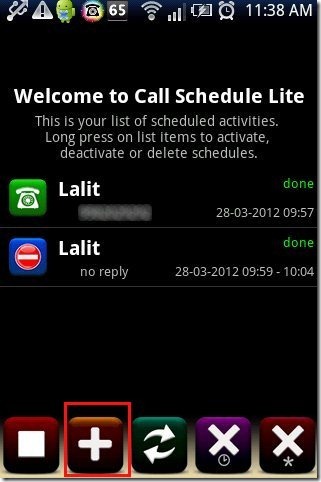
Step 4: Launch the app on your Android phone.
Step 5: Tap on “Add” button at the bottom of the app.
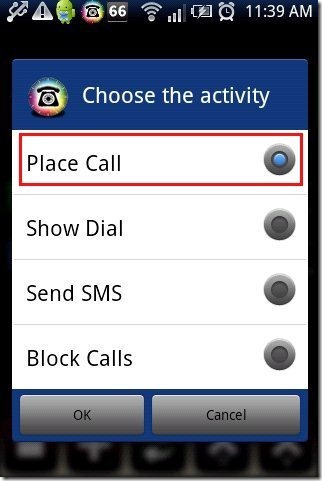
Step 6: Select “place call” option from the list of multiple options.
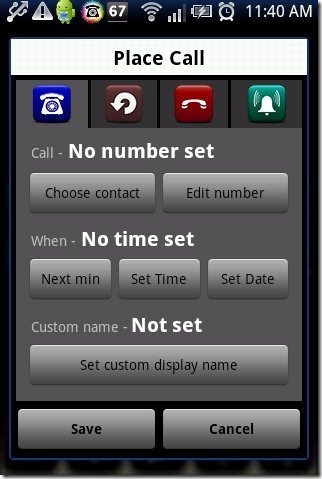
Step 7: Choose the contact from your phonebook or enter the phone number manually which you want to dial.
Step 8: Set the date and time on which you want your Android to make call.
Step 9: Set the display name in the app.
Step 10: Now tap on save option.
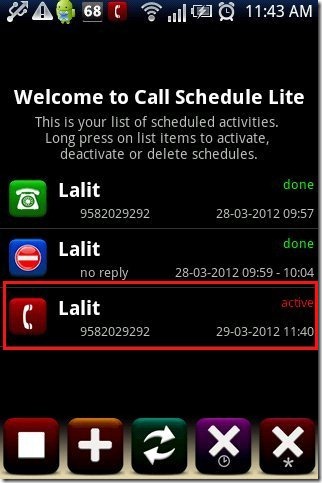
Step 11: Call will be scheduled and your Android phone will automatically make the call on the date and time set in the app.
Also, check out how to block a number on Android reviewed by us.
Call Schedule Lite is a very simple and light weight app in Android Market. Apart from scheduling calls on Android, the app also allows you to schedule a SMS on your Android phone. In addition to it, you can also block call on your smart phone between a specific time period set. So go ahead and give it a try.


