This tutorial details how to manage paging file size for disk drives in Windows 10. The RAM, or Random Access Memory (also known as physical memory) is one of the most important hardware components of a computer, and it plays an instrumental role in determining its overall efficiency. In general, more RAM means that programs execute faster. But adding extra physical memory to a computer obviously incurs a cost. In addition, there are some computers (e.g. low-end notebooks) whose physical memory can’t be upgraded. Quite a problem, don’t you think?
Not at all, as Windows’ paging file feature is here to the rescue. Intrigued? Let’s find out more about paging file, and how you can manage paging file size for disk drives in Windows 10.

What Is Paging File?
In the simplest of terms, a Paging File is a special storage area on the hard disk that the Operating System treats and uses as Random Access Memory (RAM). The Paging File is also called Virtual Memory. By default, the paging file size (for all disk drives) is automatically managed by the Operating System. However, you can also specify a custom size of the disk space to be used as RAM.
How To Manage Paging File Size For Disk Drives In Windows 10?
It’s easy to manually specify the paging file size for the different disk drives (or partitions) in Windows 10. Here’s a detailed illustrative tutorial, explaining how to do this:
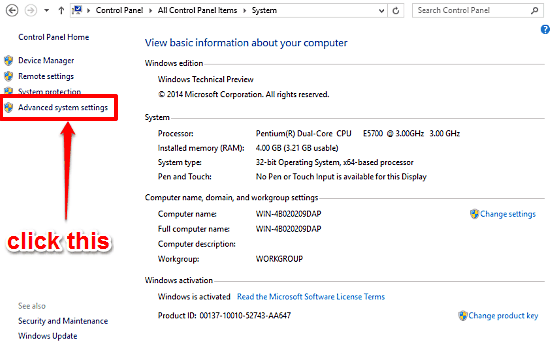
Step 1: Navigate to the classic Windows Control Panel and click on System. When the thing opens up, click on Advanced System Settings option in the left column.

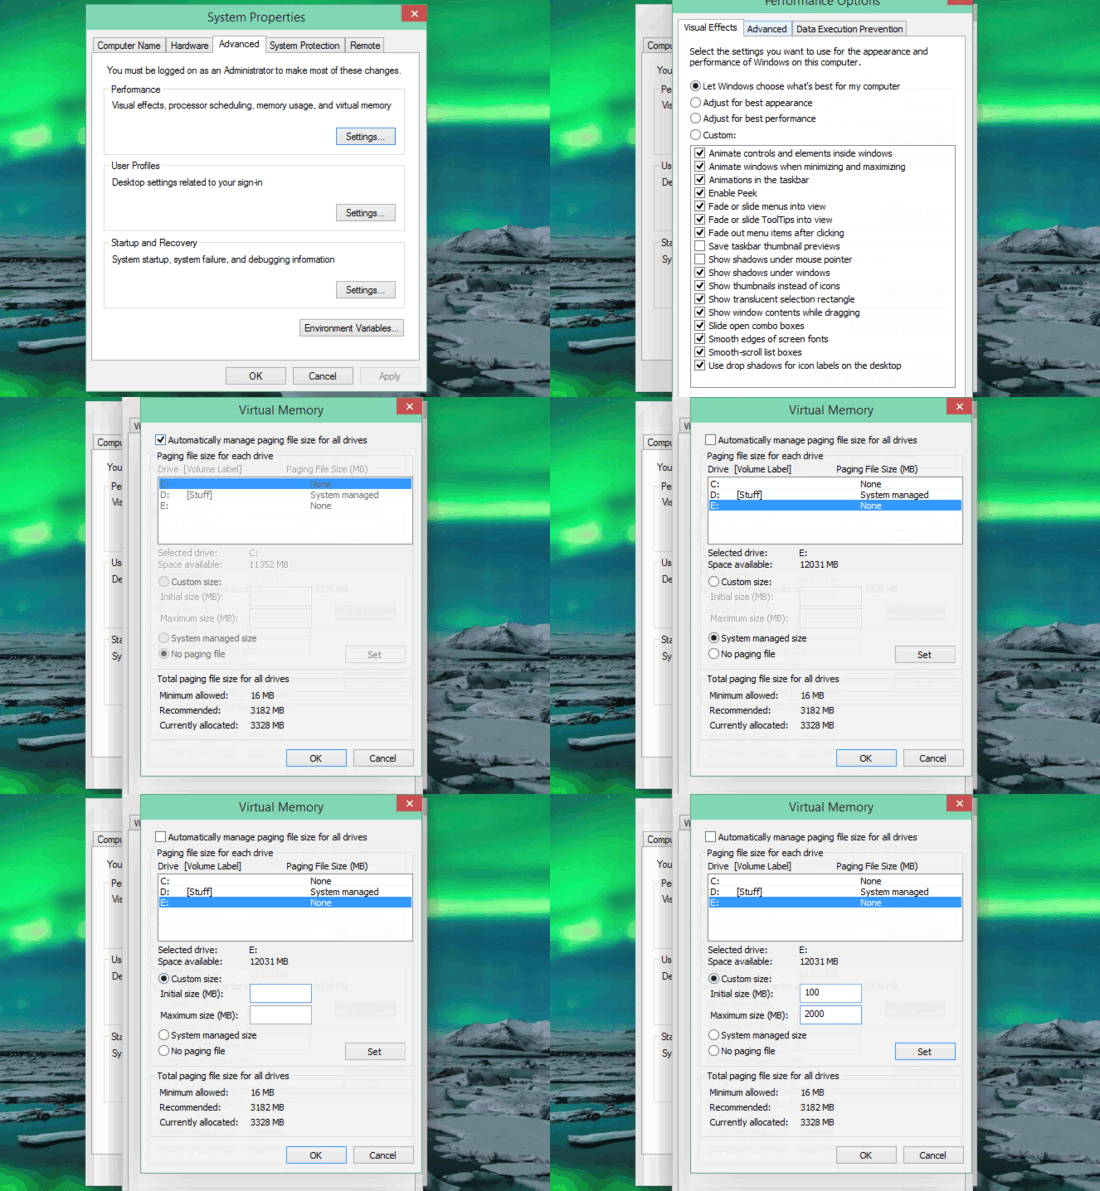
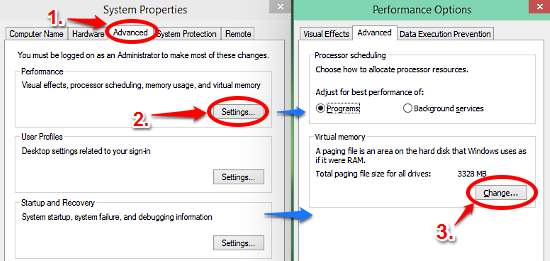
Step 2: On the System Properties dialog box that fires up next, click on the Advanced tab, and then the Settings button under the Performance sub-section. This should launch the Performance Options dialog box, with the Advanced tab already in focus. To proceed, head to the Virtual memory subsection, and click on the Change button.

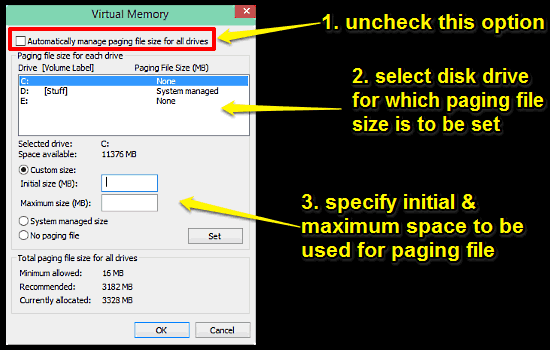
Step 3: The final step people. The Virtual Memory configuration box lets you tweak everything regarding the paging file size. As mentioned before, Windows automatically manages the paging file size by default. To do that manually, first uncheck the Automatically manage paging file size for all drives option. Next up, select the disk drive for which you want to set a custom paging file size. Finally, select the Custom size radio button, and specify the initial and maximum disk space (in MB) to be used as paging file for that particular drive, and when done, click the Set button. Repeat this for all the disk drives. Here’s a graphic:

And we’re all set. Going forward, Windows 10 will use the disk space specified by you as the paging file. Wasn’t that hard, right?
See Also: Configure Data Execution Prevention In Windows 10
Wrap Up
Paging File or Virtual Memory is one of those important features of Windows that let you increase the efficiency of your computer, even if it has limited physical memory (RAM). And the fact that you can manage it individually for all the disk partitions means that you’re in total control. Give it a shot and let me know what you think in the comments below.