This tutorial explains how to turn off changing desktop icons in Windows 10 PC. We can easily change desktop icons in Windows 10 (Recycle Bin, Control Panel, Network, This PC, etc.) using Desktop Icon Settings window. When you don’t want to change these icons or prevent others from changing those icons, then using these two built-in options of Windows 10 are handy. You can use LGPO (known as Group Policy) and Registry Editor window of Windows 10 to easily disable changing desktop icons.
These two methods simply disable access to Desktop Icon Settings window. As a result, neither you will be able to open that window nor change desktop icons.
![]()
You won’t be able to access the Desktop Icon Settings window after using any of these two options. An error will occur (like visible in screenshot above) whenever you will try to open Desktop Icon Settings. The change would be temporary as you can easily enable access to Desktop Icon Settings window anytime.
Note: These methods don’t work for the shortcuts of applications, programs, files, and folders. These are helpful to prevent changes to system icons only, that are part of Desktop Icon Settings window.
Method 1: Disable Changing Desktop Icons In Pro, Education, and Enterprise Versions of Windows 10
Step 1: Start Group Policy. You can do this with the help of Search box. Write gpedit in that box to open Local Group Policy.
Step 2: Find the Personalization folder. You can access this folder by using User Configuration, expanding the Administrative Templates, and then Control Panel. There you will see “Personalization” folder.
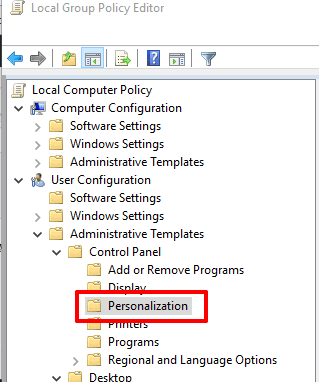
Step 3: The right part of Group Policy interface will show a lot of options. You have to double-click the “Prevent changing desktop icons“.
![]()
Step 4: Prevent changing desktop icons window will launch. To disable changing desktop icons, set “Enabled” in that window, and confirm these changes.

Now you won’t be able to access Desktop Icon Settings window.
To re-enable access to Desktop Icon Settings, you can set “Disabled” or “Not Configured” in the above window and confirm changes.
Method 2: Turn Off Changing Desktop Icons In Home Version of Windows 10
Step 1: Here is a very basic step. Open the Registry Editor. Take the help of Search box and enter regedit to start Registry.
Step 2: Search for Policies key. You can access that key by expanding HKEY_CURRENT_USER, then exploring Software, Microsoft key, Windows, CurrentVersion, and Policies.
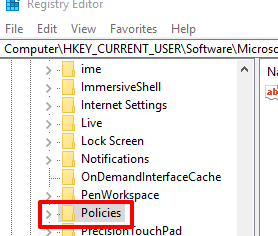
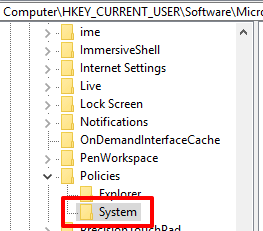
Step 3: Policies key contains System key. If it is not available, you should create it. It can be created by right-clicking on the empty area, then go to New, and click on Key option. Rename the key as “System”.
Step 4: Under the new System key, create a DWORD value, and then rename that value as “NoDispBackgroundPage“.
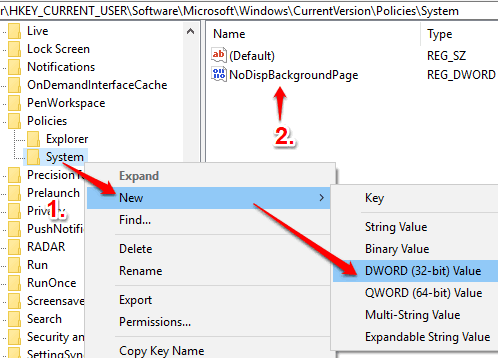
Step 5: To disable changing desktop icons, you have to change number available in value data of NoDispBackgroundPage. You have to add ‘1‘ in value data.
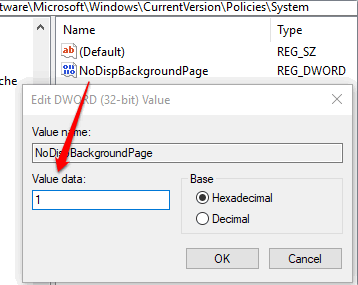
Apply the new tweak and then you will not be able to access desktop icon settings, which means you can’t change desktop icons.
To re-enable changing desktop icons feature, you can add ‘0‘ in NoDispBackgroundPage DWORD value.
You may also check How To Add Desktop Sidebar To Windows 10 and Disable Screen Saver Change In Windows 10.
The Verdict:
Using these two methods, you will have full control when you want to change desktop icons and when you want to restrict the changes. I will go with the first method as it is more convenient than method 2. Those who don’t have Group Policy, the second method is definitely helpful for them.