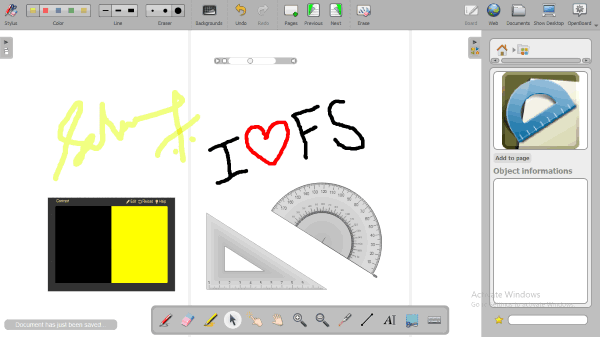
OpenBoard is a free open source interactive whiteboard for teachers. This whiteboard software can help teachers easily taught students at school, universities, etc. It provides all the necessary tools to teach like you can draw, add text, images, documents, audio, geometric shapes, flash animations, etc. on a whiteboard canvas. The canvas is pretty large making it possible for you to cover various aspects of your lecture on one screen. Apart from these features, you can also display your desktop screen while using the whiteboard and then annotate on it to explain something. You will also find other features like add multiple pages to the whiteboard, take screenshots of the screen, laser pointer, highlighter, and so on.
One of the unique features of this interactive whiteboard is that it comes with a built-in browser using which you can browse the Internet and show anything you want to your students. There are many other whiteboard software available for Windows, but none of them has the option to annotate on the desktop screen or browse the Internet directly without switching applications. So, if you’re looking for a complete virtual whiteboard solution for teaching, then you got to try OpenBoard for at least once.

How to Use This Interactive Whiteboard for Teaching:
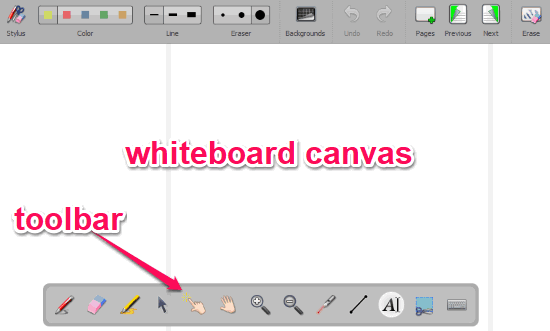
To get started, simply download and install OpenBoard on your PC. The download link is given at the end of this post. After that, open it up and you will see a blank whiteboard canvas with a toolbar at the bottom.

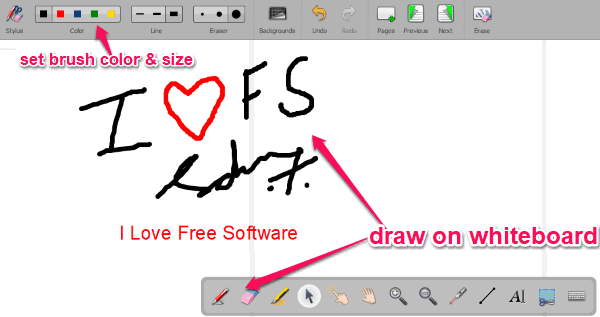
On the toolbar, you will see various tools using which you can draw on the whiteboard, highlight anything, move objects added to the canvas, zoom canvas, use laser pointer, add lines, move canvas, add text, capture screenshot of any part of the screen, erase anything, etc. To start drawing, you can choose the brush and then set the color and size manually from the top menu.

At the top menu bar, you will see other options to choose eraser size, whiteboard background, undo/redo changes, add new pages to the whiteboard, navigate through the pages, etc. On the right corner of the top menu, you will also see three different options named, Web, Show Desktop, and Documents.
The “Web” option can be used to access the built-in browser and surf internet directly. When you click on the “Web” option, a browser will open up and then you can use the address bar to open any website you want for teaching your students. While browsing, you will see a toolbar on the right with the options to trap flash content, capture part of the screen, capture an entire window, etc.

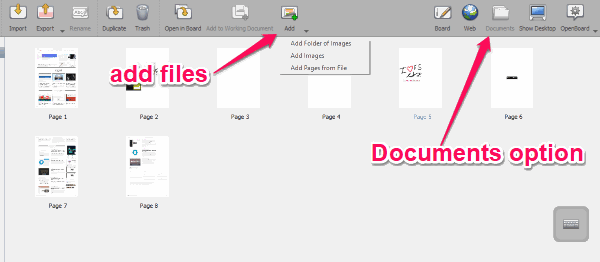
The “Documents” options can be used to add images the whiteboard pages, import PDF files, export PDF files, and more. This option also keeps an archive of all the whiteboard sessions you have had and allows you to view the pages, arrange them, delete, etc. But, if you would like to add other files like audio, flash animations, geometric shapes, etc. then you can do that by opening the slider window on the right of the whiteboard.

Now, the last option is “Show Desktop” that allows you to display your desktop screen to your students while teaching and then annotate on it. When you select this option, the desktop screen will appear with a toolbar on the left. You will find all the annotation tools on the toolbar like the brush, highlighter, eraser, and also other useful tools including the laser pointer, capture screenshot, and more.

Closing Words:
OpenBoard is a very useful interactive whiteboard software that can help you easily teach students with dozens of features. It is not limited to whiteboard drawing, but lets you make the whiteboard interactive with the help of images, animations, and so on. Personally, I have used many whiteboard software, but I think this one is distinct from all as it comes with a built-in browser and also provides the option to annotate on the desktop screen.