This tutorial explains how to auto archive specific emails in Gmail after 1 day. To do this we will use a Google Apps Script called, gmailAutoarchive. This script looks for emails with a specific label that we will create later and then archive those emails for you automatically. The script runs periodically each day and then archives the older emails that are from specific senders and newsletters.
If you don’t want to keep emails in your inbox from certain individuals, companies, or newsletters then you can simply archive them. And since archiving takes long time when doing it manually, so, you can automate that stuff using Apps Script. One such script is what mentioned below and is created by an open-source developer. The script will archive emails for you and not just 1 day, but you can also specify custom criteria as well.
What is Email Archiving in Gmail?
Email archiving in Gmail is a feature that allows you to remove an email from your primary inbox and store it in a separate folder. This helps you to keep your primary inbox clean and organized without losing important emails.
Archived Gmail emails can be found in the “All mail” folder through search. If you do not want to put emails back into your inbox, you can just unarchive them.
To archive an email, you can simply point to the message and click on the “Archive” button from the mail menu at the top side. But since in this post here, we’re talking about bulk email archiving, so the process will be a bit longer.
How to Auto Archive Specific Emails in Gmail After 1 day?
To configure the script, you need to follow these steps below.
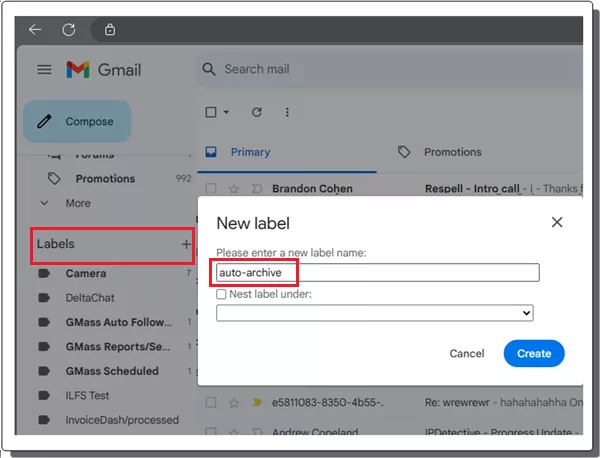
- Open Gmail and then create a new label called “auto-archive“. You can create it by clicking on the “+” icon in the Labels section in left side.
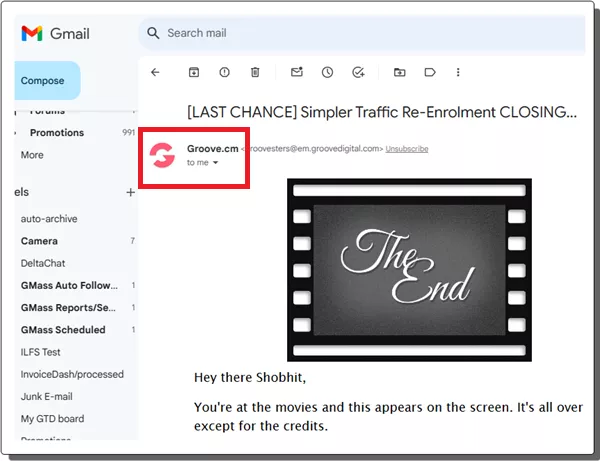
- Now, you open the email from the sender you want to auto archive from the next time.
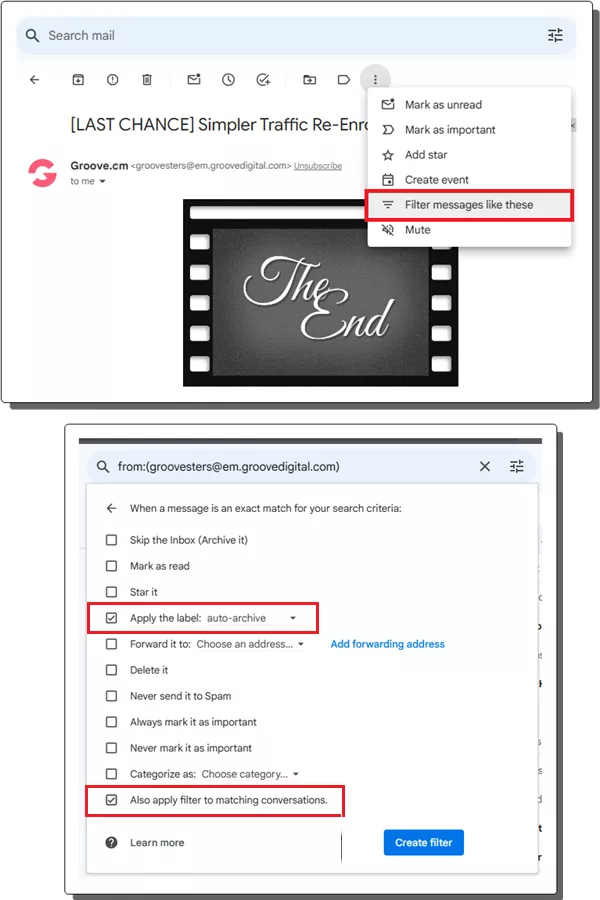
- Tap on 3 dots icon from the top side and then select the “Filter messages like these”. Next, you click on the “Create filter” option and then from the next window, select “auto-archive” label and also check the “Also apply filter too matching conversations” option.
- Now, you need to visit script.google.com and create a new project. Give this project the name “gmailAutoarchive”.
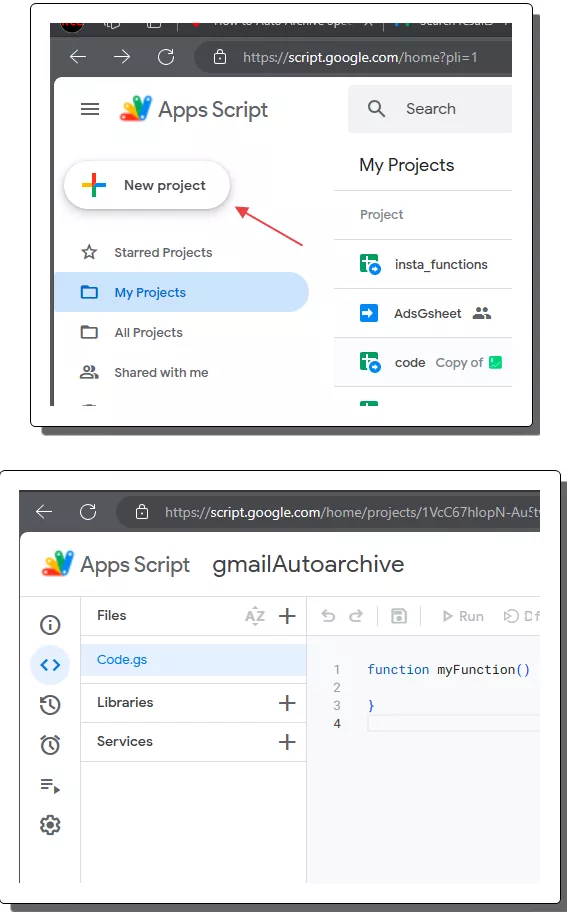
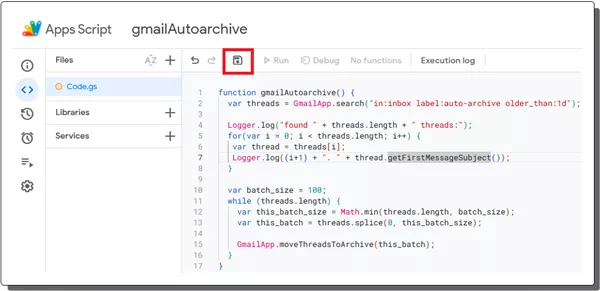
- Paste the code from this GitHub Gist into the project and the click save.
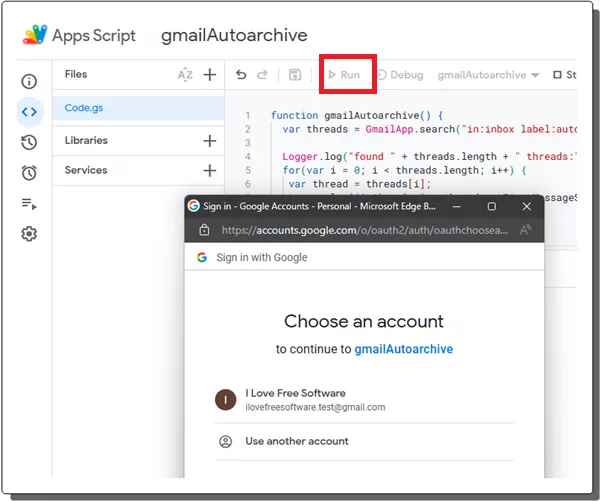
- Now click Run and then choose “gmailAutoarchive” function name. It will ask for Google authorization so allow it.
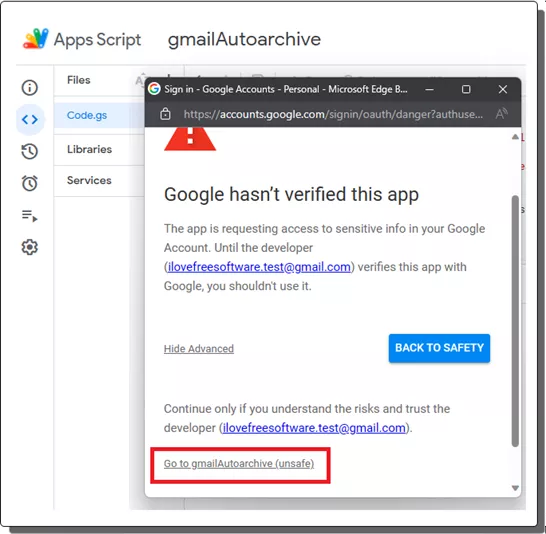
- If Google blocks execution and gives warning, then click advanced and then proceed further.
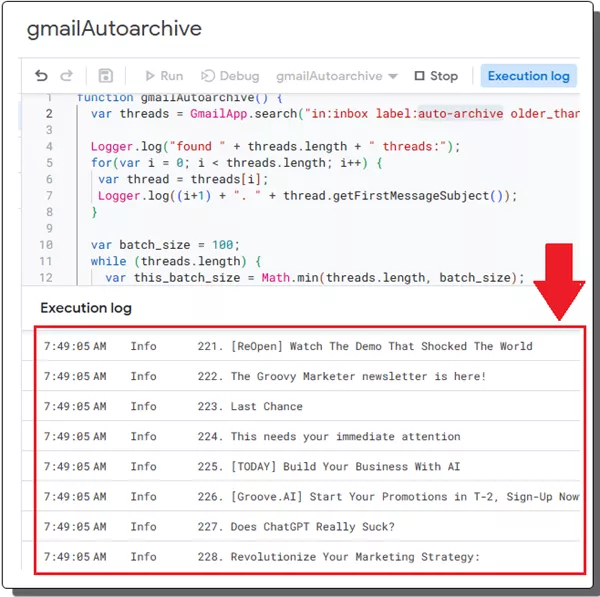
- If the run is successful, then you will see all the emails archived. You will see the subject lines. Also, when you visit the archived emails under the “auto-archive” label, you will notice that the inbox label is removed from it.
- Done.
In this way, you can setup this Google Apps Script to automatically archive emails older than 1 days. You can do this for more senders. Just apply the same label and create a filter. After that the script will take care of the rest.
You can also create a trigger in Google Apps Script function after 12 hours or every day. This will automate the process and you will not have to manually run the apps script again and again.
To create a trigger, just click on the clock icon in the left side. Create a new trigger and then from the popup, select a 12-hour schedule. Also, make sure that gmailAutoarchive function is selected.
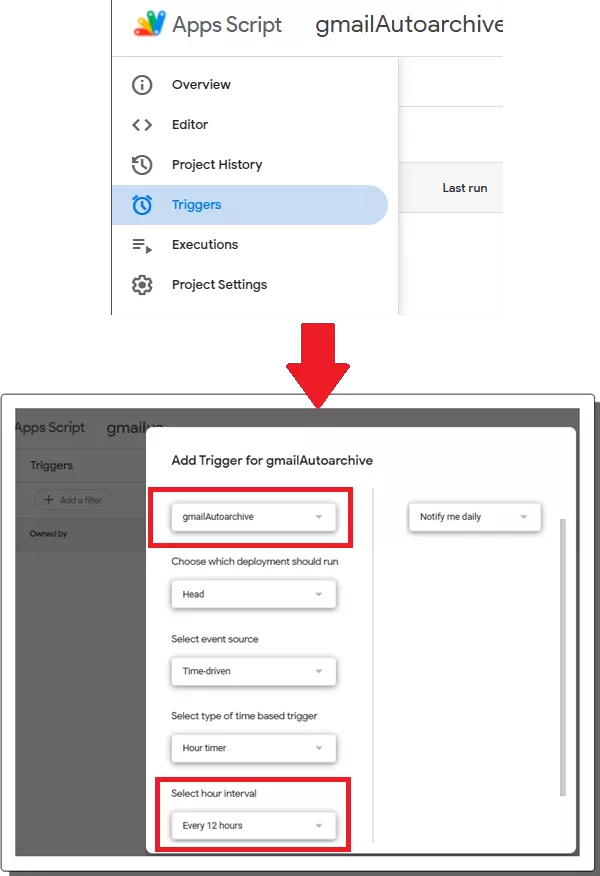
Now, save the trigger and sit back relax. From now on, you just have to assign “auto-archive” label to new emails or to any senders’ email and the script will take care of the rest in the background without your intervention.
Closing thoughts:
If you are looking for a new way to declutter your Gmail inbox, then auto archiving emails will help. Use this tutorial and setup the archiving script as I have mentioned here. The script setup only needs to be done once. It will them work on its own and will archiving emails for you in the future.