This tutorial explains how to see real-time upload and download speed in the taskbar of PC. After going through this tutorial, you will be able to see the real-time download and upload speed in the Windows taskbar, as demonstrated in the GIF below. Not just Windows Taskbar, you can also choose to view real-time download upload speed in the System Tray.
I have included two free software that can be used for this. One will simply show the current network rate in the Windows Taskbar and the second will display a minimal network activity graph and you will need to hover your mouse over it to see the real-time download and upload rate.
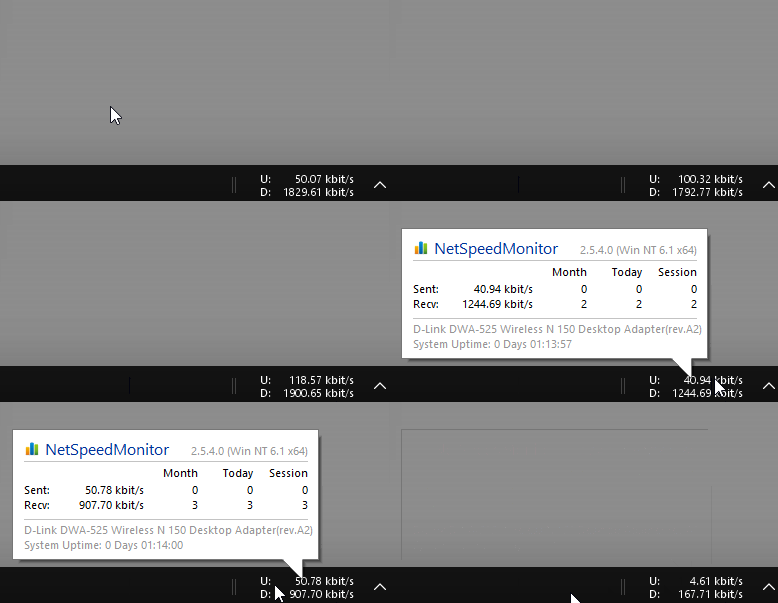
The name of the first software is NetSpeedMonitor which is outdated and discontinued, but will do the trick if installed with correct compatibility settings. You can also see the active TCP and UDP connections through it and choose to change the unit of the current network speed. Read how can you install it below.
The second one is UpDown Meter which also draws a real-time graph of network activity of a network adapter. In case you want to see network activity graph of multiple network adapters, then read this tutorial which explains how to see network activity graph of multiple network adapters. The only limitation with it is that you need to hover your mouse over the graph in the System Tray or Taskbar to see the current network speed.
How to see real-time upload and download speed in PC taskbar using NetSpeedMonitor:
NetSpeedMonitor is a free and old Windows software that can show you the real-time download and upload speed in the Taskbar. It is an outdated software which might not work properly if not installed with extra care. However, after installation, it runs pretty smooth and you won’t face any issues. You can download it from the link above and while downloading make sure you download the correct version i.e. 32-bit version for 32-bit Windows and same goes for the 64-bit.
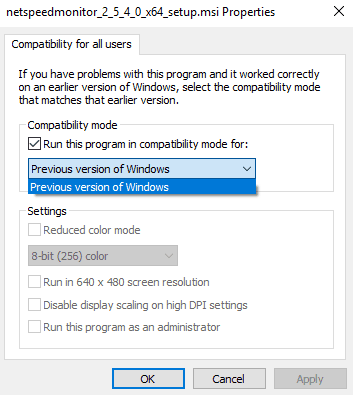
Once downloaded, change the Compatibility settings of its EXE file to run with “Previous version of Windows”. You can do it as follows: right-click on its EXE file and select Properties. After that, switch to Compatibility tab and then select “Change settings for all users”. This will pop up another Compatibility config dialog box as shown in the screenshot below. Enable “Run this program in compatibilty mode for:” option and select “Previous version of Windows from the drop-down list. That’s all you have to do to configure Compatibiltity settings of NetSpeedMonitor and after that you can move forward to install it.
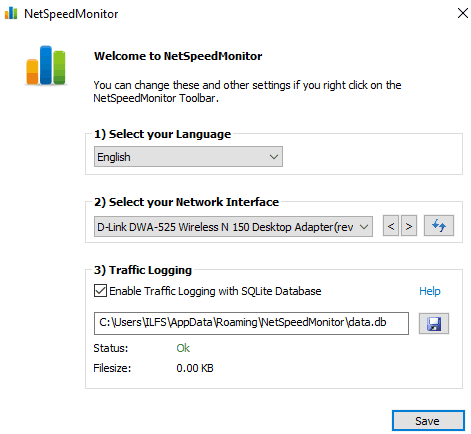
During the installation process, you need to choose the network adapter, as shown in the screenshot below. You can also change the network adapter in its settings later.
After it’s installed, it will prompt you to choose whether you want to see the real-time network speed in Windows Taskbar. So, just allow it and you will see the real-time network speed in your taskbar, as shown in the GIF above.
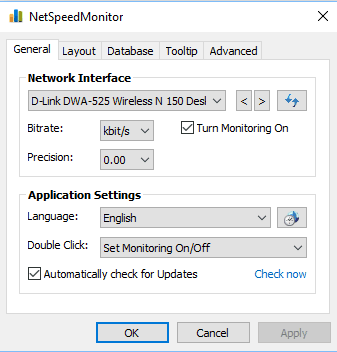
You can also change the network adapter and bitrate unit from its Configuration box. Right-click on the real-time network speed that is being displayed, and select Configuration to open it. If you want to see all the active TCP and UDP connections, then you can also monitor them, select Connections option from its Taskbar context menu.
How to see real-time upload and download speed in PC taskbar using UpDown Meter:
Let’s now see the steps to calibrate UpDown Meter and see real-time upload and download speed in PC Taskbar:
Step 1: Download the EXE from the link at the end of this tutorial and launch it. This will bring forth its minimal interface as shown in the screenshot below. Now, the first thing is you have to do is choose a network adapter to see its network activity graph and real-time download speeds in the taskbar.

Step 2: Click on the tiny Settings button on its interface and then select a network adapter from the list. To calibrate the selected network adapter, specify the actual internet speed of your network adapter in Actual speed (B/s) text box. Visit any of these websites to test internet speed and do not forget to convert the recorded internet speed to B/s (Bits per second) unit before specifying.
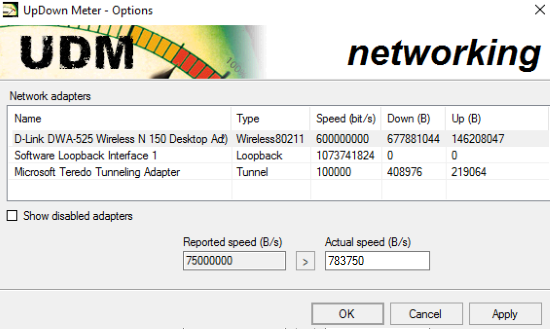
At last, click on the Apply button and the UpDown Meter will now start plotting the network activity graph, as shown in the screenshot below. Another exciting feature is that you can even make its interface to stay on top of other Windows software, applications, etc. On its interface, you will see the actual download and upload speed in the real-time.

You don’t have to apply any tweaks in it to see the real-time Internet speed in the Windows Taskbar. Just minimize it and it automatically takes a place in the System Tray. Now, just drag and drop its System Tray icon to your Taskbar and start monitoring your network speed from the Taskbar.
![]()
This freeware can also automatically start itself at the Windows startup and also in the minimized state in the Windows System Tray.
Verdict:
In this tutorial, I explained a couple of methods to see real-time download and upload rate in Windows Taskbar. If you always want to have an eye on your Internet connection speed, then NetSpeedMonitor is the one you will really like as you can see network speed without any mouse hover. But, I prefer the second one i..e UpDown Meter the most as it allows me to see the network speed on top of all other windows and I can easily put it on System Tray as well.