Everywriter is a free Windows 10 novel and book creation tool. Every once in a while we think that maybe we can be good authors. Maybe we can end up writing good short stories. But the problem always seems to be where to start. There is a proper format you need to follow for writing a novel or book. But all the ideas in your head in a jumbled up way don’t really materialize into a book. You miss out on good book ideas, as you most often forget them. But with Everywriter you will have no worries.
Everywriter is a nice tool that lets you design the outline of the novel, lets you design the characters in the novel, lets you make a book cover design, lets you export the entire things as well. You can even publish your book or stories on the reading platform of the app, where other users can read and leave comments for you.
Getting Started:
Let’s start by downloading this app. Once you launch this app you will be asked to select a language for the app first. After the language selection you will be shown a short visual tutorial on what the app can do. Once you are through that, you will have a pop up window from where you can select the theme of the app out of the given two and select a font for the app or go with the default font. Now you are ready to explore the app. Go ahead and go through some sample books or novels in the app, to get an idea about how it works. It might take you a little time to get a hang of the interface.
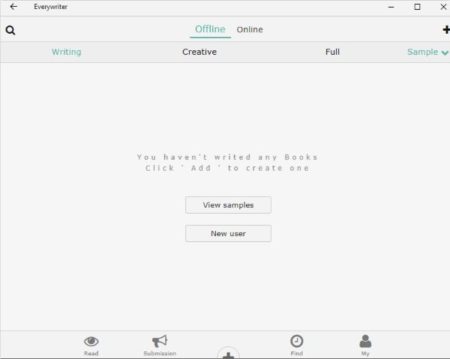
The first page you will see in this app is the one shown in the above screenshot. From here you can select samples button and go through some samples which have been added in the app for your help. When you are ready to create your own book, click on the new user button and you will be taken to a page where you will be asked to register on the app. You can also sign in to the app if you already have a account on the app.
Designing the Outline of the book:
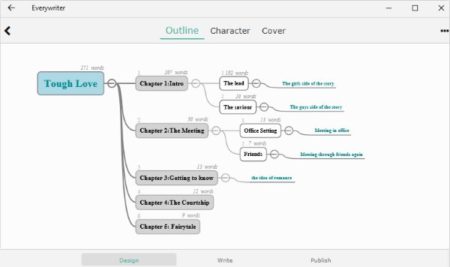
After registering you can start with your ideas for the book. Click on the write button at the bottom center of the screen. You will first of all will be taken to the design page where you can define an outline of your story. This can be seen in the screenshot below.
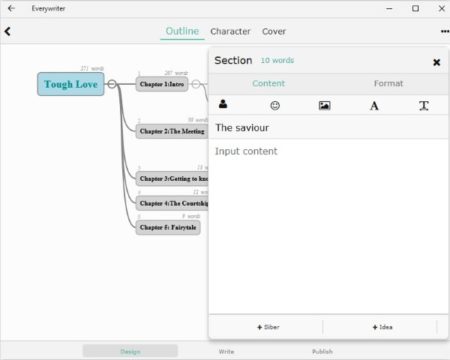
This page has the title of your book at the starting then you can define the chapters that will be there in the book by giving a title to the chapters as well. You can also write the entire chapter content in the space provided on the page, as can be seen in the screenshot below.
As you can see on the right side of the screen, there is a box which says section on it. Here you can write the content of this chapter. You can change the font, insert emoticons, images, etc. If it is a conversation between people that you are writing then the first icon will help you insert the name of any character you want, this way you do not have to write the name of the people again and again. Saves a lot of time for you if you are writing a conversation.
After you are done defining the content of the book, you can move onto the character outline or design.
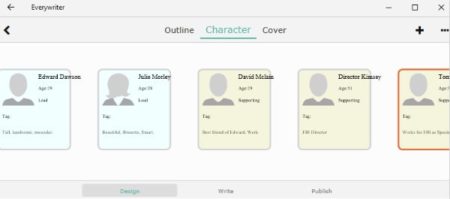
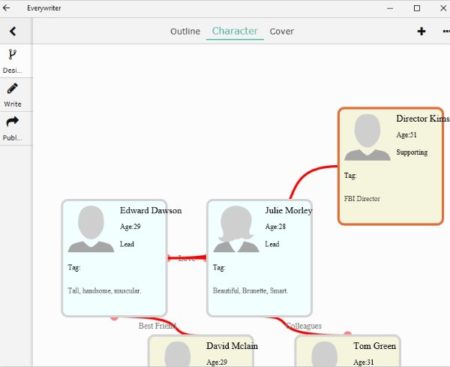
In this window you can add a new character by clicking the plus button seen at the top right corner. When you click this button a window will open up and you need to fill in the name of the character, mention if the character is male or female, choose if the character will play a lead role or a support role, mention the age of the character, and a small biography of him/ her. You can also add tags to each character. Once done just close the window and the character will be added to your screen.
To show the relationship between the characters, you can click on one character and a small red dot will appear on the character window. Using this red dot you can draw a line among the characters and define the relationship between them.
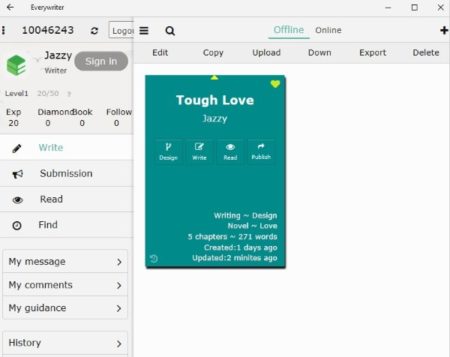
This can be seen in the screenshot above. The last tab on this page is the cover design. For cover design you can choose and insert any picture. This picture will make the cover page of your book. After this click the save option from the top right side. After saving go back to your dashboard, and you will see the book copy which you have written so far.
On the book thumbnail, you will see options to design, write, read, and publish. This can also be seen in the screenshot above. You can click the design button in case you need to make changes to the design of the book. The write option will also allow you to write or add content to any of the chapters in your book. The read option will let you read the book that you have written so far in the proper format of a book. The publish option will let you publish your story or book on the app, where other users can read and comment on it.
Conclusion:
Everywriter is a nice book creator tool. This app makes the entire process of designing the book easy. As a lot of things are just select and start using type. You can also put in your ideas on the outline design section. This way you will not forget some idea that clicked in your mind. So if you are a story writer and want to write short stories or books, this could be a great tool to help you do that. Try it out.
Check out Everywriter for Windows 10 here.
