Captura is a free screen recorder, webcam recorder, and screenshot capture software. So, it is an all in one solution related to desktop screen capture. When you have to record full desktop screen, a specific area or a particular application, you can use its screen recorder tool. The best part is that you record mouse clicks as well as keystrokes in desktop recording. You also have the choice whether you want to record desktop with keystrokes, without keystrokes but mouse clicks, or record screen without keystrokes and mouse clicks.
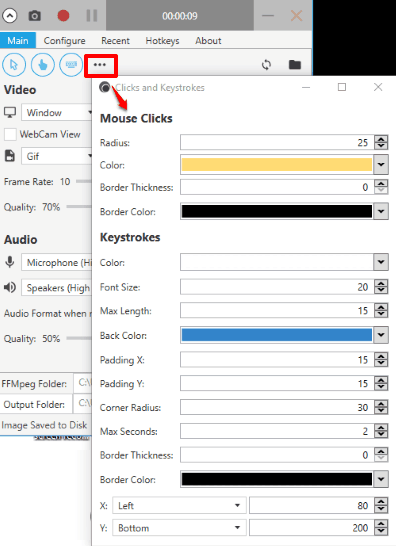
For mouse clicks, you will be able to set radius size, color, border thickness, and color. And for keystrokes, it lets you select a particular color, font size, maximum length, padding, or XY position, etc. So it is more than just a simple screen recorder software. Apart from recording desktop screen, you can use its screen recording tool to record webcam. Your desktop and webcam recordings can be saved as AVI or animated GIF.
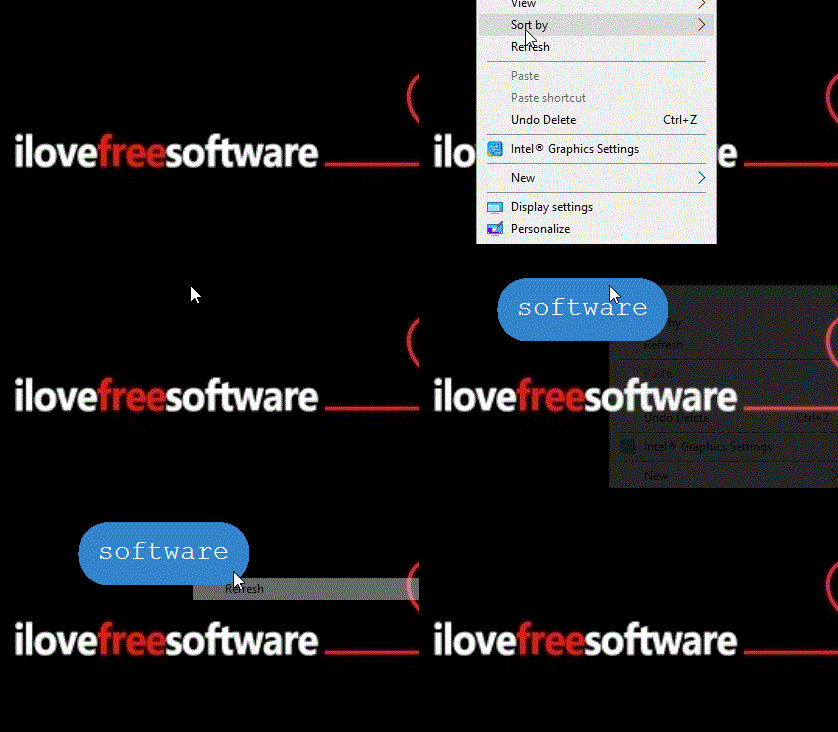
In the quick recording above, you can see I captured my desktop screen with keystrokes and mouse clicks.
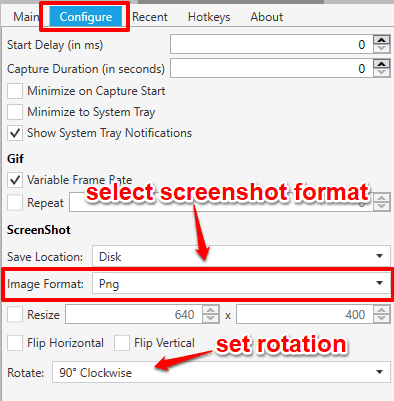
As I mentioned in beginning, this software also has the feature to take desktop screenshots. You can either take the screenshot of a specific region or the whole desktop screen. Before taking the screenshot, you can set rotation (clockwise or anticlockwise) and image format. So you can consider it a full-screen capture suite. Below you can see a screenshot captured by me using its screenshot capture tool.
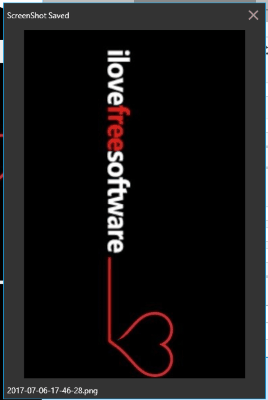
Note: All your recordings and screenshots are saved in the default location, which is “C:/Users/YourPCName/Documents/Captura“. You can easily change output folder as there is an option available on its interface to set the custom location to store recordings and screenshots.
How To Use This Free Screen Recorder, Webcam Recorder, and Screenshot Capture Software?
Captura is a portable software and you can get its zip file using this link. Launch it and you will see different menus which are related to screen capture, hotkeys to capture, recording desktop screen, and options to select if you want to record desktop screen or webcam.
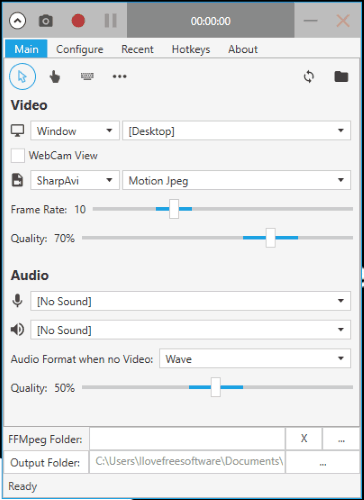
Now let’s see the important features of this software one by one:
Record Full Desktop Screen or Selected Region With Mouse Clicks and Keystrokes:
For recording the desktop screen with mouse clicks and keystrokes, you first need to select if you want to record full desktop screen or a specific region. For this, use “Video” section on its interface, and then select Window or Region as your option. After doing this, you can select Include Mouse Clicks and/or Include Keystrokes option. By default, Include cursor is already selected, but if you don’t want to show mouse cursor in recording, then you can uncheck that option.
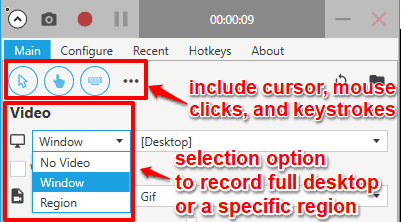
Just next to Include Mouse Clicks and Include Keystrokes option, there is a Customize icon (three horizontal dots). You can click this option and then adjust color, size, mouse clicks radius, and other options.
Once it is done, you can access Video Encoder section. Here, you can select “SharpAvi” option if you want to save the recording as AVI format or GIF (if you want to save the recording as animated GIF). You can also set frame rate and output quality using the available sliders.
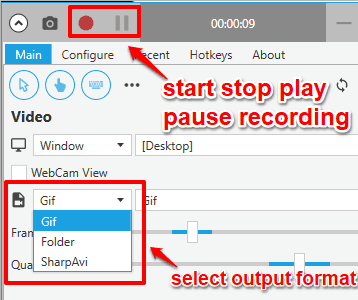
When everything is set, you can use record button or hotkey to start the recording. You can also pause and resume recording. When recording is completed, you can stop it and then it will be saved to the default folder.
Record A Particular Application With Keystrokes and Mouse Clicks:
This software also lets you select a particular opened application and record it. For this, you first need to select Window as the option under “Video” section. After that, you can use the drop down menu just next to Window option and you will see the list of all opened applications. Select an application.
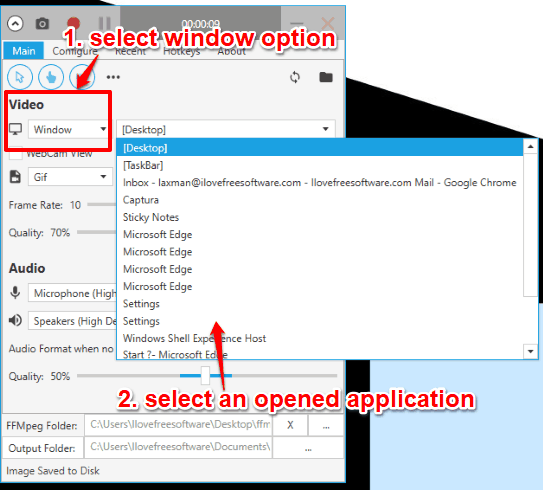
After that, you can set output format (AVI or GIF), include exclude keystrokes, mouse clicks, cursor, and other options that I have already mentioned in above section.
When everything is set, you can start the recording, pause and resume it as per your needs, and stop the recording when it is done.
Record Webcam With Mouse Clicks and Keystrokes As AVI or Animated GIF:
For recording webcam as animated GIF or AVI file, you need to use the screen recording tool of this software. It doesn’t come with separate webcam recorder tool.
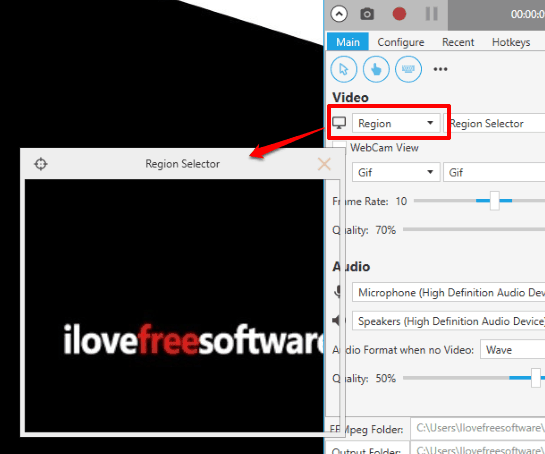
To start webcam recording, first of all, select “WebCam View” option visible on its interface. A separate window will open. In that window, you need to select the webcam connected to your PC or laptop. As soon as you do that, webcam will start and you can see what is visible through the webcam in that window. Now select “Region” option under Video section and then you can select the region covered by webcam viewer. This is mandatory so that you can record the webcam.
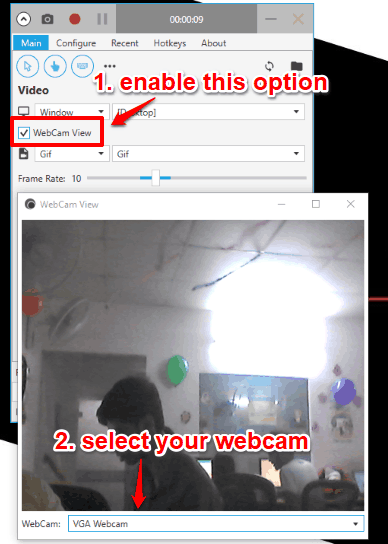
Now adjust rest of the things, such as output format, include/exclude keystrokes and mouse clicks, mouse cursor etc. Finally, you can start the recording, pause and resume it, and then stop the recording.
Take Screenshots of Full Desktop Screen or A Specific Region:
This software comes with a very simple screenshot capture feature. Using this feature, you can capture the entire desktop or a specific area. It doesn’t help you annotate screenshot, but you can set rotation for taking the screenshot. For example, you can enable flip horizontal or flip vertical option for capturing the screenshot. After that, when the screenshot is captured, it will come as vertically flipped or horizontally flipped screenshot. You can also set the output format for the screenshot. Available formats are: PNG, TIFF, JPEG, WMF, EXIF, BMP, EMF, ICO, etc. Access Configuration menu and then set output format and rotation (if you want).
Now everything is ready. To take screenshots, access Video section and then select Window or Region option. Window option means you are taking the full desktop screenshot. If you have selected Region option, then you can select a particular region and then take the screenshots.
This software provides Camera icon on its interface for taking the screenshots. However, the thing is when you use that option, then its interface is also captured. Therefore, it is good to use the hotkey to capture screenshots. You can access Hotkeys menu to view the default hotkey or set a custom hotkey. After that, you can take screenshots and those are saved to default destination location automatically.
The Verdict:
This is a powerful screen capture software. Normally, we need to use separate tools for recording the desktop, taking the desktop screenshot, and recording the webcam, this software seems to be a very good option when we need all of these features in a single software. The best part is that it gives the option to include or exclude mouse clicks and keystrokes. I am highly impressed with this multi-purpose software. I can surely recommend it to you guys.