Hey guys! Sensei Pranjal is back with another tutorial! In today’s dojo, we will have a look at some easy steps that will allow you to add an extra clock in your Taskbar Tray. You might have a far off relative in another country, or maybe you just want to know what the time is at any given place at a specific point of time. Now of course, you can Google search the time in that location, but it is much more convenient to see the time from your system tray itself, without needing any internet connection. Right?
So let’s cut to the chase, and get started with setting up a secondary clock on your Windows 7 and Windows 8 devices.
How difficult is it?
Let’s just say that your grandma can do this as well. So yes, it is very simple. So just relax, and yeah, the quintessential is to follow the steps exactly as described in the tutorial below.
Difficulty Rating: Easy
The Steps Involved…
To set up a secondary clock on your Windows 8 device, you have to follow the simple steps below.
Step 1: Click on the clock on the system tray (at the right-most corner of the taskbar). Once you have done so, you will be presented with the following screenshot.
In the above window, click on Change date and time settings…
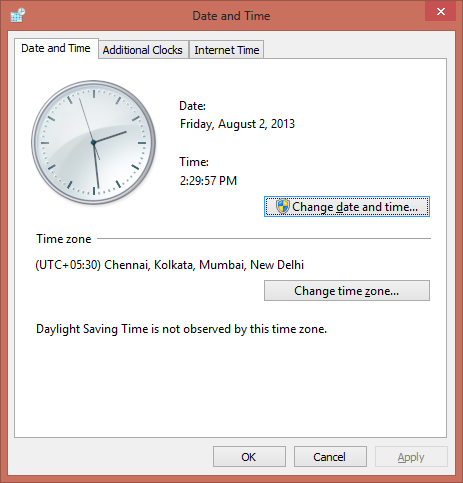
Step 2: Once you have clicked on Change date and time settings… , a popup window will appear on your screen. This window looks like the below screenshot.
In the above window, click on Additional Clocks tab at the top.
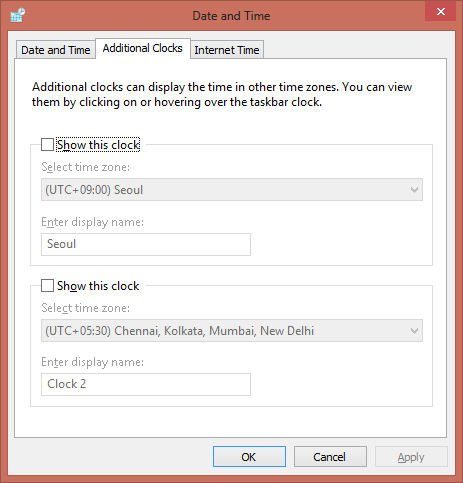
Step 3: Once you have clicked on the Additional Clocks tab, you will be now presented with an interface wherein you can select the time zone of the secondary clock. This looks like the following screenshot.
In the above window, you can choose up to two additional clocks to be displayed. Check the Show this Clock option, and select the time zone for the additional clock.
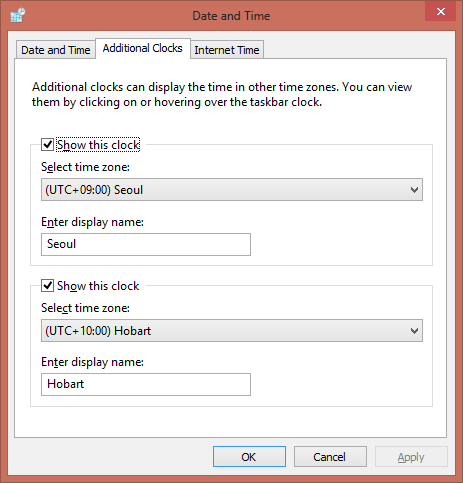
Step 4: Once you are done setting up the options, your window should look somewhat like the below screenshot.
You can change the display names of the clocks in the Enter Display Name text box. If you want only one extra clock, check only one Show this clock option, and choose the time zone for which you want the additional clock. Once you are done, click on the Apply button, and then click the OK button at the bottom of the screen.
That marks the end of the tutorial steps involved.
The result?
Now, when you hover over the clock in the system tray, you will see a popup for three times. (see below screenshot)
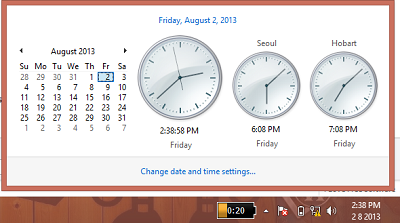
What’s more, when you click on the clock, you will be presented with three clocks ticking away! (see the below screenshot)
In the above screenshot, the bigger clock is for the local time, and the other two clocks are labeled as Seoul and Hobart. You can also name them as something else, by typing in a different name in the Enter display name section while configuring the additional clocks. (Read Step 4 above)
Well, now that Sensei Pranjal has taught you how to set up additional clocks, this marks the end of today’s dojo.
Have fun, guys!


