This tutorial demonstrates how to auto sync Android folders with Dropbox. In this tutorial, I will explain a simple method using which you will be able to automatically sync local folders from your Android phone storage with Dropbox.
The official mobile app of Dropbox can be used to automatically upload photos and videos from your phone to Dropbox using the “Camera Upload” function. But, it doesn’t allow you to automatically upload or sync other files like documents, archive files, etc. So, if you want to automatically sync all your files residing inside any local folder on Android phone storage with Dropbox, then this tutorial will help you do that.
There is actually a free Android app available named “Dropsync” which lets you auto sync Android folders with Dropbox with ease. Automatically syncing Android folders to Dropbox have many advantages like you don’t have to waste time on uploading files manually, backup your gaming data folders such that you never lose your progress, backup WhatsApp to Dropbox, and so on.
If you also use OneDrive and Google Drive for uploading files from your Android phone, then you can also check out our posts on:
- How to Auto Sync Android Folders with Google Drive
- How to Auto Sync Local Folders with OneDrive on Android
How to Auto Sync Android Folders with Dropbox:
The “Dropsync” app actually allows you to create a folder pair by connecting an Android folder and a remote folder on Dropbox. After that, when you activate the folder pair all the files inside the local Android folder will be in sync with the chosen remote folder on Dropbox automatically. Now, let me explain the steps required to auto sync Android folders with Dropbox below.
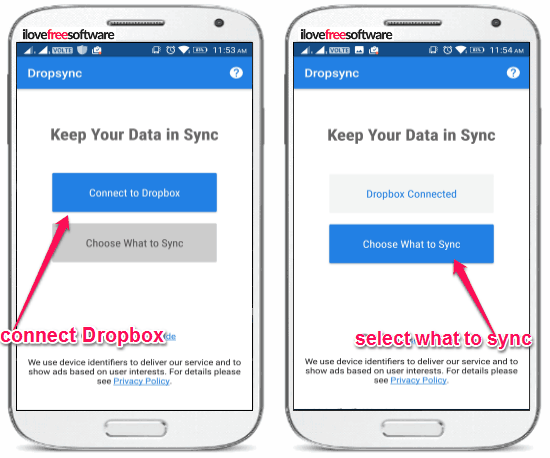
Step 1: First, you need to open up “Dropsync” app on your Android phone and then press the “Connect to Dropbox” button to connect your Dropbox account. After that, you can proceed to choose which folder you want to auto sync by tapping on the “Choose What to Sync” option.
Step 2: After you tap on the “Choose What to Sync” option, it will open up a new screen where you need to select the “Let me create my own folder pair” option. As soon as you do that, you can create a folder pair by selecting any local folder on your Android phone and a remote folder in Dropbox.
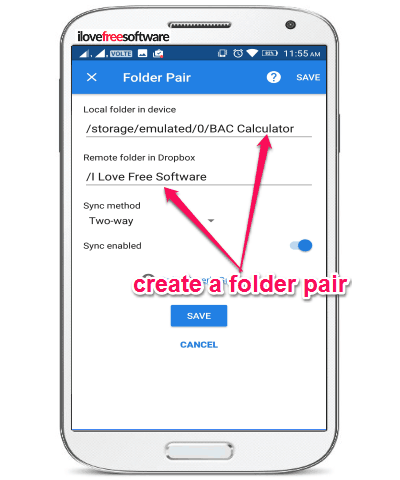
Step 3: When you’re done with selecting the folders, you need to choose the “Two-Way” sync method and also enable the “Sync Enabled” button to proceed. These parameters are very important for a folder pair to work. So, make sure you have selected these parameters properly before you save the folder pair.
Step 4: After you save the folder pair, it will automatically activate and start syncing the selected Android folder with the Dropbox remote folder. However, to enable the automatic syncing of these folders, you need to toggle ON the “Enable Autosync” button under the “Synced Folders” tab.
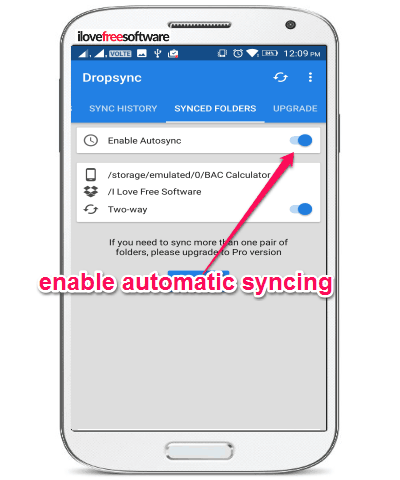
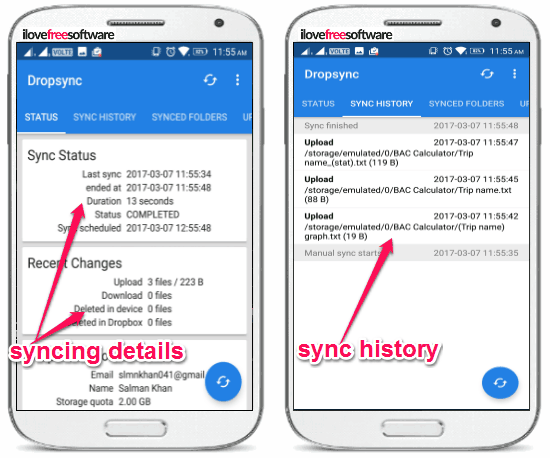
Once you do that, the “Dropsync” app will keep both the local and remote folders in sync with each other. That means whatever you will do in one folder (like add files, move files, delete files, rename files, etc.) will automatically update on the other folder from now on. You will also be able to monitor the syncing details and see the history of files which are being auto synced on this app.
My Final Verdict:
The “Dropsync” app makes automatic syncing of Android folders with Dropbox a cakewalk. So, if you have been looking for a way to automatically sync local Android folders with your Dropbox cloud storage, then go ahead and start using this app right away. It also helps you stop wasting your time on uploading files from phone storage to Dropbox manually.