This tutorial explains how to backup and restore Windows Subsystem for Linux. If you use WSL on Windows 10 or Windows 11 then you would like to make a backup of this at some point. And you will be glad to know that the new WSL2 supports backup and store functions as well. Not only that but if you want then you can restore backed up WSL on a different PC as well.
The backup function of WSL2 can backup the entire Linux system in a single TAR file. That file contains the operating system files as well as the user files. And there is a simple command to backup as well as restore that backup on same or different PC. It doesn’t matter what distro you are using in WSL, you will be able to back it up at any location with ease.
WSL backup taken on Windows 11 can be restored on Windows 10. So, it kind of supports backward compatibility as well which is a good thing for DevOps and programmers.
How to Backup Windows Subsystem for Linux on Windows?
Backing up WSL is very simple. For this post, I am using Windows 11 but if you are on Windows 10 then the process is exactly the same. Just make sure that you have an active WSL enabled with a distro installed and has some users files.
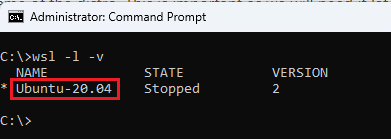
- Run this command to copy the name of the distro. This is important as we will need it later and we need the exact name of the installed distro. So, copy it down in the same format.
wsl -l -v

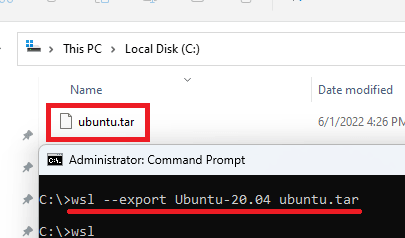
- Now, issue the command in the following syntax to start backup. You can save the backup TAR file anywhere you want.
wsl --export Distro_Name Backup_Filename.tar

- Done.
Now, in this way, you can easily backup WSL on Windows 11 as well as Windows 10. The process is simple and it will take some time depending on the size of the installed distro and user files.
How to Restore Windows Subsystem for Linux Backup on Windows?
After you have created backup of a WSL, you can restore it on same PC or a different PC. If you are intending to restore backup on different PC then make sure that it has an active WSL with all the dependency such as kernel update. Follow these steps to backup WSL from its TAR file.
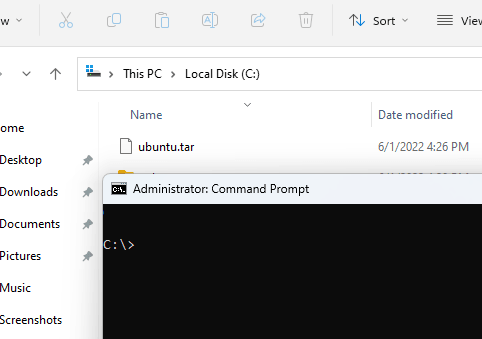
- Open the command prompt with administrator rights where the TAR file is.

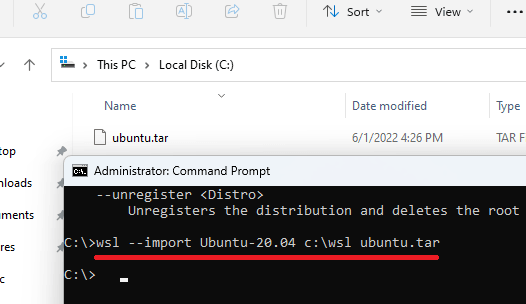
- Run the command below to restore the backup. Here you can change the destination path to extract and save the WSL files.
wsl --import Distro_Name Location Backup_Filename.tar

- Done.
These are the steps that you have to follow in order to restore a WSL on a PC. After restoring WSL, boot it and then you will find all your files intact in it. You can again make backup of this newly restored WSL using the steps mentioned in the earlier section.
Final thoughts:
If you are a WSL user then you will like to know about this handy trick of Windows to make a backup of it and restore that as well. I liked the fact that Windows developers have kept this functionality in mind and it is really useful. Especially, if you want to migrate from one PC to another then this backup-restore functionality of WSL will be really helpful.


