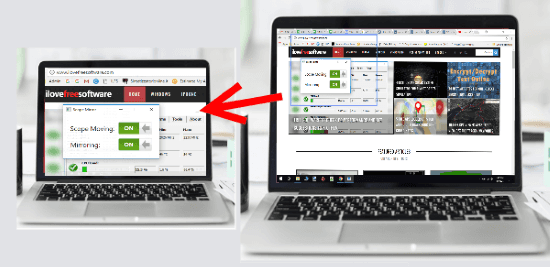
This tutorial explains how to mirror specific area of your screen to another PC in same network. The software that I will talk about here to do this is known as Scope Mirror and it can share a specific area of your PC screen to another PC easily. It comes with a client and a server that you can run on two PCs in your network to mirror a PC screen. You can select any rectangular region from your desktop to mirror it on another. And the changes will appear in the real-time. There is just a bit of configuration you will have to do.
If you want to mirror only a specific area of your screen, then this tutorial will come in handy. Also, this method is helpful when you want to project your screen to your colleague’s PC. There can be many reasons to mirror only a part of your screen. So, whatever reason you have, here you will see how you can do that.

How to Mirror Specific Area of your Screen to another PC in Same Network?
Scope Mirror is a simple software that you use to mirror only a specific part of your screen. You just need the IP address of the host computer and then you can start the mirroring process. There are no other features and functions in the software that you can opt for. This tool only focuses on mirroring your PC screen. However, it can only do that to PCs in a same network.
Here are the steps to get started with this software.
Step 1: Download the guest application on the PC whose screen you want to mirror on another PC. And download the host application on the PC which will receive the mirrored screen. Both the applications you can download from the GitHub page of Scope Mirror (see under “Lightning” section).
Step 2: On the host computer, run the “ScopeMirror.Lightning.Host.exe” application. And will turn the screen blank and will show the public and private IP address on it.

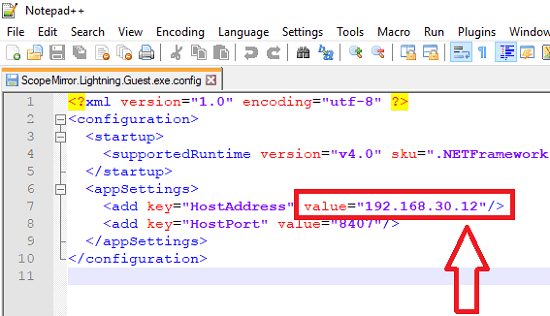
Step 3: Now, on the guest PC, first open the file “ScopeMirror.Lightning.Guest.exe.config” with any text editor. And then enter the IP address in the <value> tag as shown below. Save the changes afterwards.

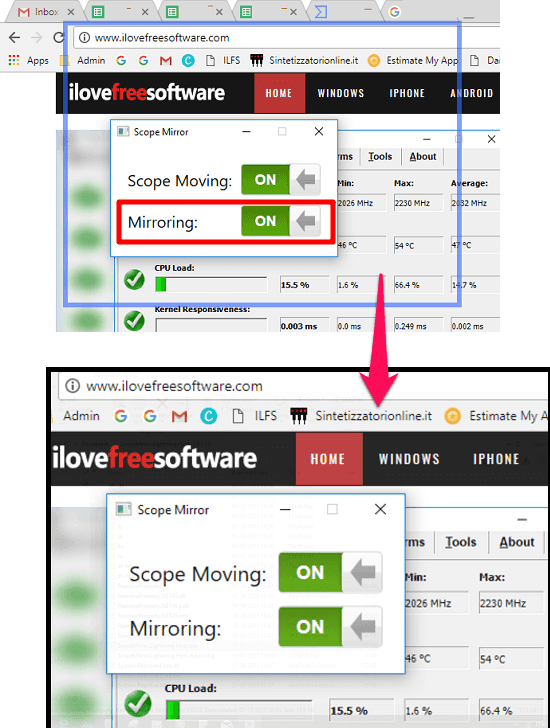
Step 4: Now, run the “ScopeMirror.Lightning.Guest.exe” application and then a rectangular border will appear that you can adjust in such a ways that it covers the area on your screen that you want to mirror on host PC. After you have chosen the region you want to mirror, simply enable the “Mirroring” switch to “On” and the selected area on your screen will appear on the host PC screen. See the below screenshot.

In this way, you can successfully mirror specific area of your screen to another PC in the same network. And Scope Mirror software will help you to do that easily.
Also read:
Closing Thoughts
There are some screen sharing software available but they can’t share a specific area of your screen. And if you want to do it, then in the above tutorial I have discussed it how to do that. You can easily mirror any specific region of your screen to secondary screen or display in just a few seconds.