MeetingBurner is a very useful online meeting scheduler that lets you schedule meetings or webinars. Once meeting has been scheduled, participants can join your meeting/webinar, and you can share your desktop screen with them. Even more, people can listen to your audio using the paid conference line (provided by MeetingBurner). MeetingBurner is different than other similar meeting schedulers, because this is not used to check users availability for attending the meeting. Using this service, you can ask invitees to join live meeting with shared screen.
Apart from this, people can even chat with each other. To get benefit of this service, you need to create a free account. Maximum 5 attendees can participate in meeting using this free version. A unique URL for each meeting is generated which you can give to required people. People can join your meeting without any sign up process.
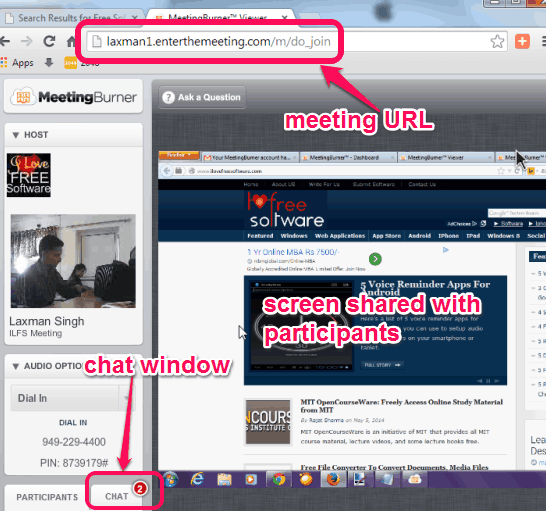
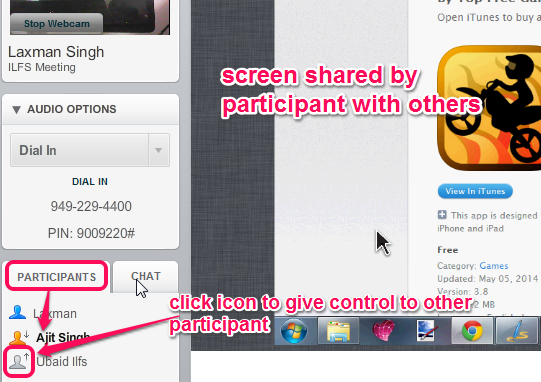
In above screenshot, you could see a meeting room created by me with shared screen.
Note: Free subscription of MeetingBurner has its own limitations. Only 5 participants are allowed in a meeting, you cannot record meeting, etc. But PRO and PREMIER accounts are also available for MeetingBurner. These two paid subscriptions provide huge number of participants, meeting recording feature, share recorded meeting, etc. You can upgrade anytime for paid subscription or can continue to use it freely.
Similar meeting schedulers: Calendly, TimeBridge, and agreeAdate.
How To Work With This Free Online Meeting Scheduler?
You first need to sign up to this free online meeting scheduler. Access its homepage and start the sign up process. You can use homepage link available at the end of this review. Using your first name, email address, and password, you can sign up.
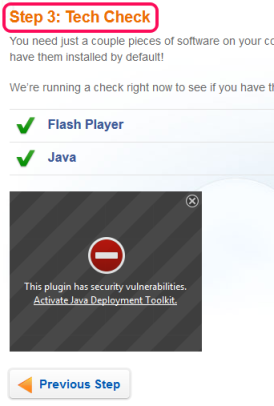
Just after sign up, a Starter wizard will open up. It is not mandatory to go through this wizard, but it is helpful to setup things for you. Such as: fill your profile details and to run tech check. Tech check is used to run if Flash Player and Java is installed on your browser or not. If not, then it will help you to download these two utilities. Therefore, wizard is useful.
After completing the wizard, it will prompt you to go through a demo meeting. Its your wish whether you want to join that meeting or not.
Now you are ready to schedule a meeting or webinar. Just few simple steps are required to schedule a meeting. These steps are as follows:
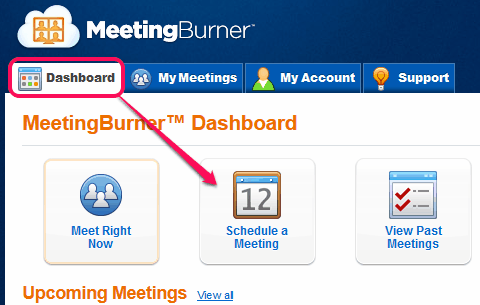
Step 1: Go to the dashboard of your account to schedule a meeting. Dashboard is also helpful to view past meetings (that had been finished). On your MeetingBurner dashboard, you need to select whether you want to schedule a meeting or want to start an immediate meeting. Choose any option accordingly. Lets take an example of scheduling a meeting. After clicking on this option, enter your meeting name and description.
Step 2: This step is used to enter meeting date, meeting time (start and end time), and time zone.
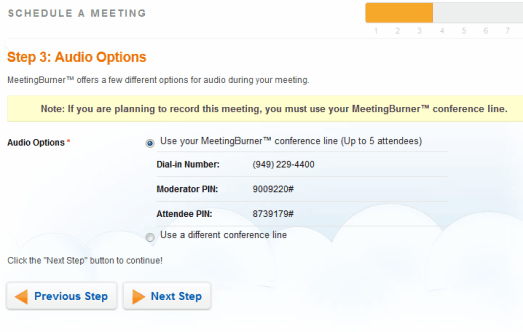
Step 3: Using this step, you can select audio conferencing options. You can use MeetingBurner conferencing option to dial in with preset Dial-In number, Moderator PIN, and Attendee PIN. This is a paid conferencing feature provided by MeetingBurner. Audio option helps to let participants listen to your audio (you will be requiring a microphone) during meeting.
If you don’t want to use it, you can add any other conference line by providing required Dial-In number, moderator and Attendee PIN.
Step 4: This step is used for Facebook integration. If you will allow Facebook registration, then users can join your meeting using their Facebook account.
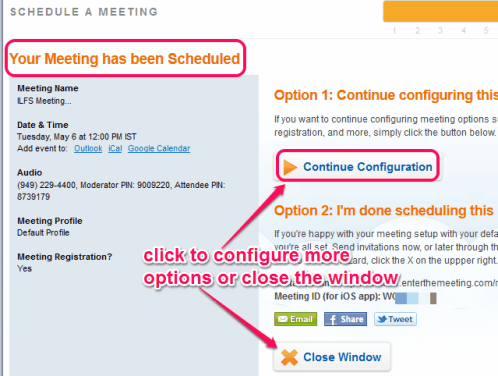
Step 5: This could be the last step to schedule your meeting if you don’t want to go for configuration options. Using configuration options, you can add password to join your meeting, fill meeting profile, and enable/disable users registration for attending the meeting. It is your choice what you have decided. Once the meeting is scheduled, a unique URL will be generated for your meeting.
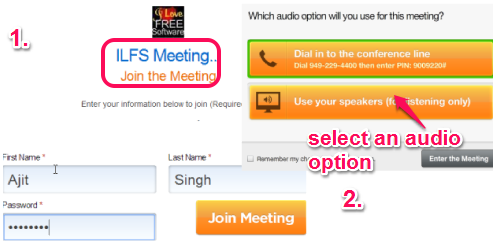
Similarly, more and more meetings can be scheduled. All meeting details can be accessed and edited using My Meetings section. Now you can copy any meeting’s join link to give to required participants. People can join meeting by entering the information set by you for joining your meeting.
After this, they will be asked to select audio option: Dial In or Speakers. Speakers are used to only listen to audio.
Enter The Meeting Room:
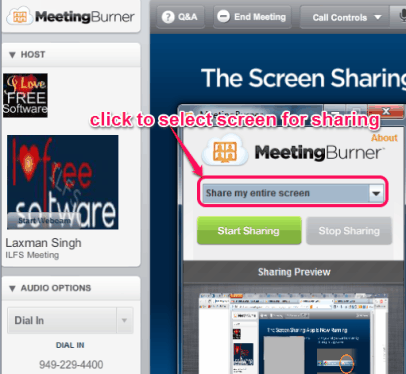
Once participants have joined the meeting room, you can enter meeting room with Dial In or Speakers option. As you are the owner of meeting, so you should go through first option. Immediately after entering the meeting room, it will show you option to download & Run Screen Sharing app (meetingburner.jnlp). To share your screen with participants, you should run it. Participants can’t share their desktop screen, but can see what is happening on your screen. For sharing your screen, you could select any particular opened window, or the whole desktop screen.
Now whatever activity will happen on your screen, participants can view it (if you have shared whole screen). Apart from this, at left side of meeting room, start webcam button is also available. Using this button, you can let others see your face or surroundings, if webcam is attached with your PC.
All participants on meeting room can be viewed at bottom left side on meeting room. If you will click on any participants icon, then you can give control of your meeting room to that person. Isn’t it interesting! Than that person can share his/her desktop screen with you and others.
To make meeting more valuable, there is chat tab available to let participants chat with others and you. Screen sharing feature is surely beneficial, but it is quite slow. Screen will show up at your end with some time delay. Once your meeting is completed successfully, you can end the meeting with available button.
Conclusion:
MeetingBurner is an interesting service as not only you can schedule meetings with people, infact you can perform live audio conferencing and screen sharing. However, I can’t exactly say screen sharing feature live. But MeetingBurner is handy for business partners, collaborators, and other users as well.
