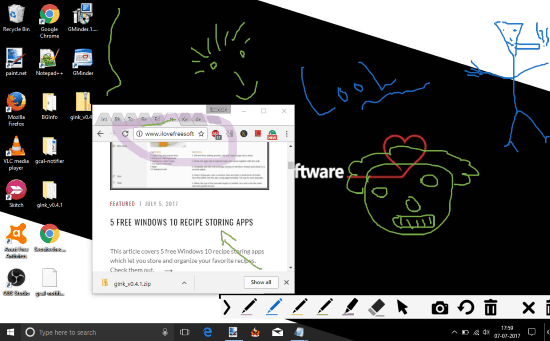
Open Source software gInk is a free screen annotation software that lets you draw on desktop screen with different pens. The best part of this screen annotation tool is that you can switch between applications, open folders, and other programs in between the drawing and then continue drawing from where you left off. This feature makes it stand apart from the crowd. While other similar tools freeze desktop screen to enable drawing mode, this tool lets you draw and open any application without closing the drawing mode. Once the drawing is completed, you can take a screenshot of full screen or specific area and save it as JPG image.
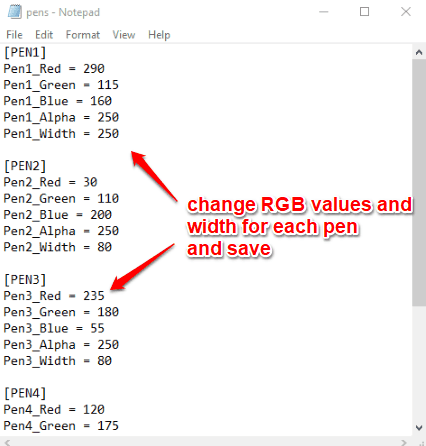
This software, by default, provides 5 different pen colors, but you can change RGB values of those pens so that you can use the custom colors of your choice. For each tool, you can set transparency and width as well. If you draw something by mistake, then you can also undo the last step(s) or erase the complete drawing and start from scratch.

In the screenshot visible above, you can see a masterpiece generated by me using this free desktop drawing tool. This desktop drawing tool is currently in beta version, but it worked like a stable version during my testing.
How to Use This Free Screen Annotation Software to Draw on PC Screen?
Here is the link to get the zip file of this free software to annotate screen. Extract that zip and then launch the software. It will start running in the system tray. To start the drawing mode, you can either use default hotkey (Ctrl+Alt+G) or double-click its system tray icon.
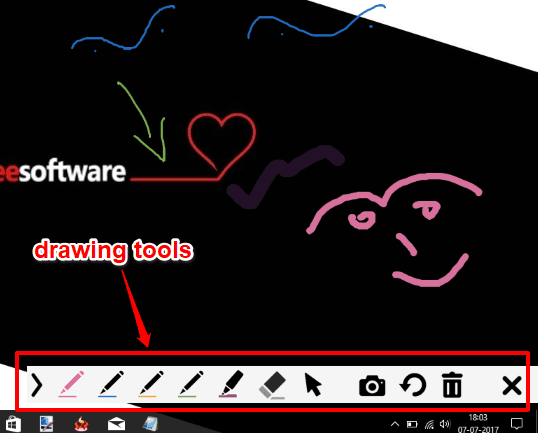
When the drawing mode is activated, your whole desktop screen will turn into a drawing sheet. That means you can draw anywhere on the desktop screen. You will see a drawing palette on the bottom right side, that contains:
- 5 Different colors of pens.
- An eraser to wipe the drawing.
- Arrow icon to pause drawing temporarily to switch between applications, open folders, etc.
- Undo icon to undo the last step, and
- Camera icon to enable screenshot capture mode. When screenshot capture mode is activated, you can capture full desktop or specific area and then your screenshot will be saved as JPG image.

Your drawing is saved to default location. Also, all 5 pens will have default transparency level and width. You can change it easily by accessing configuration files of this desktop drawing tool. For this, right-click on its system tray and you will see two options: Pen Configurations and Options.
Use Pen Configurations option to open the associated configuration file in notepad. After that, you will be able to change Red, Green, and Blue (RGB) values for each individual pen, set the transparency level, and width. You can’t preview the changes until you save the configuration file. So first save the file, re-launch this drawing tool, and then you will see changes in the colors of pens, their width, etc.

Using Options, a configuration file related to options menu of this tool will open. Using that file, you can change the destination location to save the drawing and set a hotkey to open drawing mode.

Try adjusting the options and then you can use this tool as per your needs.
The Verdict:
This desktop drawing tool is quite interesting and can be used by anyone easily. While other desktop drawing programs provide limited choices for pen colors, this tool lets you customize RGB values to use any color you want for drawing. Also, the feature to switch between applications while drawing is fantastic. It would have been better if this software came with a GUI to adjust settings, but editing the configuration files are also quite easy.