This tutorial explains how to create animated PNG from PNG and TGA images.
APNG Assembler is a free software to generate animated PNG file from still PNG and TGA images. You can add multiple supported images on its interface and quickly create APNG file which you can use wherever you want. For every single input image, you can also set the time delay that makes it more interesting. You can set time (in seconds) when the next image will appear after the current frame while playing your APNG image.
This process to generate APNG file is similar like creating animated GIF. Multiple images are packed (known as frames) to create a single animated file. Although, APNG file is not so popular as compared to GIF file. However, for any reason, if you want to create an APNG file, this software will be very useful.
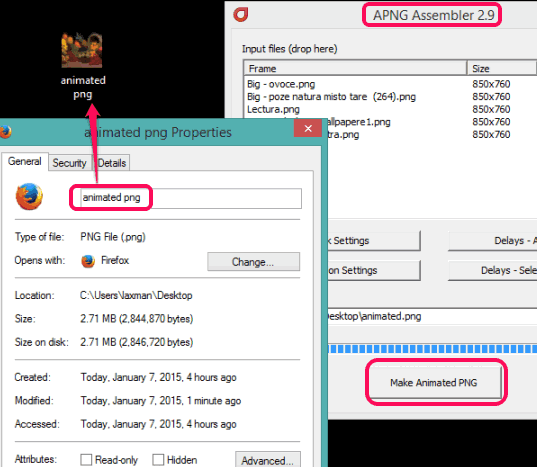
Above screenshot, shows the interface of this software and an animated PNG file created by me using this software.
Note: Make sure all input images are of the same size (height and width), otherwise it will show an error. Moreover, it checks the size of the first image and consider that size to be exactly same for the rest of the images. You have to resize all the images, before inserting them on its interface.
You may also check apng2gif, APNG Disassembler, and gif2apng.
How To Create Animated PNG from PNG and TGA Images using This Free Software?
Following steps will help you to easily create an animated PNG file using this freeware:
Step 1: Download its zip file using the link placed at the end of this tutorial. That zip file contains the portable application file of this software. You need to extract the zip file and execute its application file.
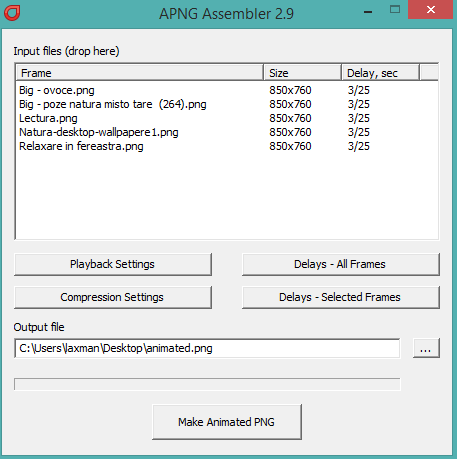
Step 2: On its interface, drop the PNG and/or TGA files that you want to convert into animated PNG.
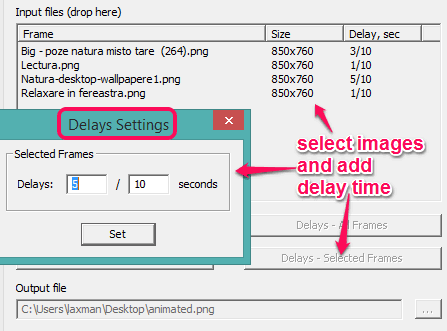
Step 3: After adding the images, it’s your choice whether you want to manually set delay time (in seconds) for input images or want to keep the default delay time. To add delay time for a particular image or multiple images, just select the image(s), and click on Delays – Selected Frames button. It will open a small box, like visible in the screenshot below.
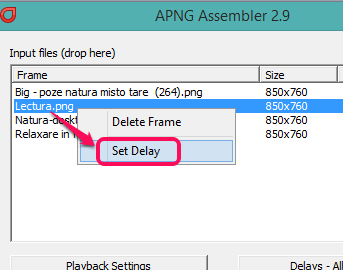
Add time delay in seconds and click Set button. You can also use right-click context menu option to select time delay for selected images.
Step 4: In this step, you can set ‘Playback Settings’ for output. You can set number of loops to play the animated PNG or can set it for infinite loops.
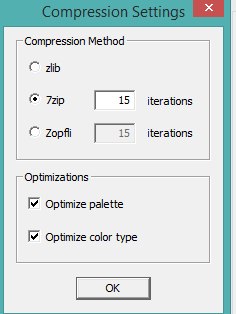
Step 5: Use Compression Settings button that will help to optimize the size of APNG file. You can use zlib, 7zip, or zopfli option for adjusting the compression level. Apart from this, you can also optimize color settings by enabling the Optimize palette (color palette) and Optimize color type option.
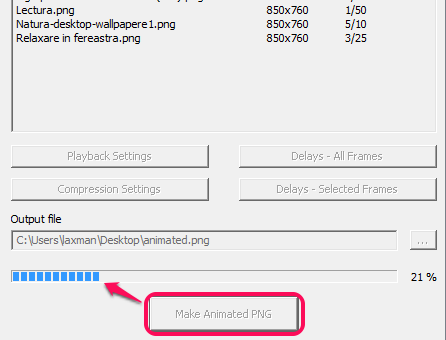
Step 6: In this final step, you can select destination location for the output file. After this, tap on Make Animated PNG button. Process to generate APNG file, will start which won’t take much time.
After generating the APNG file, you can play it with Firefox browser, or some standalone application that supports *.apng format.
Conclusion:
APNG Assembler is really handy for creating an Animated PNG file using TGA and PNG images. Its feature to set time delay for individual image or for multiple images is also good.
