This tutorial explains how to quickly switch between power plans using shortcuts in Windows 10. This comes in handy when you have created multiple power plans (like balanced, high power, and power saver) and need to switch between those power plans regularly. By creating the shortcuts of power plans, you can activate any of those power plans with just two mouse clicks.
To quickly switch between power plans using shortcuts in Windows 10 PC, you need to take the help of CMD (Command Prompt) and desktop shortcut creation wizard. CMD window helps to see all the plans available in your Windows 10 PC along with their Power Scheme GUIDs and shortcut wizard helps to create the shortcut of any plan with the help of its Power Scheme GUID. This tutorial covers all the steps to help you easily create the shortcut of power plans and then switch to any power plan using the desktop shortcut.

Above you can see shortcuts of three different power plans visible on my Windows 10 PC. Executing any shortcut will activate that particular power plan. While manually, you need to follow 5 to 6 steps to change a power plan. Using shortcut to change a power plan in Windows 10 is just one step and simpler.
How To Switch Between Power Plans Using Shortcuts In Windows 10?
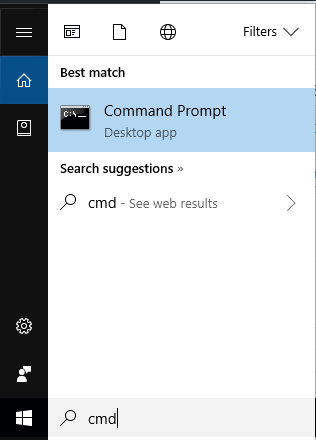
Step 1: Open CMD (Command Prompt) window using the Search box. See the screenshot visible below.
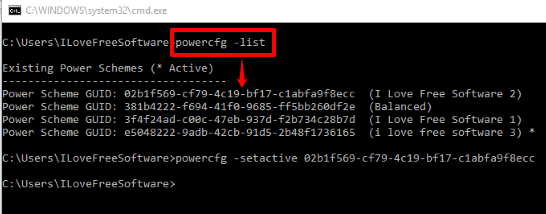
Step 2: Enter this command: powercfg -list. This command will show the list of all the available power plans including the currently active power plan. For each power plan, it also shows a unique “Power Scheme GUID“. Copy and paste these GUIDs to sticky notes or somewhere else as you will need them later. Or else, you can keep open Command Prompt window if you don’t want to copy paste GUIDs of power plans.
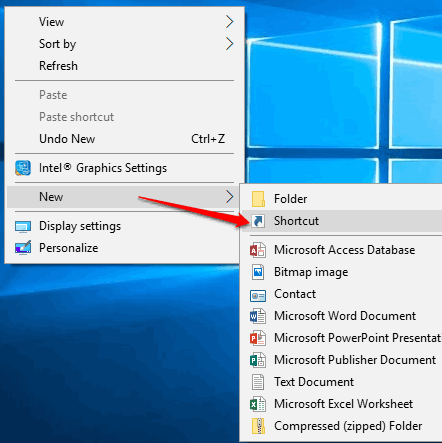
Step 3: Right-click on the desktop, access the “New” menu and click on the “Shortcut” option. It will launch the desktop shortcut creation wizard window.
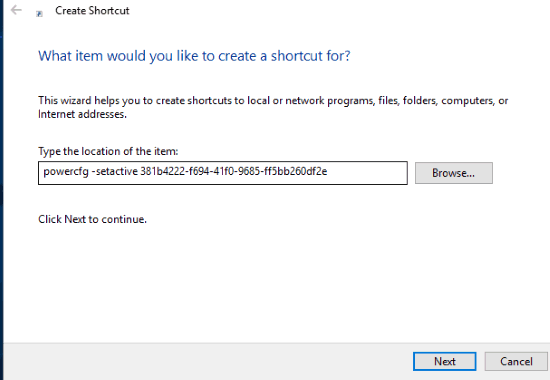
Step 4: In shortcut wizard window, enter “powercfg -setactive” press “space” and then paste the Power Scheme GUID of a power plan. So the full command would be like: powercfg -setactive e5048222-9adb-42cb-91d5-2b48f1736165. Remember that you need to enter the power scheme GUID that is visible for a particular power plan in your Windows 10 PC.
Step 5: Now give a name to the shortcut you are going to create. You can give it any name that will be easier for you to know which power plan is associated with that particular shortcut.
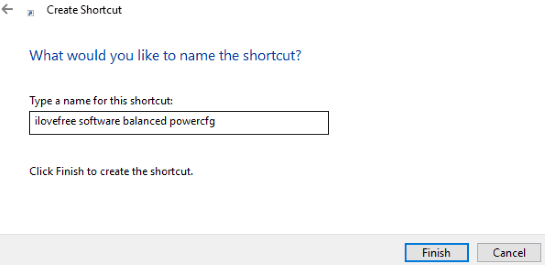
When the name is given, you can finish the wizard.
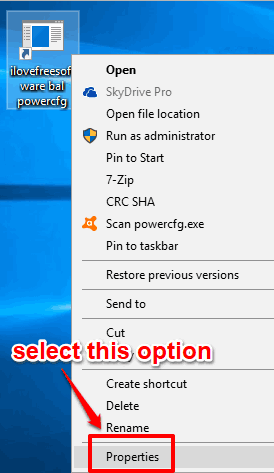
Step 6: You can execute desktop shortcut of that power plan and it will be activated. But, the shortcut icon doesn’t look nice. So, it would be good to change the shortcut icon with some power icon. For this, right-click on the desktop shortcut and then select Properties.
Step 7: Its Properties window starts with “Shortcut tab” and it contains “Change Icon” button. Click that button and another window will open. There paste this path and press enter: C:\Windows\System32\powercpl.dll. This will show some power icons. Select any icon of your choice.
![]()
Save the changes. Now power plan shortcut will show power icon selected by you.
Step 8: Repeat all the above steps to create desktop shortcut of some other plan.
That’s it! Whenever you have to change the power plan in Windows 10, you can double-click on any of the power plan shortcuts.
Other helpful tutorials related to power plans for Windows 10 are: How To Export A Power Plan In Windows 10 and How To Import A Power Plan In Windows 10.
The Conclusion:
We can easily create a power plan in Windows 10 and then change to any of the created power plans manually. But, to change a power plan manually, we need to open Control Panel, access Hardware and Control, go to Power Options, explore the list of available power plans and then select a power plan. This whole process contains multiple steps. Therefore, switching to a particular power plan using a shortcut is convenient and straightforward. Only two mouse clicks will help you change from current power plan to new power plan in Windows 10.