This article explains how to enable Start Screen in Windows 10. As almost everyone knows by now, Microsoft announced the latest version of its Windows family of desktop and enterprise OS’, called Windows 10, at an official press event a few days back. Windows 10 introduces a slew of new features and brings back some old ones. Out of these, probably the most notable is the returning Start Menu, which is now more powerful than ever, and is now present at its usual bottom left corner of the desktop in Windows 10.
If you’ve been playing around with the freely downloadable Windows 10 Technical Preview build, you must’ve noticed the redesigned Start Menu. But what if you’ve grown to love the Start Screen that was introduced in Windows 8, and want it back? Thankfully, your beloved Start Screen is still there. You just have to do a little tinkering. Wanna know how to enable Start Screen in Windows 10? Keep reading to find out more!
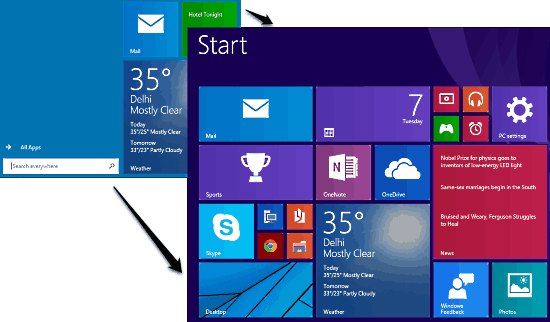
Why Does Not Windows 10 Display The Start Screen?
Yes, it’s true! If you’ve downloaded the Windows 10 Technical Preview build and spent some time with it, you must’ve noticed that the Start Screen is no longer there. But that doesn’t mean it’s gone. It is still an integral part of Windows (and for the foreseeable future, will be). However, Windows 10 Technical Preview has the Start Screen disabled by default. That’s the reason it directly boots to the desktop mode, with the Start Menu enabled.
How To Enable Start Screen In Windows 10?
Now that we know that the Start Screen is there in Windows 10, it’s time to get it back. Enabling Start Screen back in Windows 10 is really easy, and all it takes is a few clicks. Follow the simple steps outlined below to get the Start Screen in Windows 10, in almost no time:
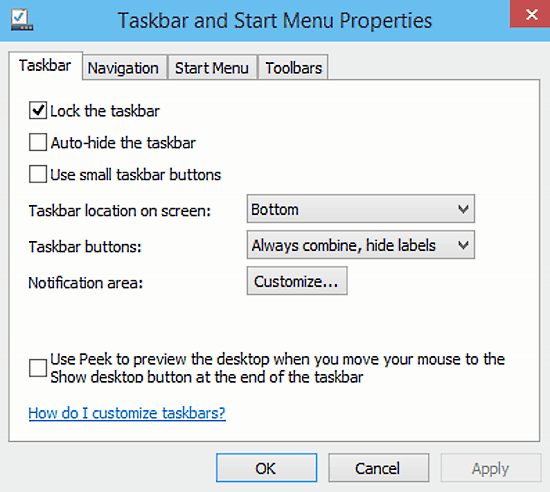
Step 1: While on the desktop, right click on the Taskbar and select Properties. This should fire up the Taskbar and Start Menu properties dialog box:
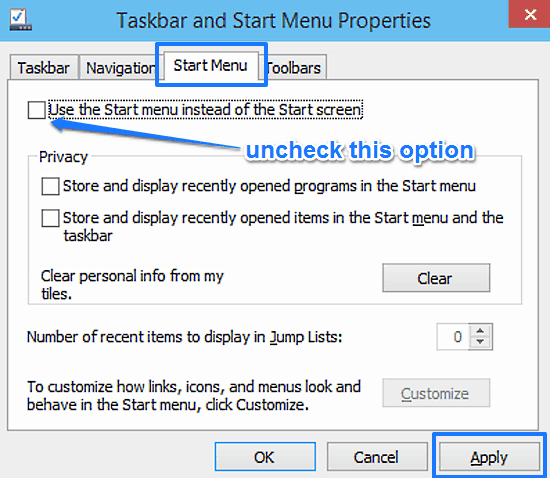
Step 2: Navigate to the tab named Start Menu. Once there, you’ll see an already selected checkbox, labeled with the words ‘Use the Start menu instead of the Start screen.‘ All you have to do now is uncheck this option. Hit Apply, followed by OK.
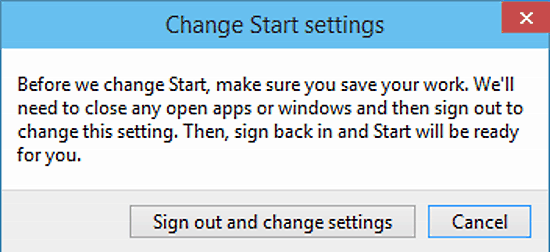
Step 3: To make the change, Windows 10 will need to sign you out (and then back in). Consequently, a dialog box will pop-up, asking you to save any changes. Hit the Sign out and change settings button.
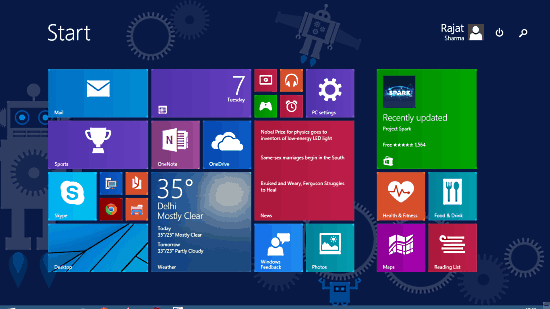
Step 4: That’s it folks! You’ll now be automatically signed out of Windows 10. And once you log back in, your good ol’ Start Screen will be there, waiting for you! That wasn’t hard now, was it?
Also See: Windows 10 Announced By Microsoft: A Lot Of Exciting Stuff, And Then Some More!
Conclusion
When Start Screen was introduced in Windows 8, a lot of hue and cry was raised over it. Probably this is the reason behind the re-introduction of the Start Menu in Windows 10. However, despite the fact that a majority of the users didn’t react positively to the Start Screen, a lot did (I, personally love it). If you’re already using Windows 10 Technical Preview and want the Start Screen back in Windows 10, simply follow the steps detailed above. Can’t get any simpler than that, right?