myCollections is a free multimedia file manager that helps you to organize multimedia files in a much easier manner. This free multimedia file organizer has been programmed to help the user to navigate and manage all their multimedia files on their system with ease and from a single place. These multimedia files could be all your movies, music files, games, or even apps which you have on your system. There are some more advanced features which this software comes with which have been discussed below.
Installing this multimedia manager
The installation process is quite simple where you need to open the site of the developers here and click on the download link. Once you do so the zip folder gets downloaded on your system where you need to extract all the files inside. Once you do so you have to click on the myCollections.exe file to launch this free multimedia file manager. It’s all you need to do to start using myCollections where you need not install it on your computer. You can also try Data Crow, Helium Music Manager and Jaangle reviewed by us.
Using myCollections
Once launched, you would see a greenish interface which has several options all over. The center of your screen would seem to be blank whereby the left corner of the main window would have the option to add media or create charts. In order to start using it you need to run the auto scanner which is an automated search which myCollections would perform once you have selected the relevant options. This free multimedia file organizer would scan your hard drive for the related files and folders once you have initiated it with the options on it.
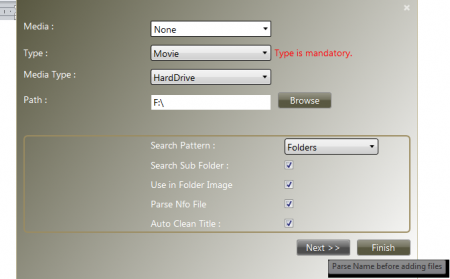
To do that you need to click on the add media option, which opens up a popup on your screen with some options which need to be selected. The options that need to be inserted are as follows:
- Media: You need to select the specific media files which you wish to search on your system.
- Type: This is a place where you need to search the type or category of file you wish to search. For example if you are searching for Movies, music, books or other things listed in the drop down you need to select the one which you are looking for.
- Media Type: Here you need to select the place where you wish to search i.e. your hard drive or the cd in your cd drive or any of the other options listed in the drop down.
- Path: Finally you need to browse the path or the drive location where you wish to scan for the type of files you are looking for.
- Other options: Below these you need to check or uncheck the places or type of files you wish to ignore in your scan process.

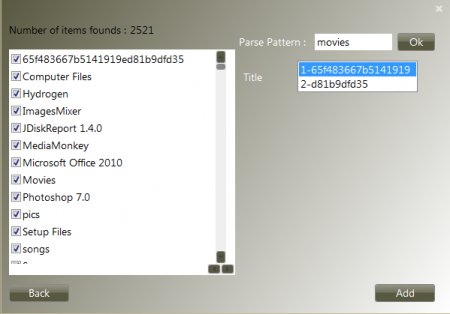
Click on next and the files on your drive would be searched. It takes around 10-15 seconds depending on the number of files you have and you are presented with the new window asking you to enter Parse Name and add the particular section to the program. The moment you click on Add a new processing starts for the entire files that had been found on your drive. It would take another couple of minutes to process depending on the number of files that had been scanned.
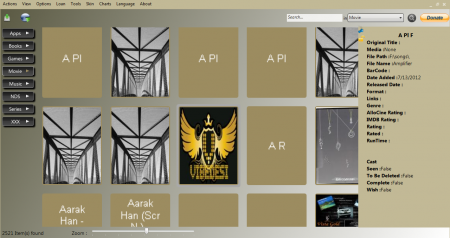
After the processing completes you are brought back to the main window where you need to click on the relevant head where the files have been saved to access them. Once you do so, all the files under it would be displayed on the main screen in thumbnail format in the big blank area. You can click on any of the files and move your cursor to the right of the screen which would open up file properties of the particular file.
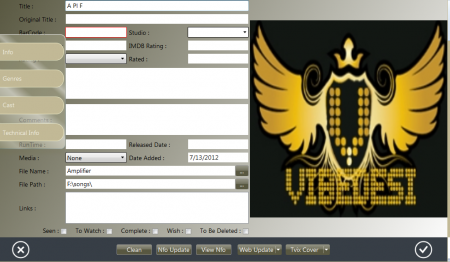
You can make changes to the location, description, and several other sections for a particular file by double clicking on them. This opens up a new window as shown below.
There are lots of other things which you could do with this program whereby to make changes to your preferences and other settings for the nature in which the myCollections runs could be changed from the options available in the menu bar.


