Filezilla server is a free FTP server that is cross-platform and open source. With this software you can create a FTP server with much easy. This article will guide you through the whole process.
The software started out as a class project by two classmates in 2001. And has gained amazing popularity across all platforms. And is now known as one of the best FTP server available for all major platforms.
Filezilla Server is definitely not the only good FTP server out there. We have already reviewed a few, like, Home FTP server, and Golden FTP server. However, Filezilla is quite stable, and has regular updates. It is one of widely used open source FTP server software and open source community keep adding new features to it.
FTP (File Tranfer Protocol) is used transfer files over the internet between devices. Through FTP we can share driver, folders, files etc. in an organization, home network, or over the internet with an external computer. FTP is one of the most simplest ways of sharing files between computers and hence has become so popular. It is based on client-server architecture. We will learn here how to deploy a FTP server and how to access it from anywhere.
Installation and configuration for Filezilla server:
- Start the installation by double clicking on the downloaded file (Download link at the end).
- Keep clicking next, the installation will be over in a while.
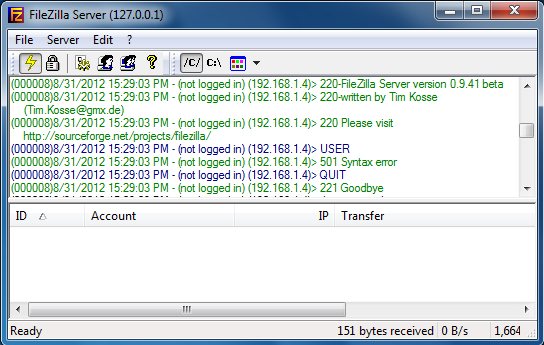
- Start the application by double clicking the desktop icon or from the start menu, remember you have to start FileZilla Server Interface. Now you will be greeted with the main window.
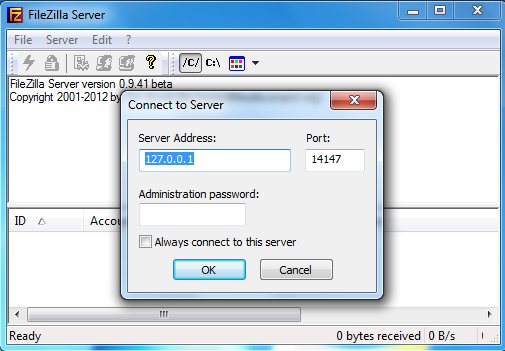
- Let the server address remain the same, as you want to create and administer a server on your device. Add an administration password for security, and click on okay when you are done.
- Now you will see Filezilla icon in the system tray as shown in the screen shot below. This means the server is working.
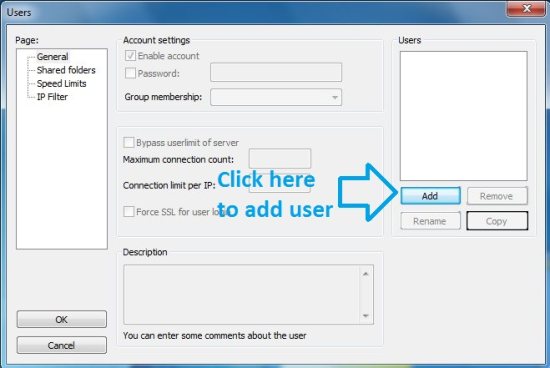
- Now navigate to Edit -> Users from the menu. Here we will create an single user as an example.
- You have to add a user and password, so that you can keep your files secure and only the allowed users can access their quota of the rights over an directory or a file.
- Add an user by clicking on add button and naming the user.
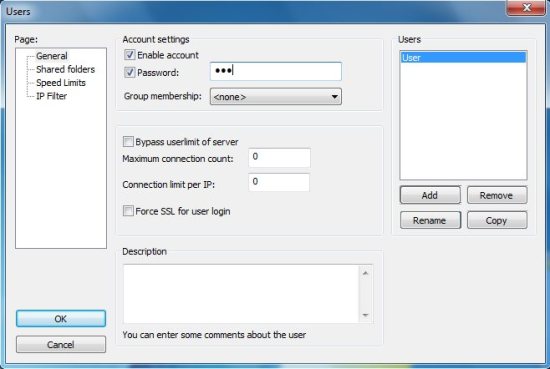
- Now select the user you created here and enable the account and set a password for them.
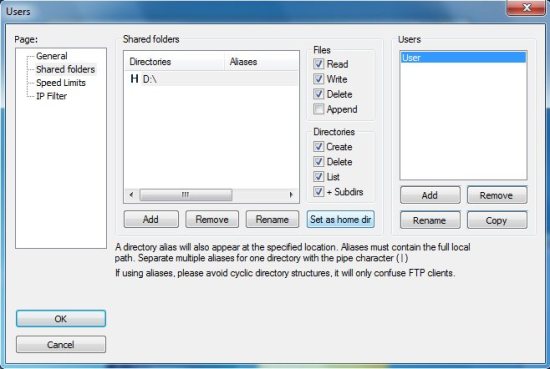
- Then navigate to the Shared folder page from the left hand side of the window. Click on Add and select the directory you want to share, give the rights as required for the user and click okay button.
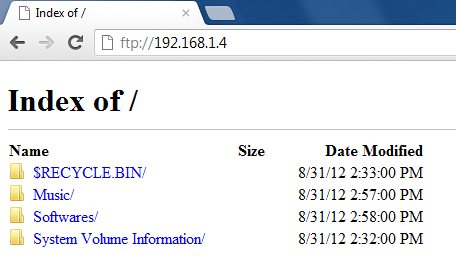
- Now the user has been created and a directory has been granted to them. To access the files just open up any web browser and put your IP in the following format(ftp://your ip). To check what your ip is open up command prompt and type ipconfig.
- A dialog box will come up here. Just put the credentials of the user you created and login.
- Now you will see the files and folder in the directory as below.
 Note: Make sure this application is allowed to communicate through the Windows firewall by the going to Control panel -> System and Security -> Windows Firewall -> Allowed Programs.
The Server is now online and can be accessed by using the ip of the computer, which is running the FileZilla ftp server. This a nice solution for running a file sharing system inside an organization or home. If you want to access the ftp from the an external computer or other device then make sure that the computer running the application has a Static IP. You can access this FTP server using any FTP client for Windows.
Features of Filezilla FTP Server:
- Filezilla server does not consume too much RAM and CPU.
- It is easy to configure and maintain.
- It supports FTPS, SFTP, and FTP.
- It supports SSL which provides secure connections to the server.
- It supports on-the-fly data compression, making the files smaller and reducing transfer time.
- IP blocking.
- Speed limits on groups and users.
- Supports multiple operating systems (Windows, Linux, Mac OS X).
- Best of all, filezilla server is open-source and free.
Click here to download FileZilla FTP server.
