Here, is a simple tutorial that will enable you to change cursor thickness in Windows 8. The cursor is the blinking vertical line that you get when you are writing stuff on a computer. These settings, like in earlier version of Windows, are located in the ease of access center, but the process of navigating to the ease of access center is different. Also the interface of ease of access settings have been completely changed.
So, here is an easy and step-by-step tutorial that will enable you to navigate through the Windows 8 and change cursor thickness in Windows 8.
Steps to change cursor thickness in Windows 8:
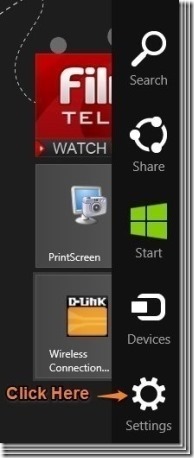
- The first thing that we are supposed to do is to open up the charm bar. So just press the combination of the Windows Key + C and charm bar will open up as shown in the screenshot below.

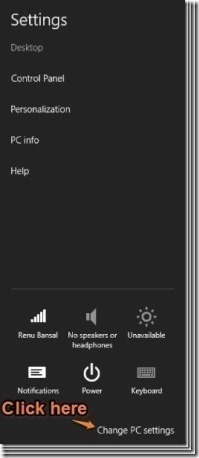
- Now that you have the charm bar opened, click on the button named settings as pointed out in the screenshot below. This will open up the settings panel as shown below.

- The next setup here is to open up the PC settings window. To do so just click on the option which says change PC settings as pointed out in the screenshot above.
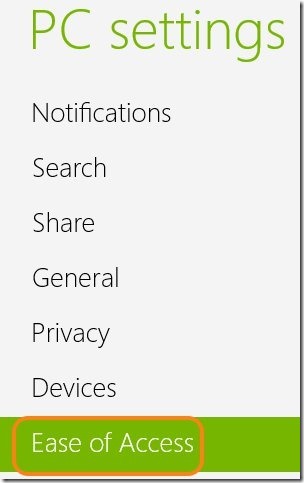
- Now just head over to the Ease of Access options as highlighted in the screenshot below.

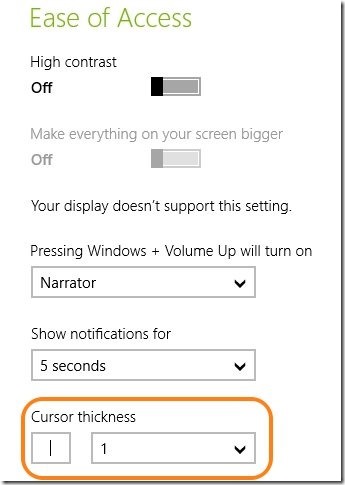
- The ease of access options is shown in the screenshot below. Now just change the value of the cursor thickness as pointed out in the screenshot below. The thickness of the cursor is displayed in the option this makes things so much more easier.

Now you can change the thickness of the cursor according to your need anytime.
So, if you don’t like the default tiny winy cursor that Microsoft provides, use the steps above to customize width of cursor as per your liking.
Here are some other interesting Windows 8 tutorials worth checking:
How To Delete Search History In Windows 8
