This tutorial explains how to add one more column to Windows 10 Start Menu.
By default, there are 3 columns in Start Menu of Windows 10. The left column shows the recent apps, most used, and all apps and rest of the two columns are used to add or pin tiles. However, do you know that there is a secret or hidden column that you can activate in Windows 10 Start Menu? This will help you add more tiles (your favorite programs) and have more space on Start Menu.
You need to perform a few mouse clicks only and then you can activate that secret column for Start Menu. You also don’t have to restart the PC. As soon as you activate the column, it is visible in the Start Menu. You can also switch back to the default 3 columns layout whenever you want.

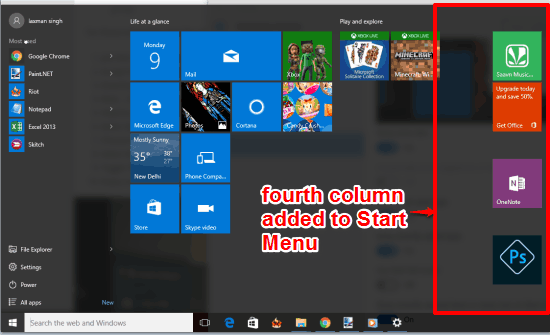
Above you can see the fourth column added by me in Windows 10 Start Menu.
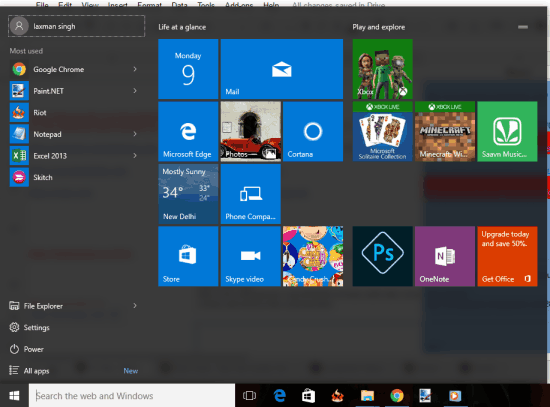
In the screenshot below, you can see the default Start Menu, which contains only 3 columns.

You may also read some other important Windows 10 tutorials:
- How To Customize The Windows 10 Taskbar.
- How To Enable Transparency for Windows 10 Start Menu.
- How To Customize Start Menu In Windows 10.
How To Add Fourth Column In Windows 10 Start Menu?
Following are the steps:
Step 1: You first need to open the Settings window. Use Start button or Search box to access Settings.
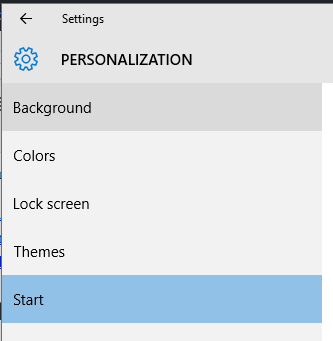
Step 2: Now click on Personalization option. It has many options. You need to click on ‘Start’ option.

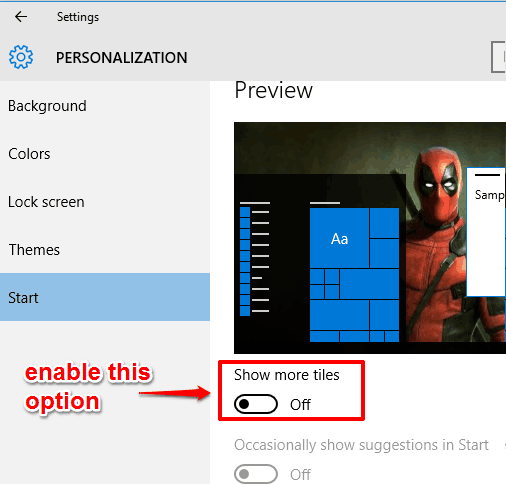
Step 3: Start option contains multiple sub-options. You need to find and enable Show more tiles option.

That’s it! It will immediately activate the new column and add in the Start Menu. You will also be able to see the preview within that window.
The Verdict:
This fourth column is really beneficial for all those Windows 10 users who access their favorite programs directly from the Start Menu. Activating this secret column will provide more space in Start Menu to pin more tiles.