This tutorial explains how to disable Registry access in Windows 10. By doing so, no one, including you, can access the Registry until you manually disable the lock or allow access. There are three different options covered in this tutorial to lock Windows 10 Registry. I have used Group Policy Editor and two free software. You can’t set the password protection, but yes, the access to Registry can be denied easily using any of these options. Of course, if someone knows how to remove these settings, they will still be able to access registry, but that will be difficult for a normal person.
Whenever you or someone else will try to open Registry Editor after applying the lock, a message will appear that “Registry editing has been disabled by your administrator“.
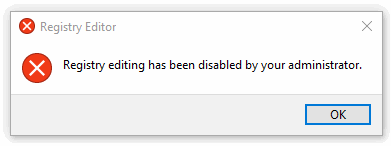
Option 1: Disable or Lock Registry In Windows 10 Using Local Group Policy Editor:
This option is useful for people running Windows 10 Pro and Enterprise editions. Local Group Policy Editor is not available in Windows 10 Home edition.
Step 1: You can use Run command (type gpedit.msc) or the Search box to open the Local Group Policy Editor window.
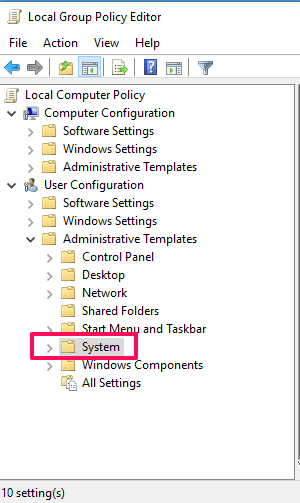
Step 2: Now go to: Local Computer Policy → User Configuration → Administrative Templates → System.
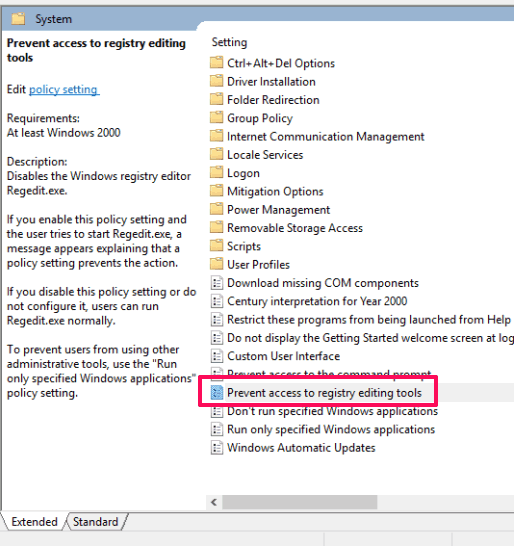
Step 3: Now at the right side, you will see multiple options. You need to find and double-click on “Prevent access to registry editing tools” option.
Step 4: A new window will be in front of you. In that window, you need to click on the Enabled button. That Enabled button is used to prevent registry access.
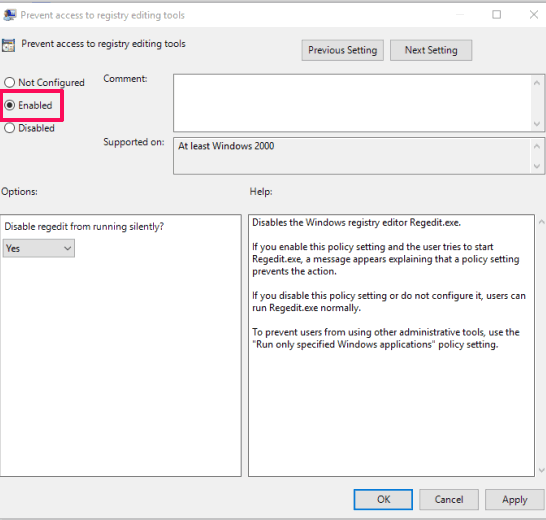
Press Apply and OK buttons to save new settings.
Now try to access Registry Editor. You will get the error that administrator has blocked registry editing. To regain access to registry, follow the same steps and choose “Disabled”.
Option 2: Lock Windows 10 Registry Using A Free Registry Permission Tool:
Users who are not able to access Local Group Policy Editor, because of different Windows 10 edition, can use this free and simple software, “Registry Permission Tool“, to lock Windows 10 Registry.
Step 1: Get the zip file of this software and extract it.
Step 2: This is a portable tool. Open its interface (run it as administrator) and on the right side you will see two options: disabled and enabled. These options are used to disable access to Registry. Select ‘disabled‘ option and press Set button.
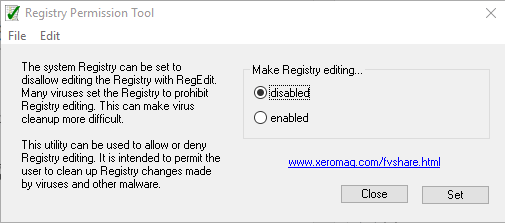
That’s it! The Registry Editor is blocked.
Step 3: To get back access to Registry, you can use its interface and set ‘enabled’ option.
Users who have access to Group Policy Editor can repeat the steps mentioned in Option 1 to enable the registry access.
Option 3: Disable Registry Access In Windows 10 Using a Powerful Ultimate Windows Tweaker Software:
Ultimate Windows Tweaker is another free and portable software that comes with hundreds of tweaks. Among those tweaks, there is one tweak available to disable access to the registry.
Step 1: Grab the zip file by accessing its homepage and then download its zip. Open the UI and multiple menus will visible to you on the left side.
Step 2: Click Security & Privacy menu and options available under that menu will visible at the right side under Security Settings tab. Now you need to click on Disable Registry Editor option.
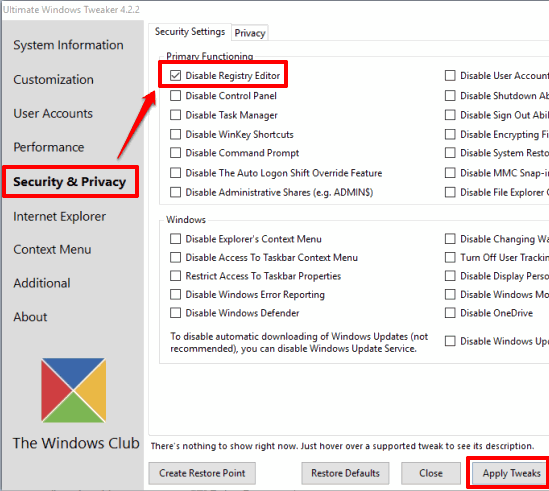
Step 3: Finally, you can press Apply Tweaks button. The selected option is applied and then ‘File Explorer’ is refreshed automatically.
After that, when you will try to open Registry Editor, you will receive an error. Whenever you have to get back the access, you can disable that option.
The Verdict:
Windows Registry is a very important part and when you want to prevent access to it, any of these 3 options will be helpful. You can also monitor Registry to check if there are any changes without your knowledge, but preventing access to Registry is a more useful in case you don’t want unauthorized people to access it.