Tmplink is a Free Web Application for Temporary File Storage and Transfer that allows you to set a validity on all the uploaded files.
You can choose to upload and store files permanently or provisionally for 24 hrs, 3 days or 7 days. If any user downloads a file whose validity period is 3 or 7 days, the validity is once again extended (reset) to the same duration. You can organize your storage with folders to store different types of files. Once the files are uploaded, they can be shared with others using a link or a file key.
How it Works:
1. Navigate to Tmplink using the URL provided at the end of this article.
2. Click on Sign in to Login or to register for a free account using your Email address.
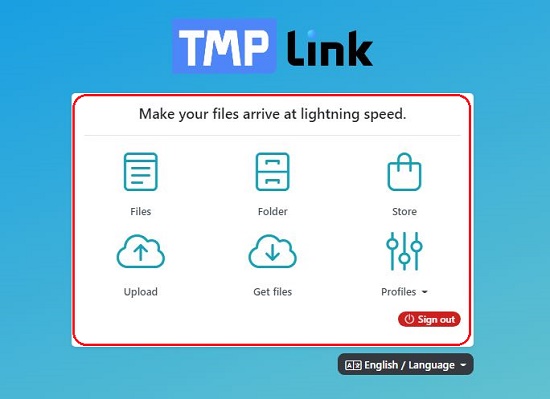
3. The main interface that is displayed after login allows you to Manage Files and Folders and Upload / Download files.
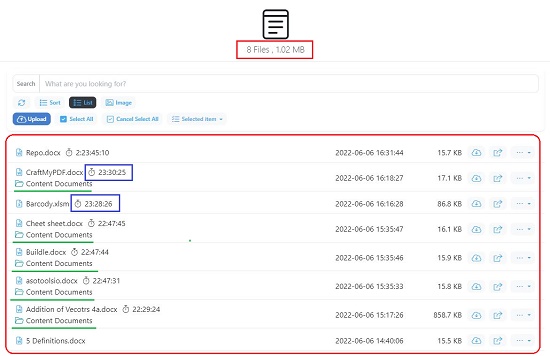
4. Click on ‘Files’ to view / manage all the uploaded files. The Location (folder) of each file is depicted below its name and the adjacent countdown timer shows the time left before it expires.
5. To Create new folders and Manage existing Folders, click ‘Folder’. Next click on ‘Create Folder’, give it a Name, assign the Permissions (Private / Public) and click on ‘Ok’. You can create Unlimited folders to organize all your files in separate containers.

6. Click on any folder name to open the folder. You can now click on ‘Create folder’ to create subfolders inside it. Click on ‘Preferences’ and switch on the Toggle for ‘Collaboration’ if you wish to allow others to upload files to this folder. To copy the folder link, click on ‘Share’ in the Folder window and share the link with for collaboration.
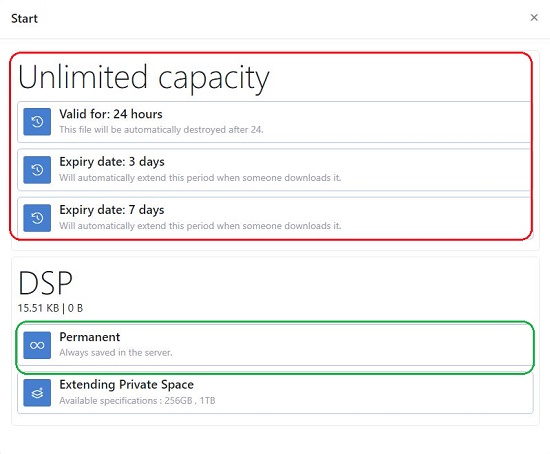
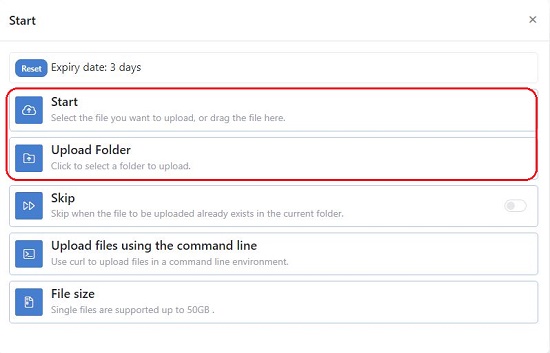
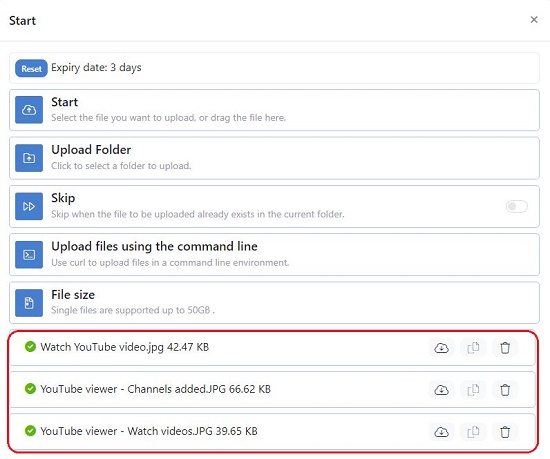
7. Click ‘Upload’, and from the popup windows that appears, select the duration for which you want to store the file (24 hrs, 3 days, 5 days or Permanent). In the next popup window, click ‘Start’ to upload the files. You can also drag and drop the files in the marked space. If you wish to upload an entire folder from your local disk, click on ‘Upload Folder’.
8. Successfully uploaded files are indicated at the bottom of the window with green tick marks. Click on the ‘x’ sign to close the window. All the uploaded files for the selected folder will be visible, with a countdown timer beside it indicating the time duration left for its expiry. You can copy the link to the file by clicking on the small ‘Share’ icon for each file name. You can also sort the files in the selected folder by clicking on ‘Sort’ and customizing the order.
9. Click on any filename to open all the activities associated with it. To generate the link (URL) or file key, click on the relevant icons in this window. You can also click on ‘QR Download’ to generate and save the QR code (for the link) to be shared with others.
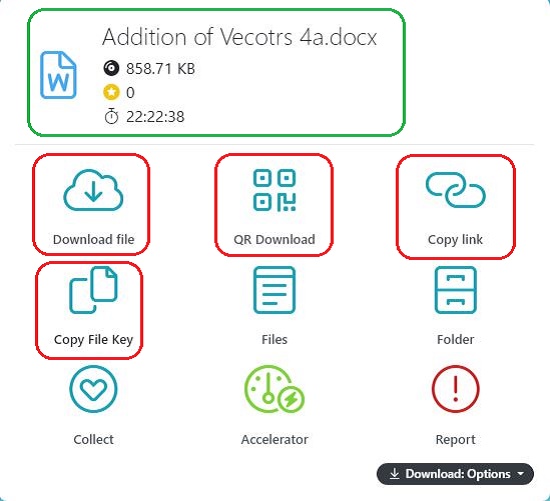
10. To download the files, users must have registered for a free account. Once you share the URL or QR code with others, they can download the file directly by using the link. If you share the file key with them, they can download the file by clicking on the ‘Get Files’ icon on the main page and specifying the file key that you shared with them.
You can use Tmplink without registering any account but only one file (upto 50 Gb) can be saved / uploaded. You can then share the link or file key with others so that they can download the file.
Downside:
- The option to allow others to save files in your folder doesn’t work. Despite configuring the setting, the folder seems unavailable to other users.
- Data Safety and Security policies of the Web application aren’t clearly mentioned anywhere on the website.
Final comments:
Overall, Tmplink is a good tool for temporary storage and transfer of files to other users. The facility to set an expiry date on each file is very handy. There are no clearly mentioned policies about Data Safety and Security, hence users availing Tmplink should be cautious about uploading any personal or sensitive data.
Click here to navigate to Tmplink and try all the features.