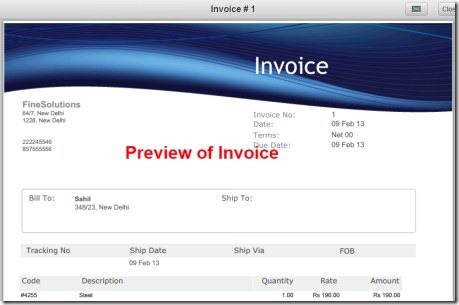
Invoice2go is an app available free for Google Chrome that lets you easily create invoices and estimates online on your Google Chrome. Using Invoice2go, you can easily create an invoice by choosing a desired template style. Even more, you can send the desired invoice to desired customer(s). Moreover, you can also preview your invoice before emailing.
Creating an invoice is an easy task with the help of Invoice2go. You can also easily track or keep an eye on those people who owe money to you. It’s a suitable app for you if you are running a business (dealing in product or service). There is a lot to do in this handy app. And all this could be done for free.
Key Features of Invoice2go:
- Easy to create invoices.
- Send invoice to desired customers.
- Choose desired template style from over 21 styles.
- Preview facility available to look over your invoice.
- Use it for free on your Google Chrome.
How To Create Invoices Using Invoice2go?
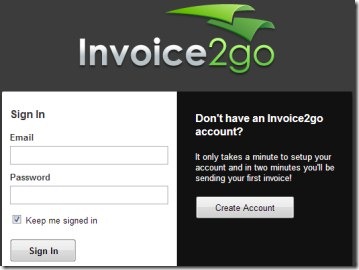
Creating an invoice is not a difficult task using Invoice2go. Firstly, you need to add Invoice2go. Click on this given link to add this handy app to your Chrome browser. After adding it, you can access it easily from the apps page(new tab). Just click on its icon and it will direct you to a new web page. Here in this web page, you need to sign up for free to create an account as you could see in the above given screenshot. Just create an account by simply providing your desired email and password.
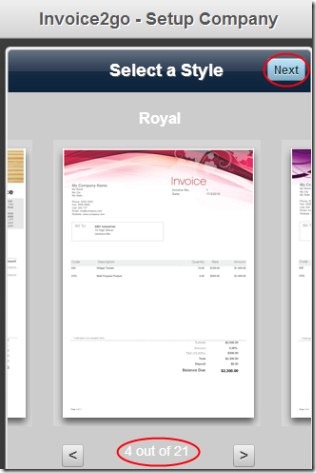
- Just after this, it will ask you to set up your company. Simply select a style from the available templates as you can see in the below screenshot.
- There are 21 template styles available in it. You just need to select the desired one. And after selecting, proceed further by clicking on available Next button.
- Enter details such as Company name, company address, phone numbers, email addresses (if you want) and complete your template.
- This will create your template and you will be moved to home page of your Invoice2go account showing your created invoice at the top.
Create Your Own Customized Template:
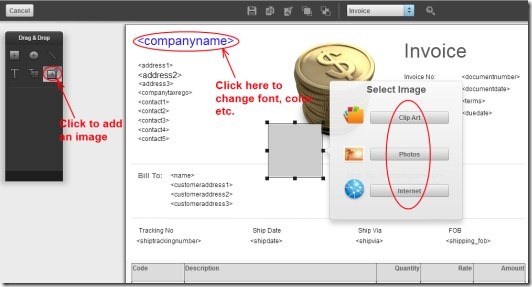
If you want to create your own customized template style, then it could also be possible. For this, you need to click on available settings icon. After this, click on the given Custom Template option. A small pop up will open up. There, you need to click on the available Create Custom Template. This action will open up a whole new layout as you can see in the below given screenshot.
Here, Click on the company name, addresses, etc. to change the font type, font color, size, shape etc. Moreover, you can even create and add an image to your template. For this, you need to click on the available button for this which is located at the left side. Hold and drag this button to the desired place. Add an image from the available Clip Art button or upload an image from your PC. Adjust settings according to your need.
And after completing it, hit the available Done button. It will save your created template. This template will be used while sending an invoice to desired customers.
Create, Preview, and Send Your Invoice:
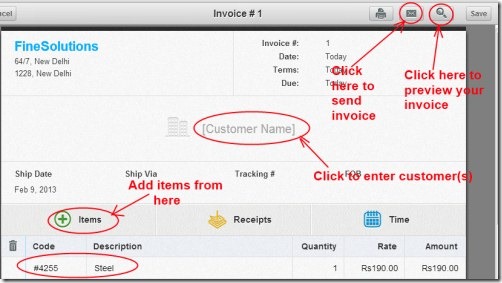
- After selecting a desired layout, you can create an invoice easily. For this, go to home page by clicking on the given home button icon. There, hit on the Invoice option. It will open invoice sheet. There you need to add items to your invoice list. For this, click on the given Items option for this (see the below mentioned screenshot). It will open a small pop up. From their, you can add those products which you want to add in this invoice by clicking on Pick from Product List button. If you haven’t added any product in your product list, then you first need to add products.
- After selecting number of items, simply click on the Customer Name option. It will open a pop up where you can add customer details such as: customer name, email, address, shipping address, etc. After adding the desired customer(s), your invoice is ready to send.
- But before sending your invoice, it would be nice to have a look at the invoice. For this, preview button is available (as you could see in the below given screenshot). Click this button and it will show you preview of your invoice. See the below given screenshot:
- After previewing your invoice, you are ready to send your invoice. Simply hit the available send email button located just beside the preview button to send your invoice.
More Options:
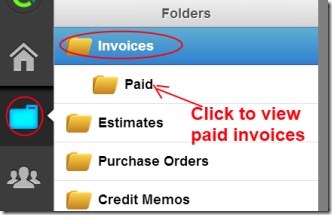
Your invoices are organized into folders. For accessing them, simply click on the folder icon as you could see in the below given screenshot. Here, you will find all your customer invoices. Simply click on desired invoice to view it. And, if you have received payment from the customer(s) on that invoice, mark it as paid via available option for this. By performing this action, your that specific invoice will automatically store in Paid folder.
This way you can track your invoices and you can know about the people who have paid you. But you need to spend a bit time to understand about it completely. Then you can use it easily.
Note: This free version of Invoice2go allows only 3 invoice documents to be created. You can give a try to the free plan of this handy app. And if you find this app useful and want more features, then you can upgrade it to the paid version according to your requirement.
Invoice2go is really a good app that lets you create invoices and send them in an easy manner. Try it yourself to see how it works.
Try some other free Chrome apps to create invoice.
