HSTRY is an online educational platform to collaboratively create timelines. Students can collaborate with other students or teachers to collaboratively create timeline online.
This free web application allows teachers and students to interact with each other through timelines. HSTRY timelines are very similar to Facebook timelines, as you can add a cover/banner on top and then your posts. You can post text, images, videos, quizzes, etc on timelines and other people can add comments to your posts. The best part of timelines is that you can add other students/teachers to collaboratively edit timelines and the changes are reflected back in real-time. You can even see who is currently making changes to your timeline in real time. All changes are automatically saved during collaboration.
You can also explore timelines created by other people on HSTRY community and get inspired by their designs.
Apart from letting you collaboratively edit timelines, it also allows you to share timeline to Facebook, Pinterest, etc and copy timelines to create templates for students.
Keep reading to know more about timelines and how you can collaboratively create them.
NOTE: In the free version of HSTRY, you are limited to add 2 people for collaborating on timelines. If you are using it with a free teacher account then you can view first 200 timelines of students.
In order to use HSTRY, you will need to register yourself on it either as a teacher or a student. You can create a free account on it from here.
HSTRY is a more like a student-teacher community where teachers and students can interact with each other through timelines. As I already mentioned above, you can collaboratively create timelines, so let’s see how you can do it and at the later part of this article I will tell you more about its teaching options.
How to collaboratively create timelines on HSTRY:
The feature to collaboratively create timelines help teachers and students to interact with each other. A Teacher can add timelines in their class to teach students and support it with some useful content which may include a text update, add images and media, etc. Students can make copies of timelines added in their class and submit them to teachers after editing it. The best part is that teachers and students can collaborate with each other to create timelines.
The timeline which we will create now will be private by default and no one can view it other than you, not even your teachers or students. You can make it public by sharing it with HSTRY community.
So let’s start by collaboratively creating and editing a timeline.
Step 1: To test collaborative feature of this free online learning web application, I first registered myself as a teacher and then as a student. You can simply register yourself as a teacher but to sign up as a student you will need a class code. You can ask it from your teacher and then register yourself on the website.
Step 2: After you have successfully logged on to the website, you will see an option to create a timeline. If you have logged on as a teacher then you will see an additional option to add a class. You can create a timeline inside a class that will be automatically shared with your students. But for now, let’s see how we can create a personal timeline that will be displayed in your “My Timelines” sections after completion.
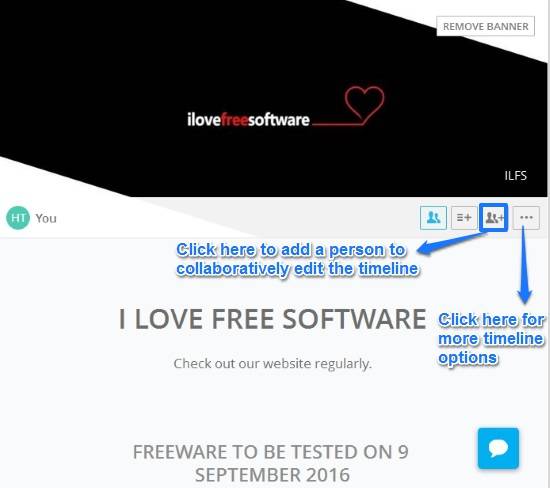
To create a timeline, simply click on Create a timeline button which will open up a template to edit. Now click on “Collaborate” button to add a person, as shown in screenshot included below.

If you add someone to collaborate on your timeline then the timeline is automatically added to their “My Timelines” sections as well. You can start editing the template by adding an appropriate banner/cover on its top and then followed by a suitable heading for the timeline, and so on.
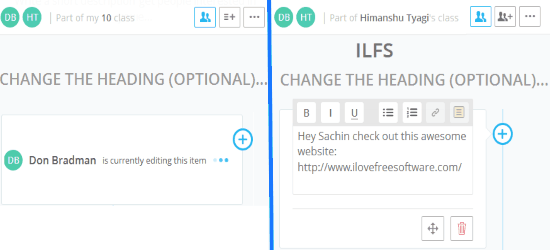
Step 3: Now, you both can collaborate with each other in real-time to edit the timeline. It reflects real-time changesl and the name of a person who is currently editing a timeline post, as you can see in the screenshot included below.
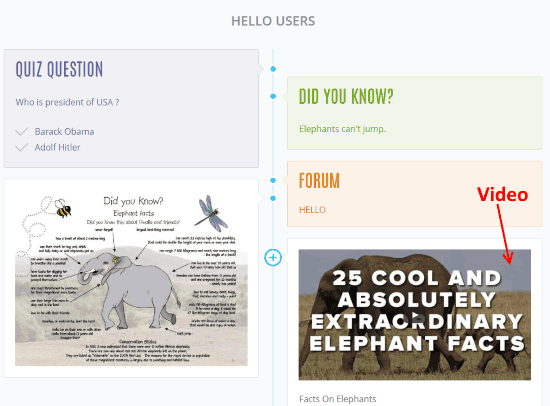
While collaboratively creating a timeline you can post a text update, images, videos, quizzes/multiple choice, audio, etc. You can also organize your posts into sections by inserting headings and then update related posts to it. All changes made while editing a timeline are automatically saved.

The person with whom you share editing rights can add his/her own posts, edit your posts, and can even delete your posts. In short, he can perform same tasks as you except he can’t delete your timeline. It would have been better if a lot more customized editing options were available like choosing who can modify your posts, or who can delete them.
As I mentioned above, students can copy timelines and then after editing at their end, they can submit it to teachers. Teachers can see the submitted timelines on their class page and students can find copied timelines in My Unsubmitted Timelines section.
Also see: EasyClass: Free Teaching Platform for Teachers to Create Courses, Share Assignments, Discussions.
Note: In free account teachers and students can create an unlimited number of timelines but teachers can only view timelines of first 200 students. Apart from it, and you can only add URLs of Youtube videos can just 2 people can collaborate with each other to create and edit timelines. You can’t print timelines also. But the good news is that there are no limitations on storage space used by media.
Verdict:
HSTRY is an online learning platform where teachers and students can interact with each other through timelines. They can collaborate with each other to create and edit timelines. It would have been a lot better if the free version allowed more people to collaborate on a timeline. I think a lot more teaching options are missing and there is no way to track students performance, create assignments for students, etc. I can recommend it to you as it brings a new style in teaching through timelines and allowing students to interact with teachers and each other.
